Looking to use an image of my artwork, in your next book, game, album, magazine cover, advertisement, film, prints and merchandise, then you’ll need to request a image license.
Australian requests click on the link above ^
International requests contact the artist directly info@outlook8studio.com
Please click the button below to continue reading my latest blog posts on my new website where I have artworks available, portfolio, latest blogs & more… Pop over and subscribe to receive Outlook8studio’s latest news and artworks.
This website is not going anywhere. If you wish you can browse years of older blogs about art stuff, art and travel, creative process’s, projects, exhibitions , arts business and more from this website.
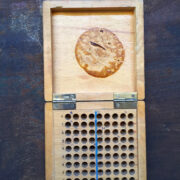
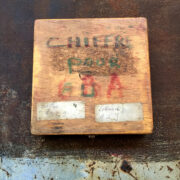
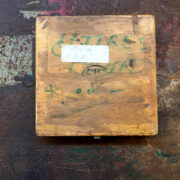
The 2 vintage boxes above grabbed me today and got me thinking…. I found them on one of my trips to France in a little old messy antique/secondhand corner shop in Asnieres sur Seine. I kept them as an item I thought I would eventually sell in my vintage shop Ateliernostagi
Now, I find them too precious to let go of. Instead I’ve decided to use them in a future art project.
Look at those marks….
Life is too short to hold onto precious things and pack them away into boxes and cupboards. Waiting for the perfect time to use them or, pass onto family and friends, who really aren’t as interested in them as you are.
Enjoy and use them while your still here!
To me, they look like some sort of storage box that may have held wooden or metal letter stamps. Maybe a hold for jewelers burs, or counters…
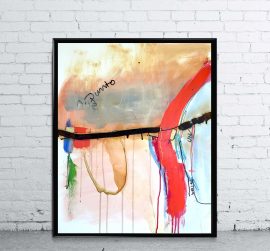
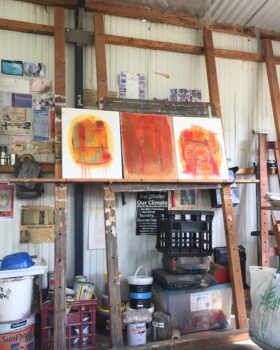
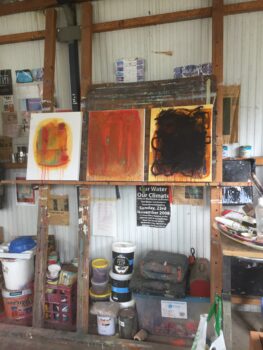
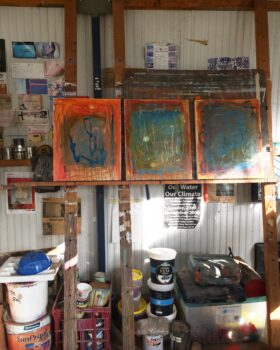
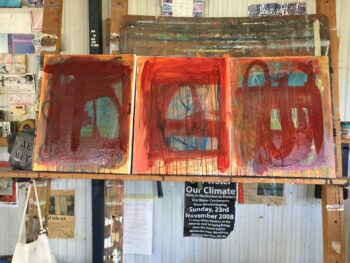
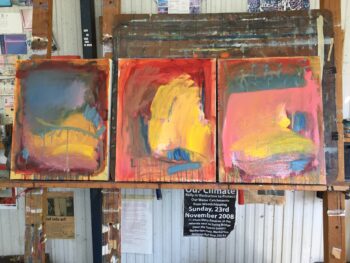
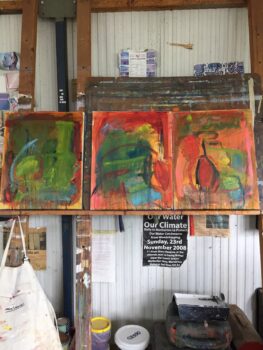
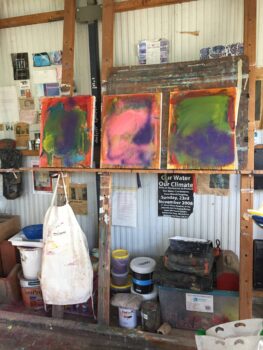
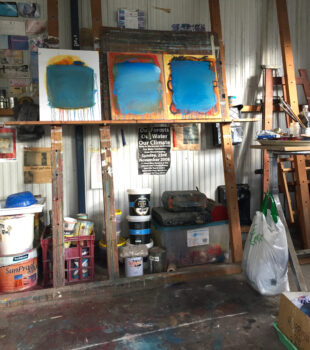
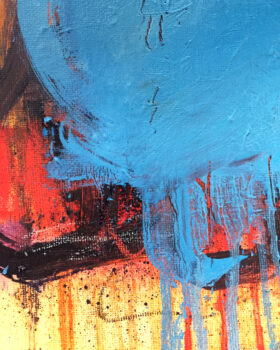
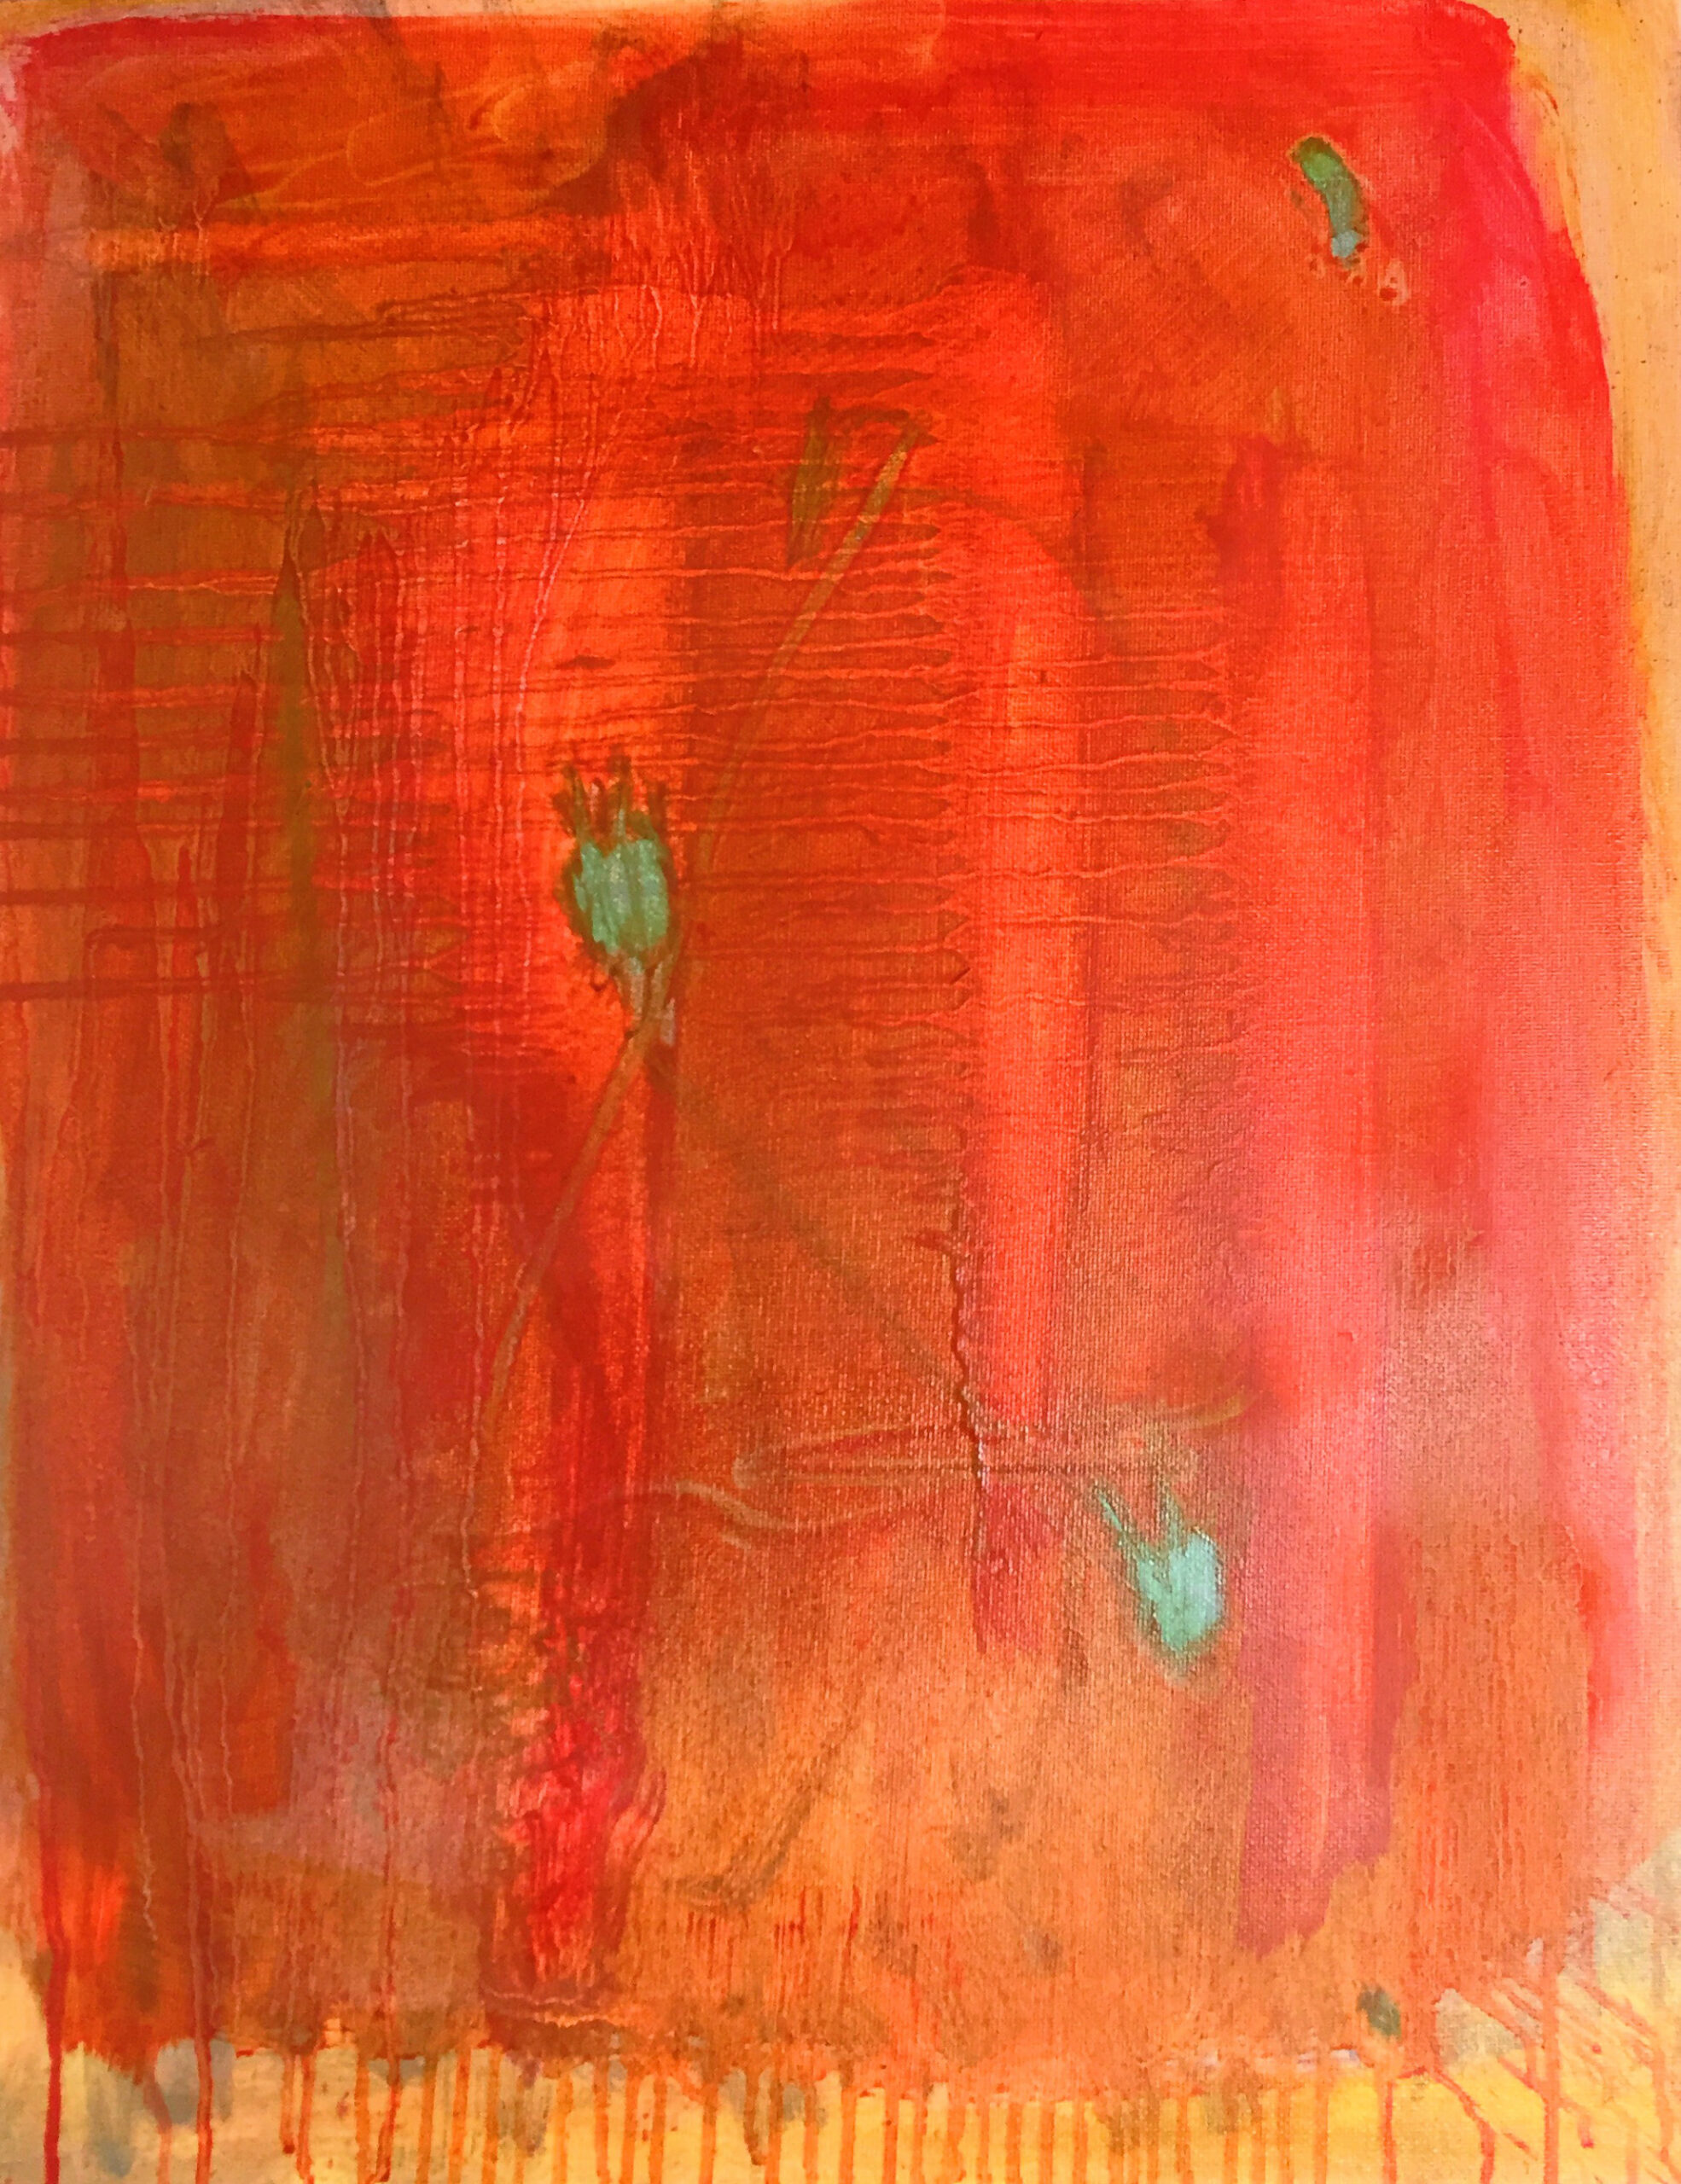
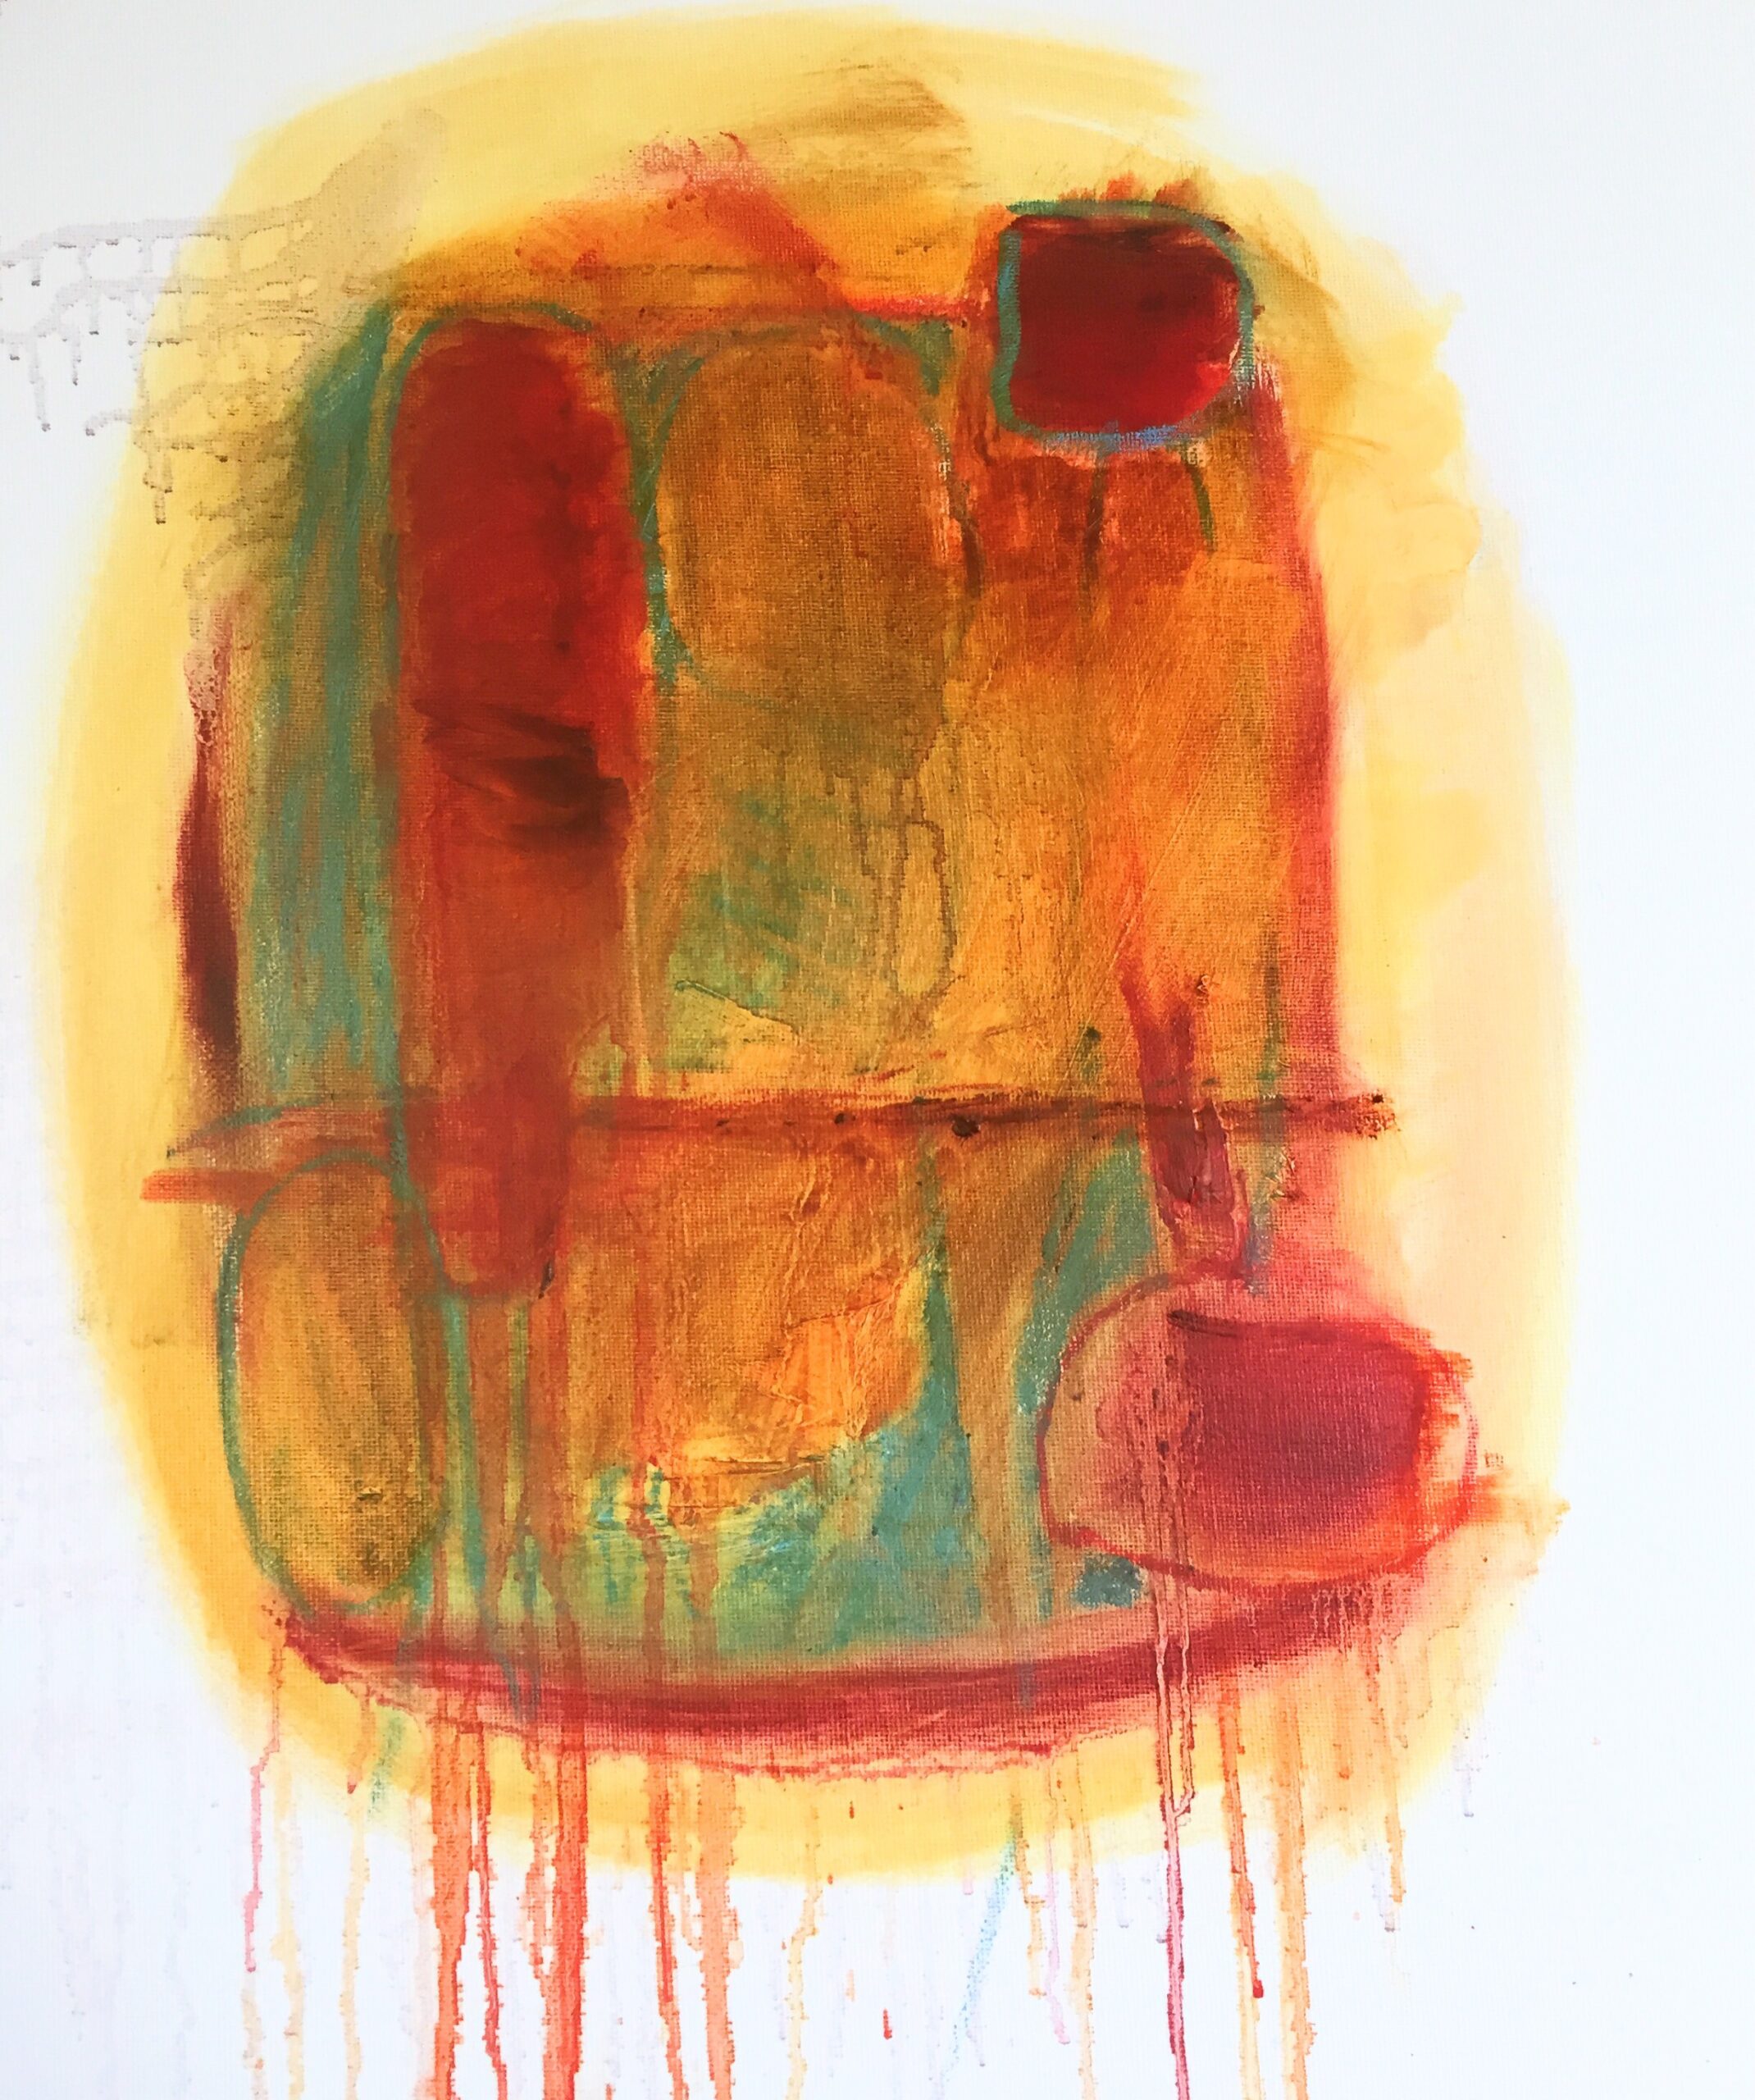
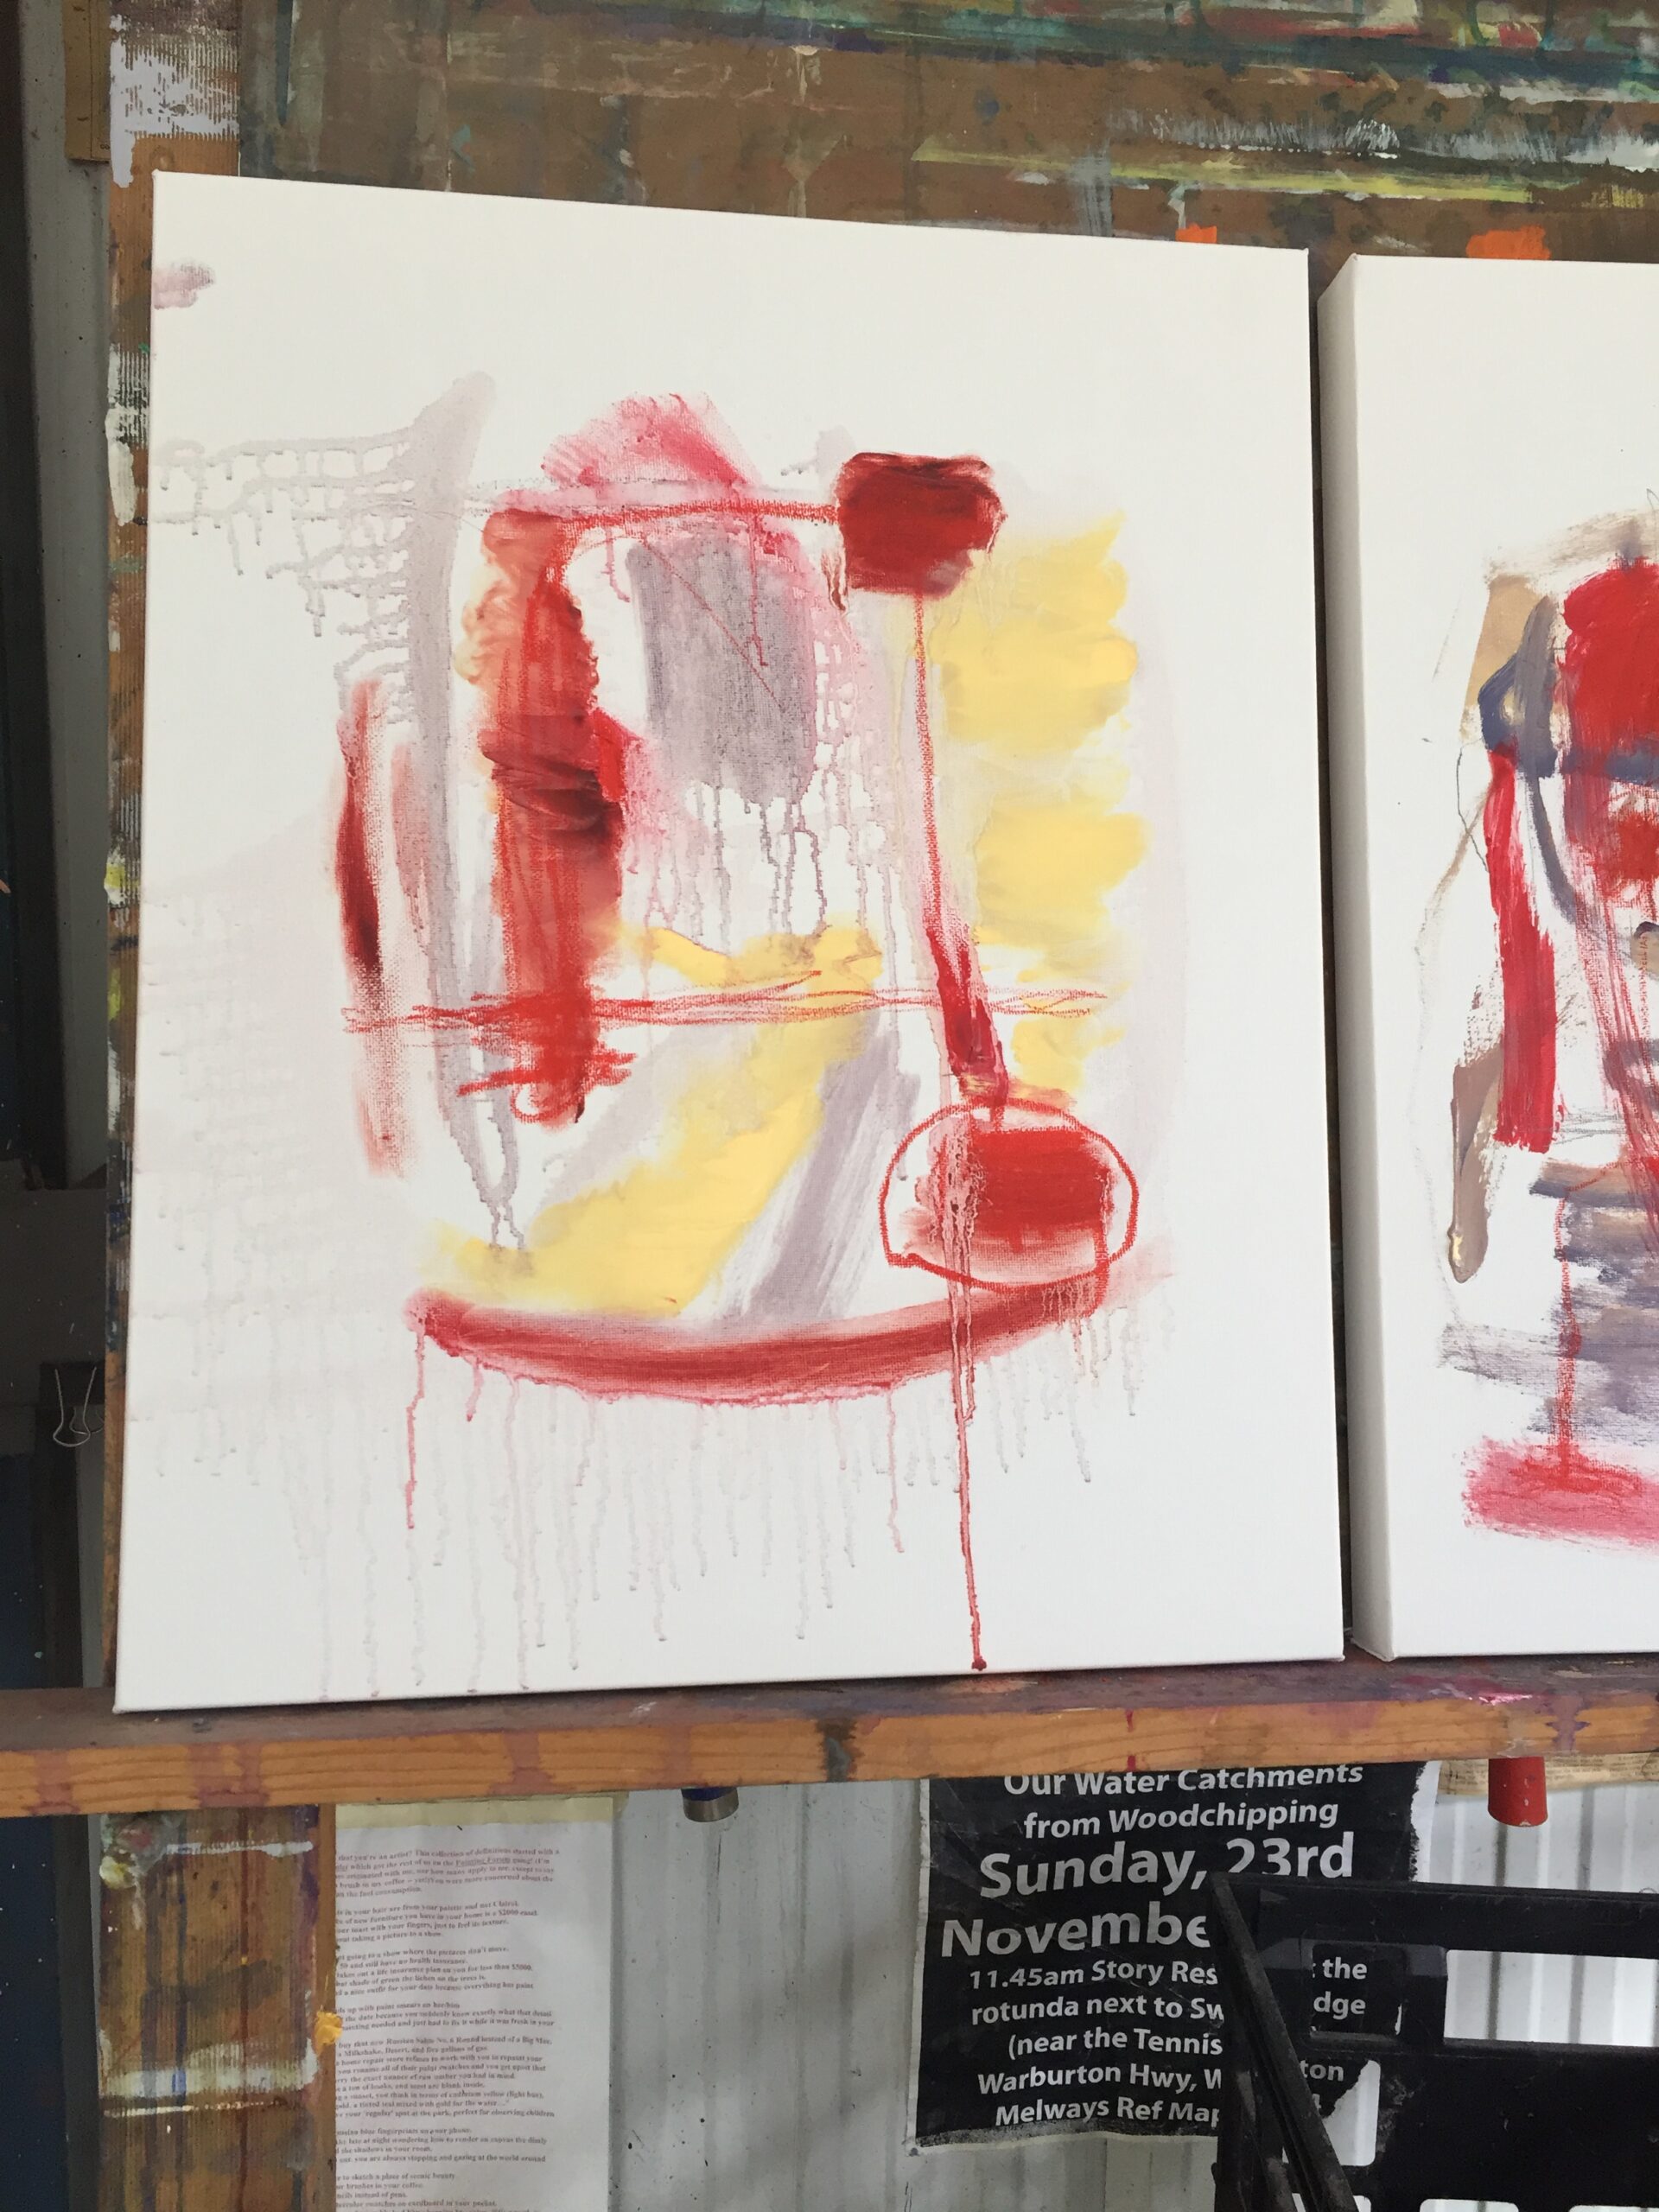
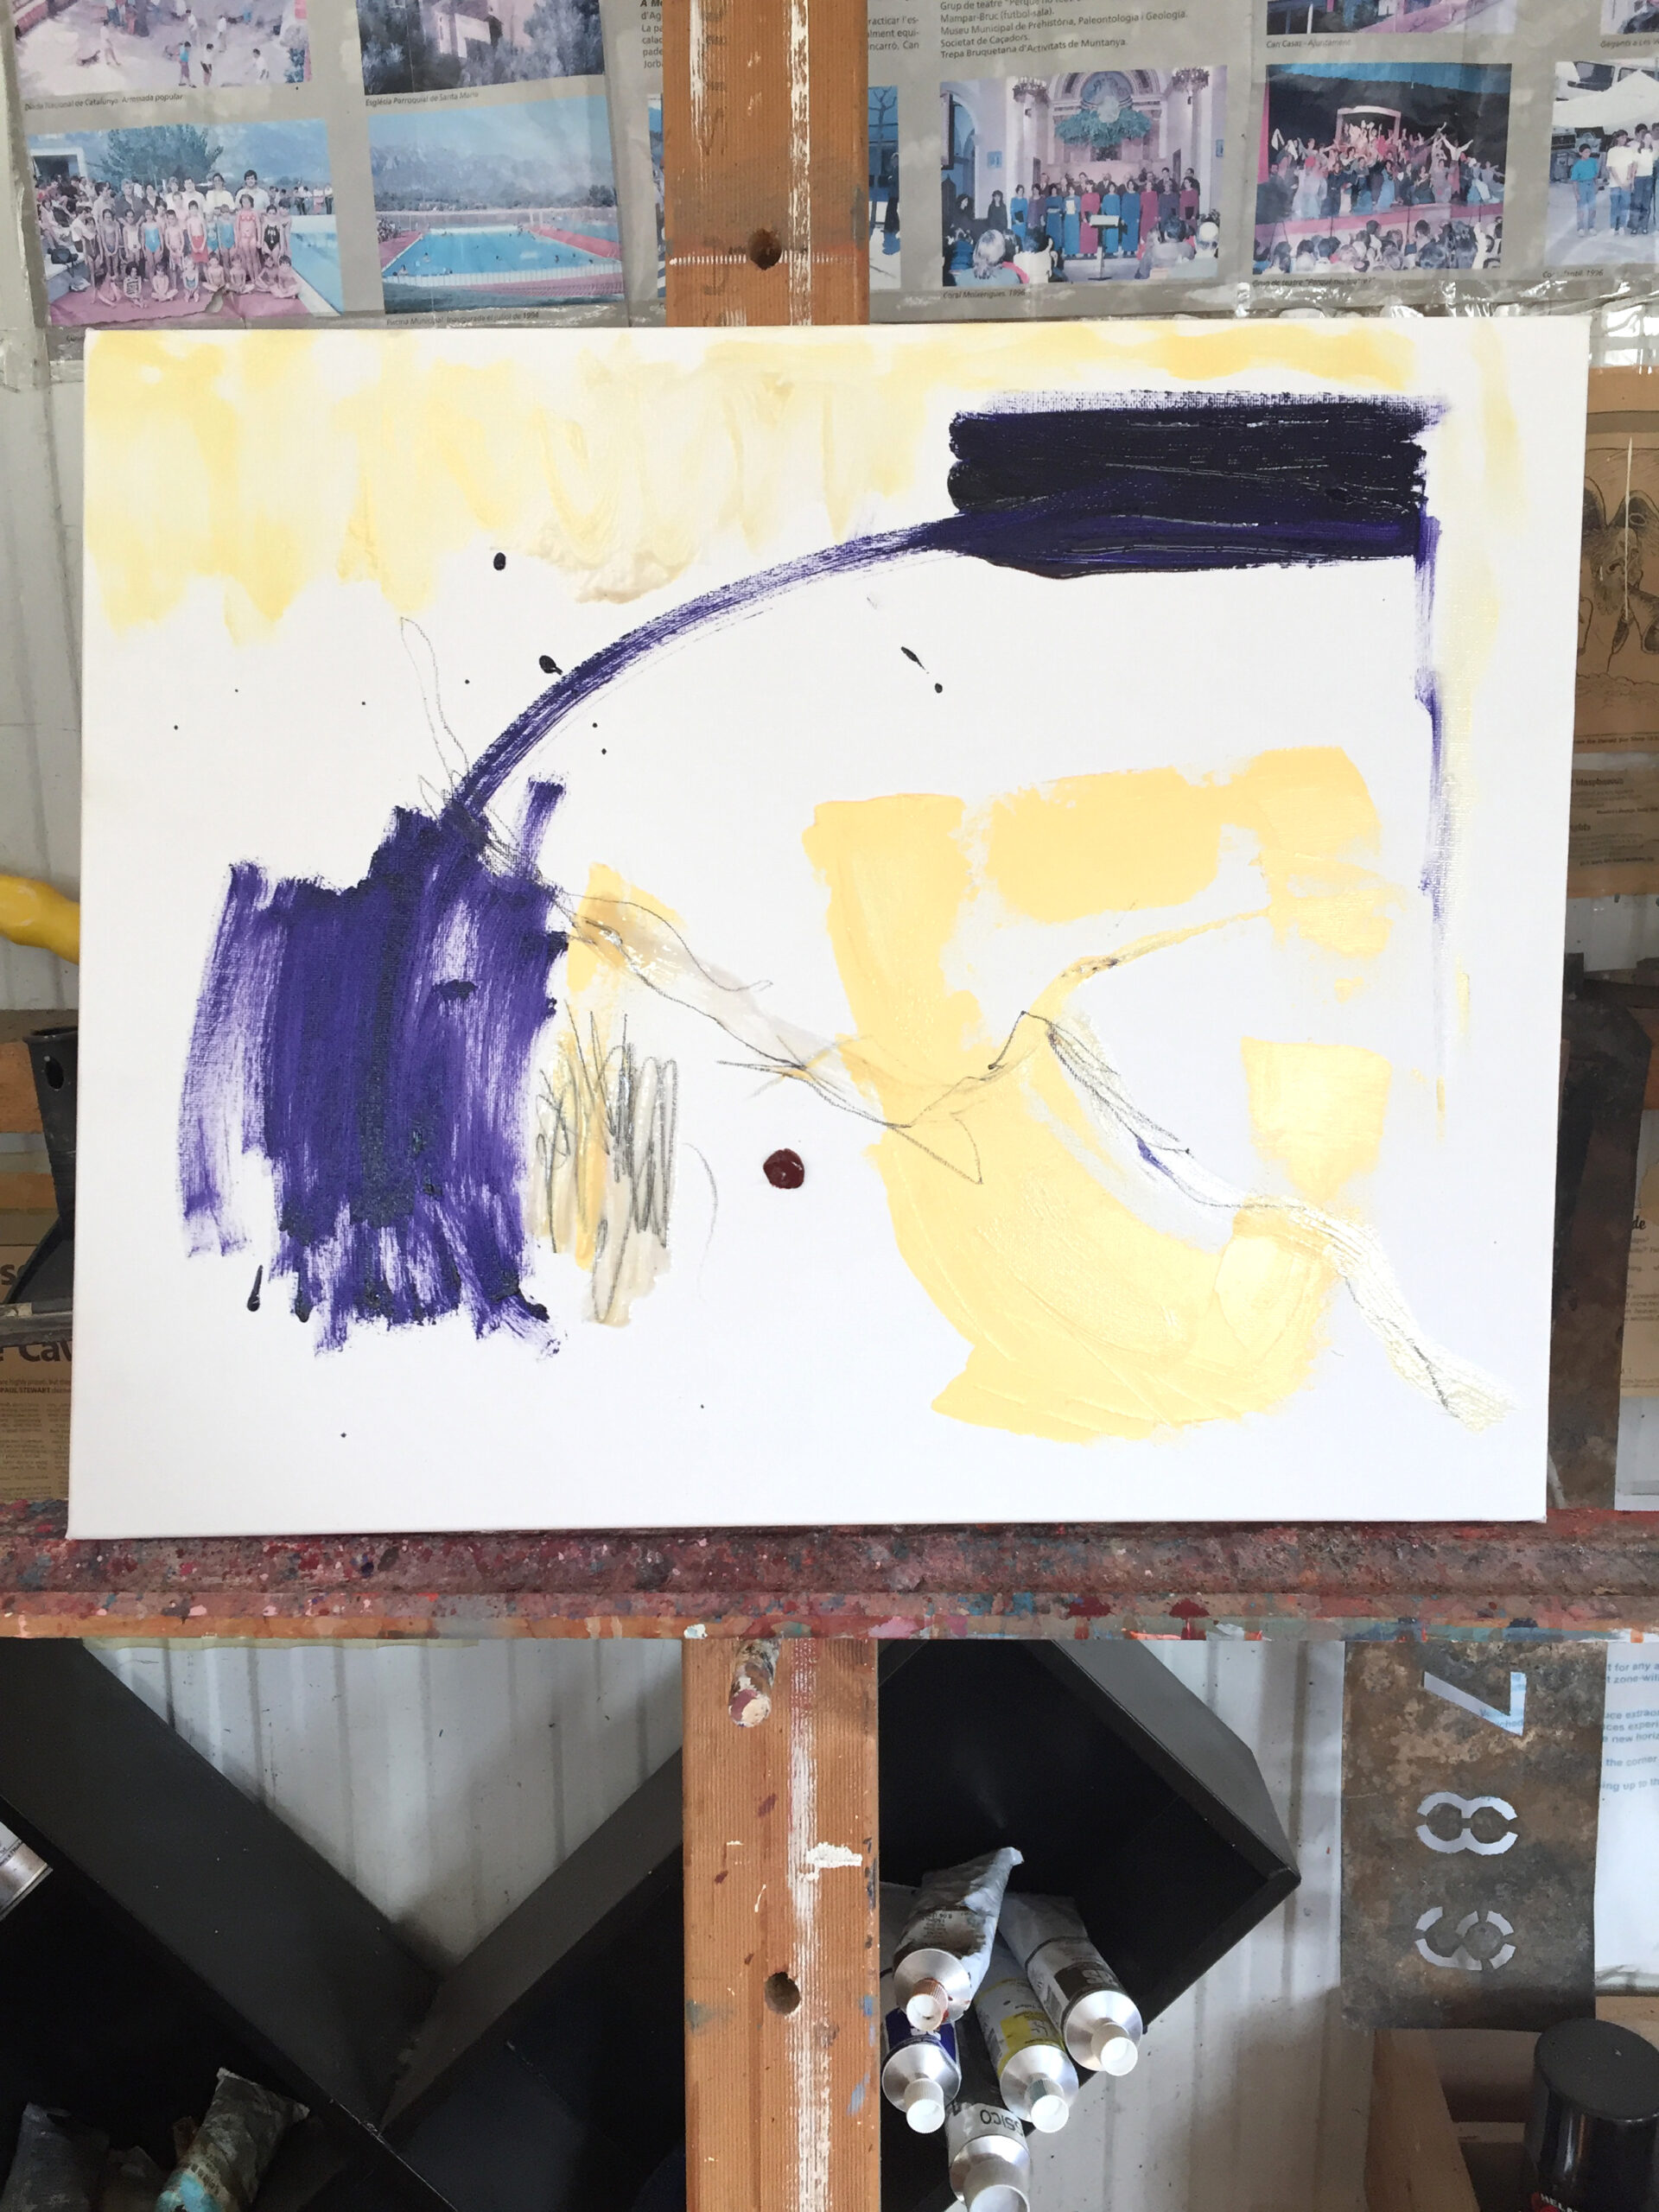
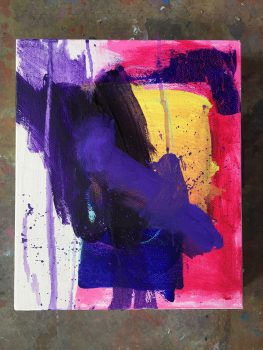
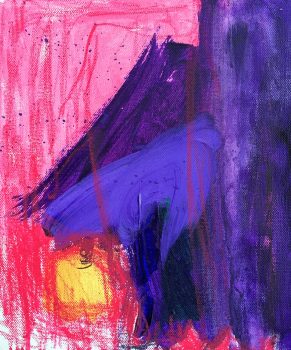
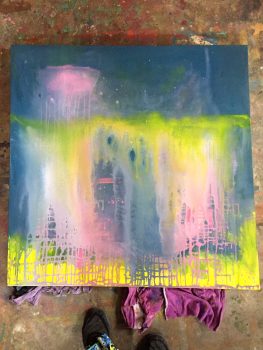
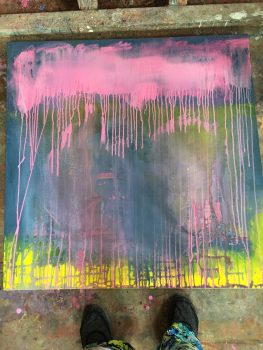
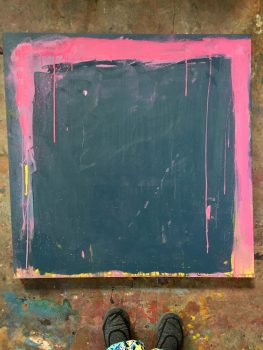
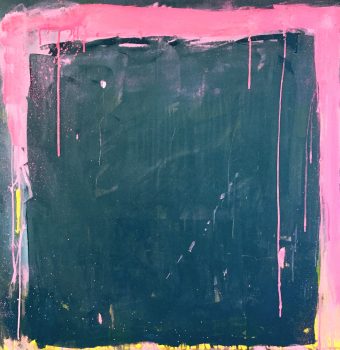
Just when you think a painting is done push it further and you may be surprised… In this post I will show you the process of 3 abstract oil paintings.
Love how these paintings just keep transforming the more I push them. I could have stopped at any stage but like to take risks….
I’m liking the 8th stage in the process but will probably scribble into them. Sometimes I prefer the first layer but taking risks, moving on and through is way more fun and opens up a lot more possibilities to consider … It has taken me 12 months so far to get to this stage. In between commissions, other creative projects and working through the varies emotions of what life throws at you.
1st Layer2nd Layer3rd Layer4th Layer5th Layer6th Layer7th Layer8th Layer9th Layer and still going…
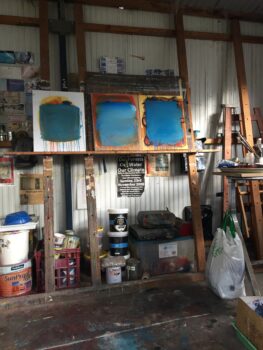
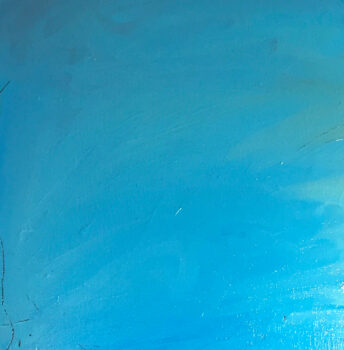
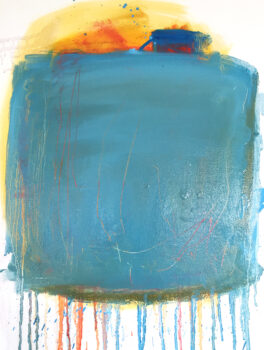
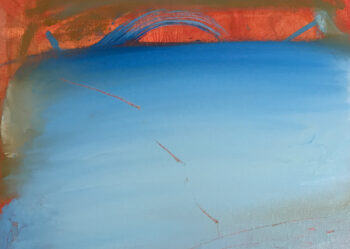
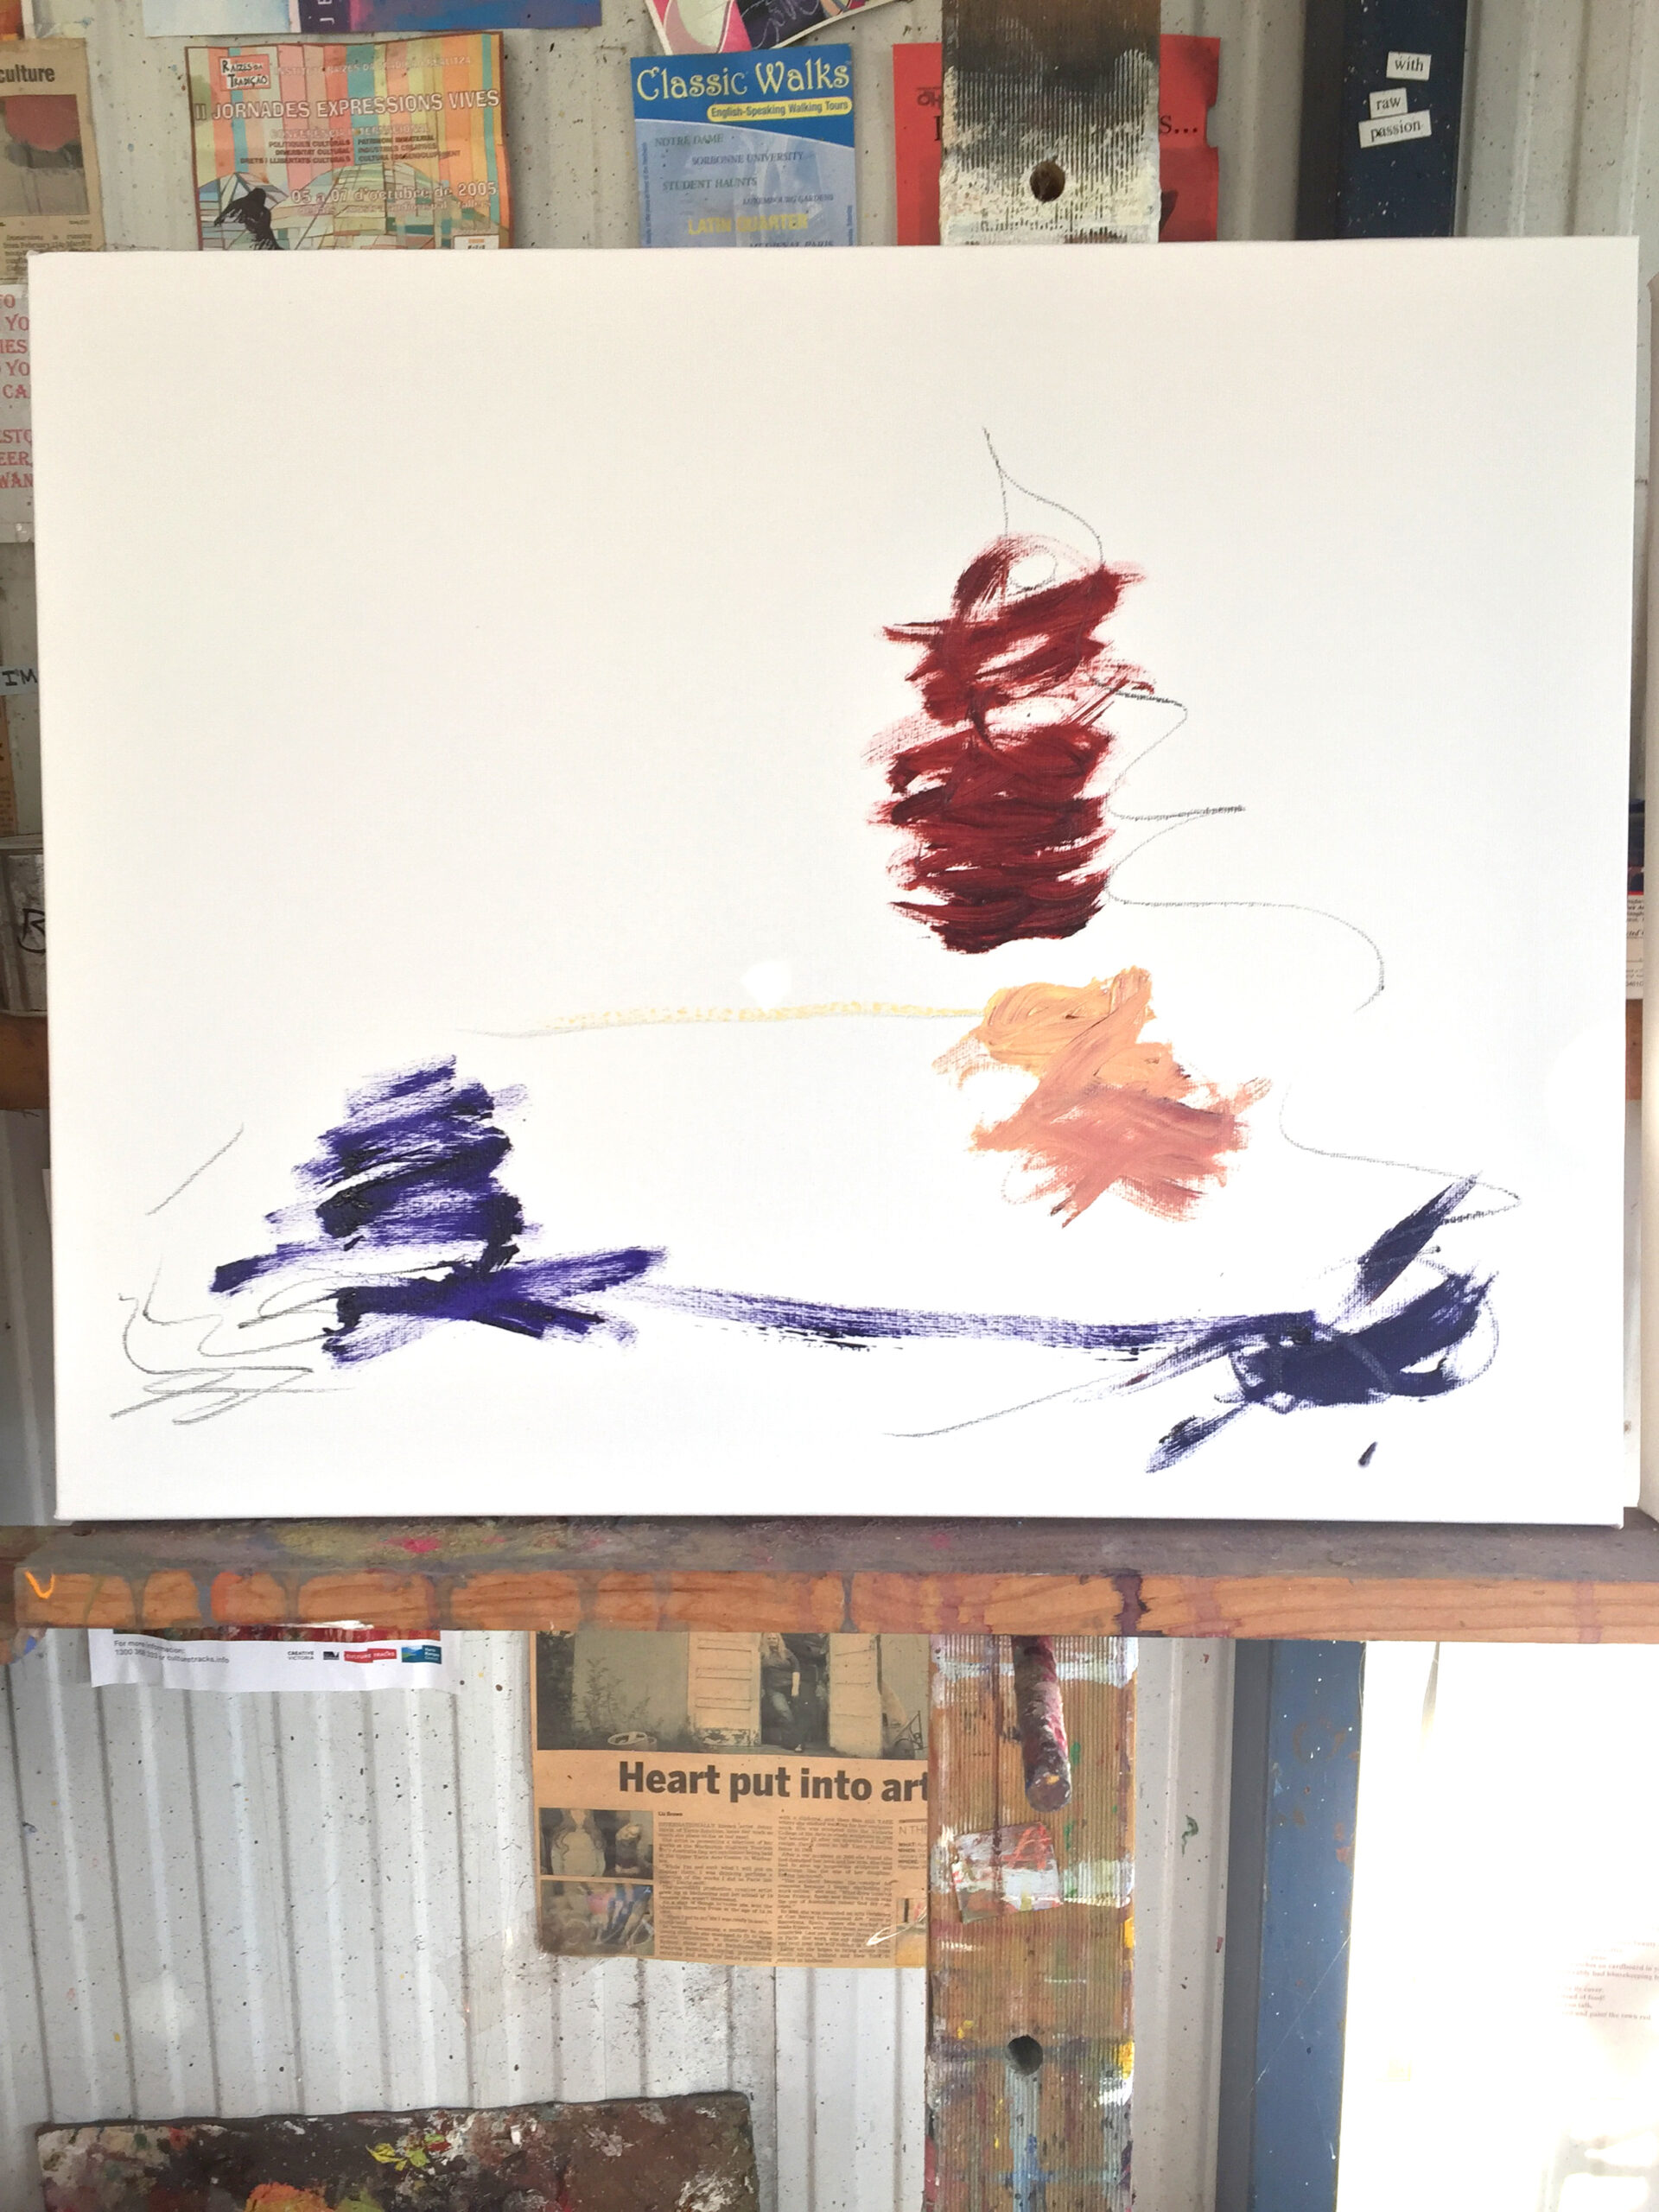
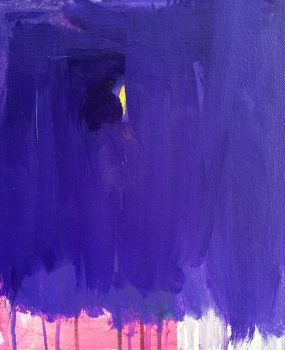
In the studio today I painted for 3 hrs. I painted blue. Not just the colour of blue, but the feeling of blue. Blue Blue Blue… naples yellow, ultra marine and titanium white. Slowly mixing unconsciously a colour that is not a colour, but, a presence of….Making it present, making it center of attention and felt.
Pure emotion – can it be painted?
Blue today is for my brother. Blue that he is not here. Blue that he won’t be present as he was, after passing on, early in May this year. My hero brother, my mentor, my inspiration, my world. The brother who was so full of creativity, imagination and love. Who would weave the wildest stories. The big brother who supported my creativity, my art and made me feel so proud of, who I am today, after all, I had gone through in my life. A brother who always believed in others before himself
The blue in the studio today is his presence and my deepest feelings of loss and loss regained. I don’t know if I can paint any more without hearing his voice, forever telling me to keep doing what your doing and reminding me of all the reasons why I should. So gradually, I will just have to get on with it only in a different way.
I think I might just let the paintings stay blue in the studio today…..
From my diary a few days after the passing of my brother 4/05/2023
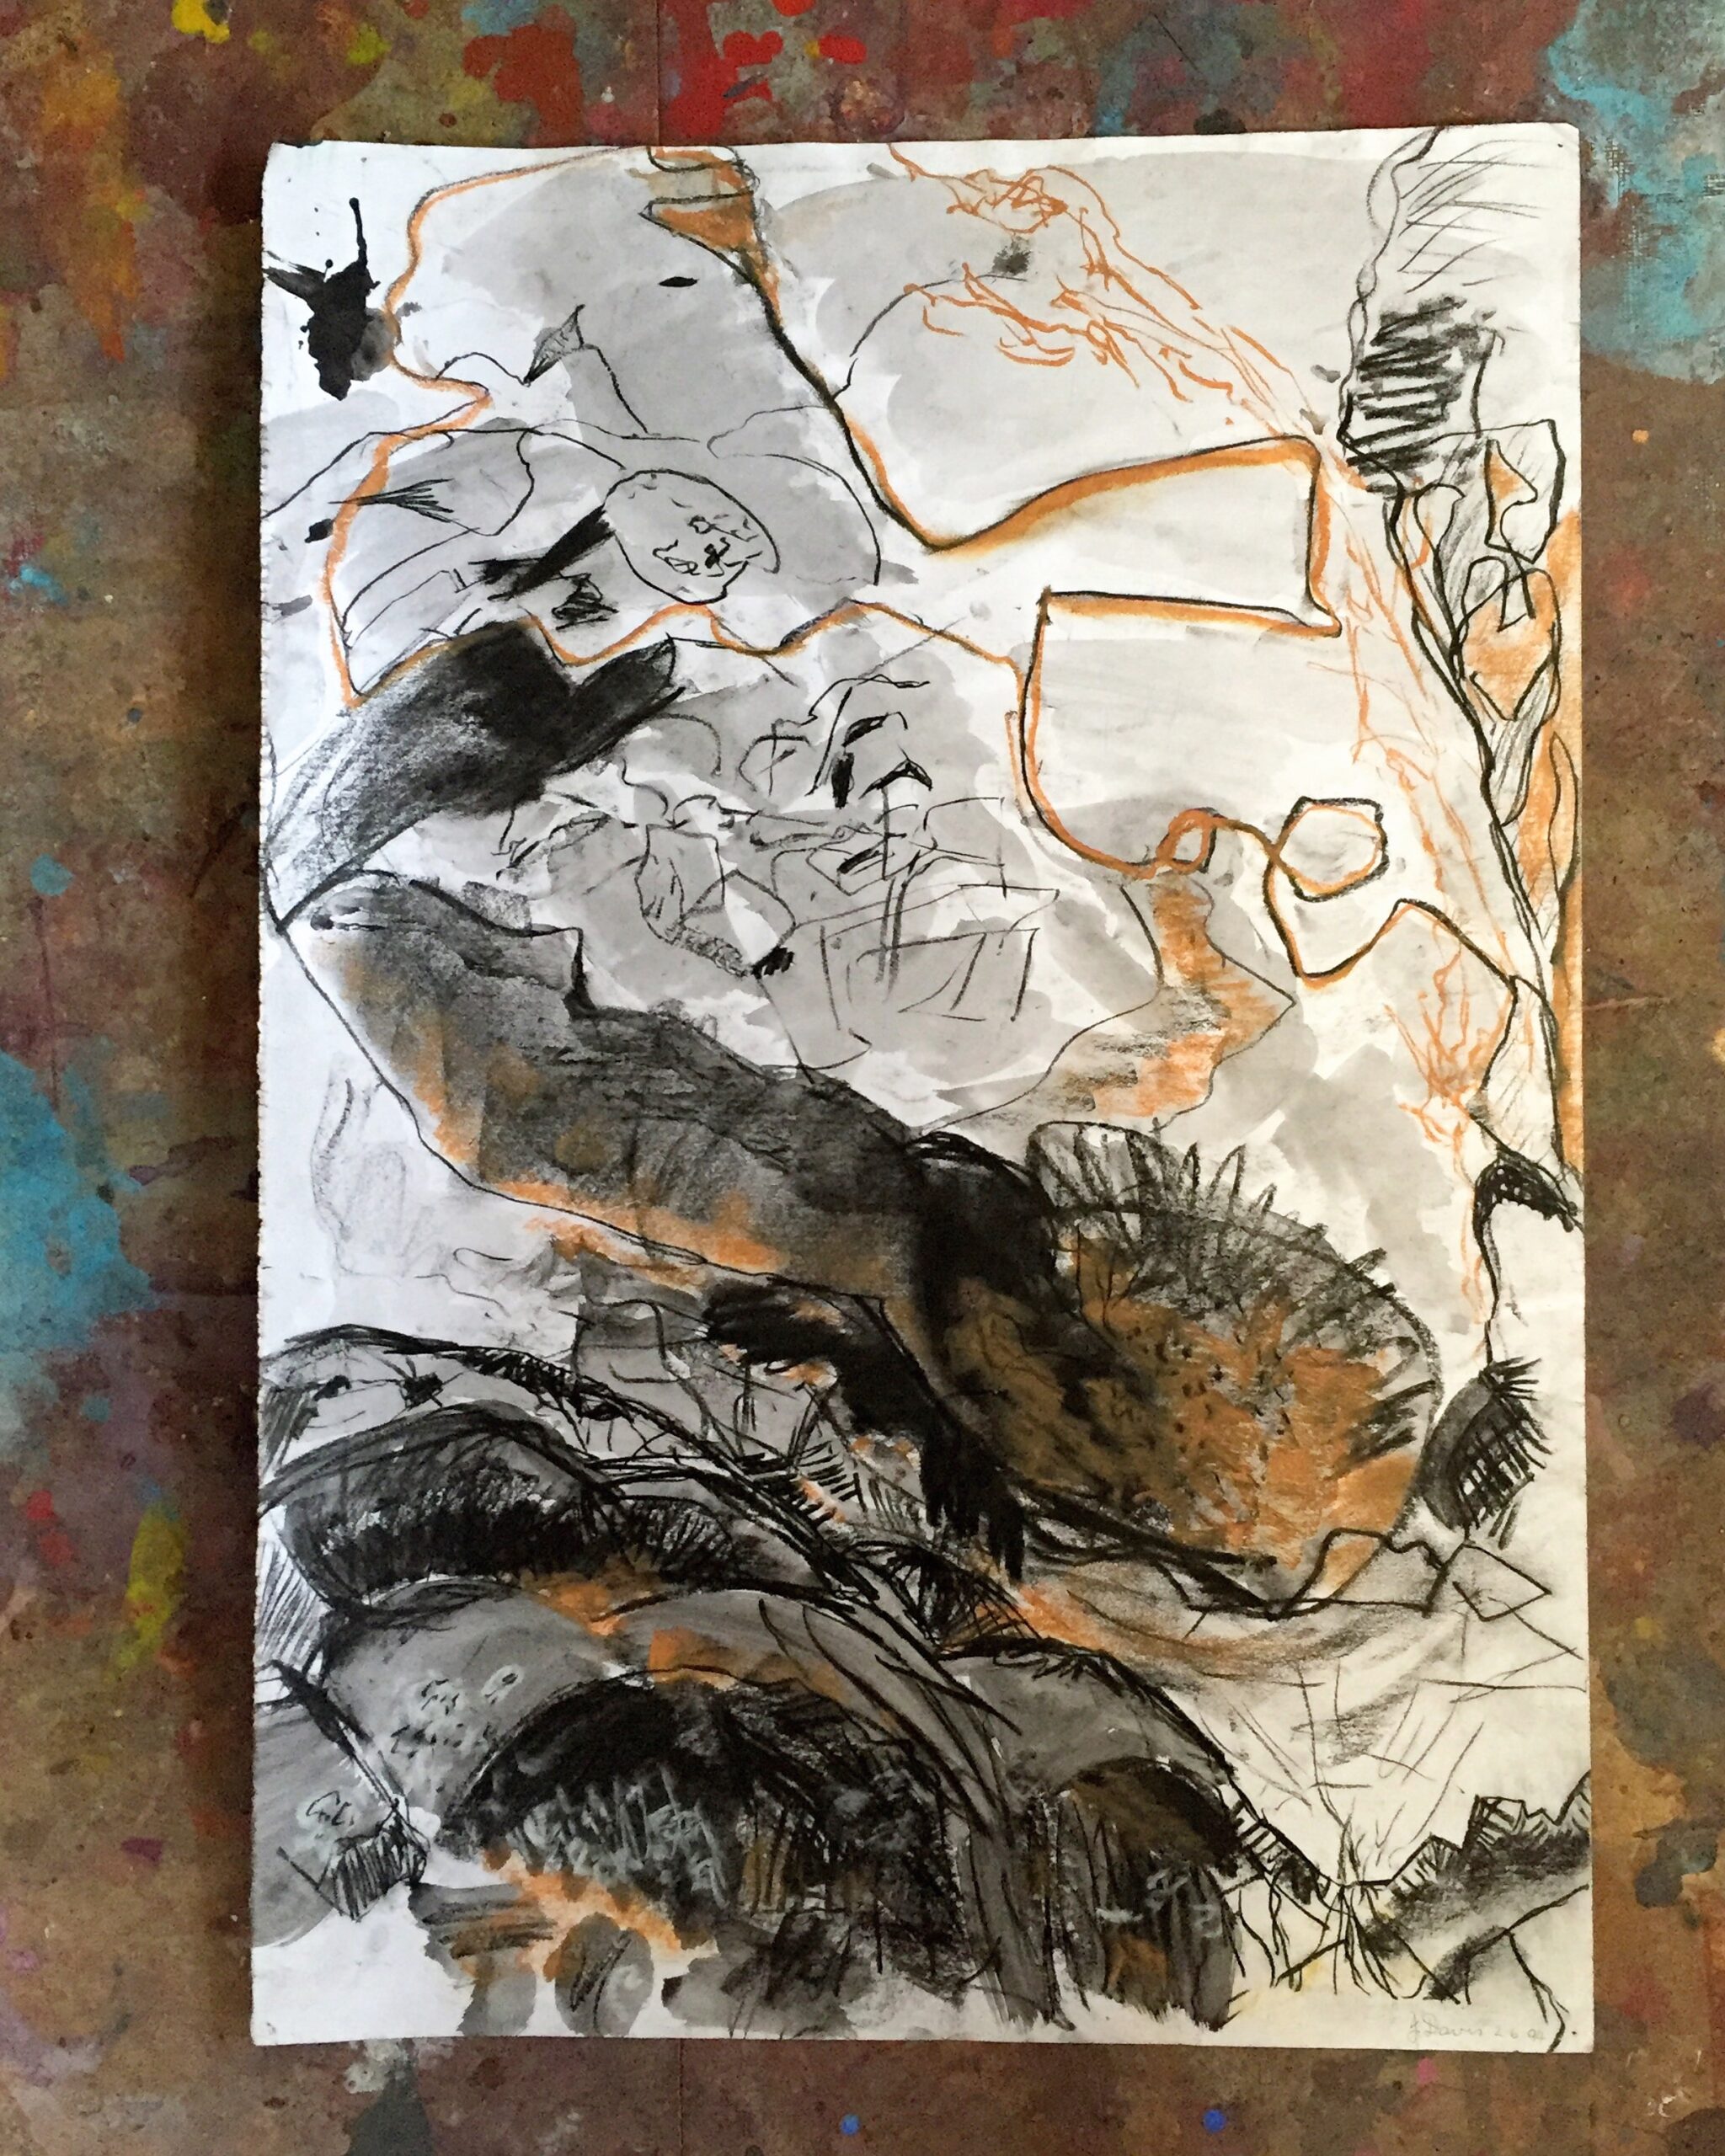
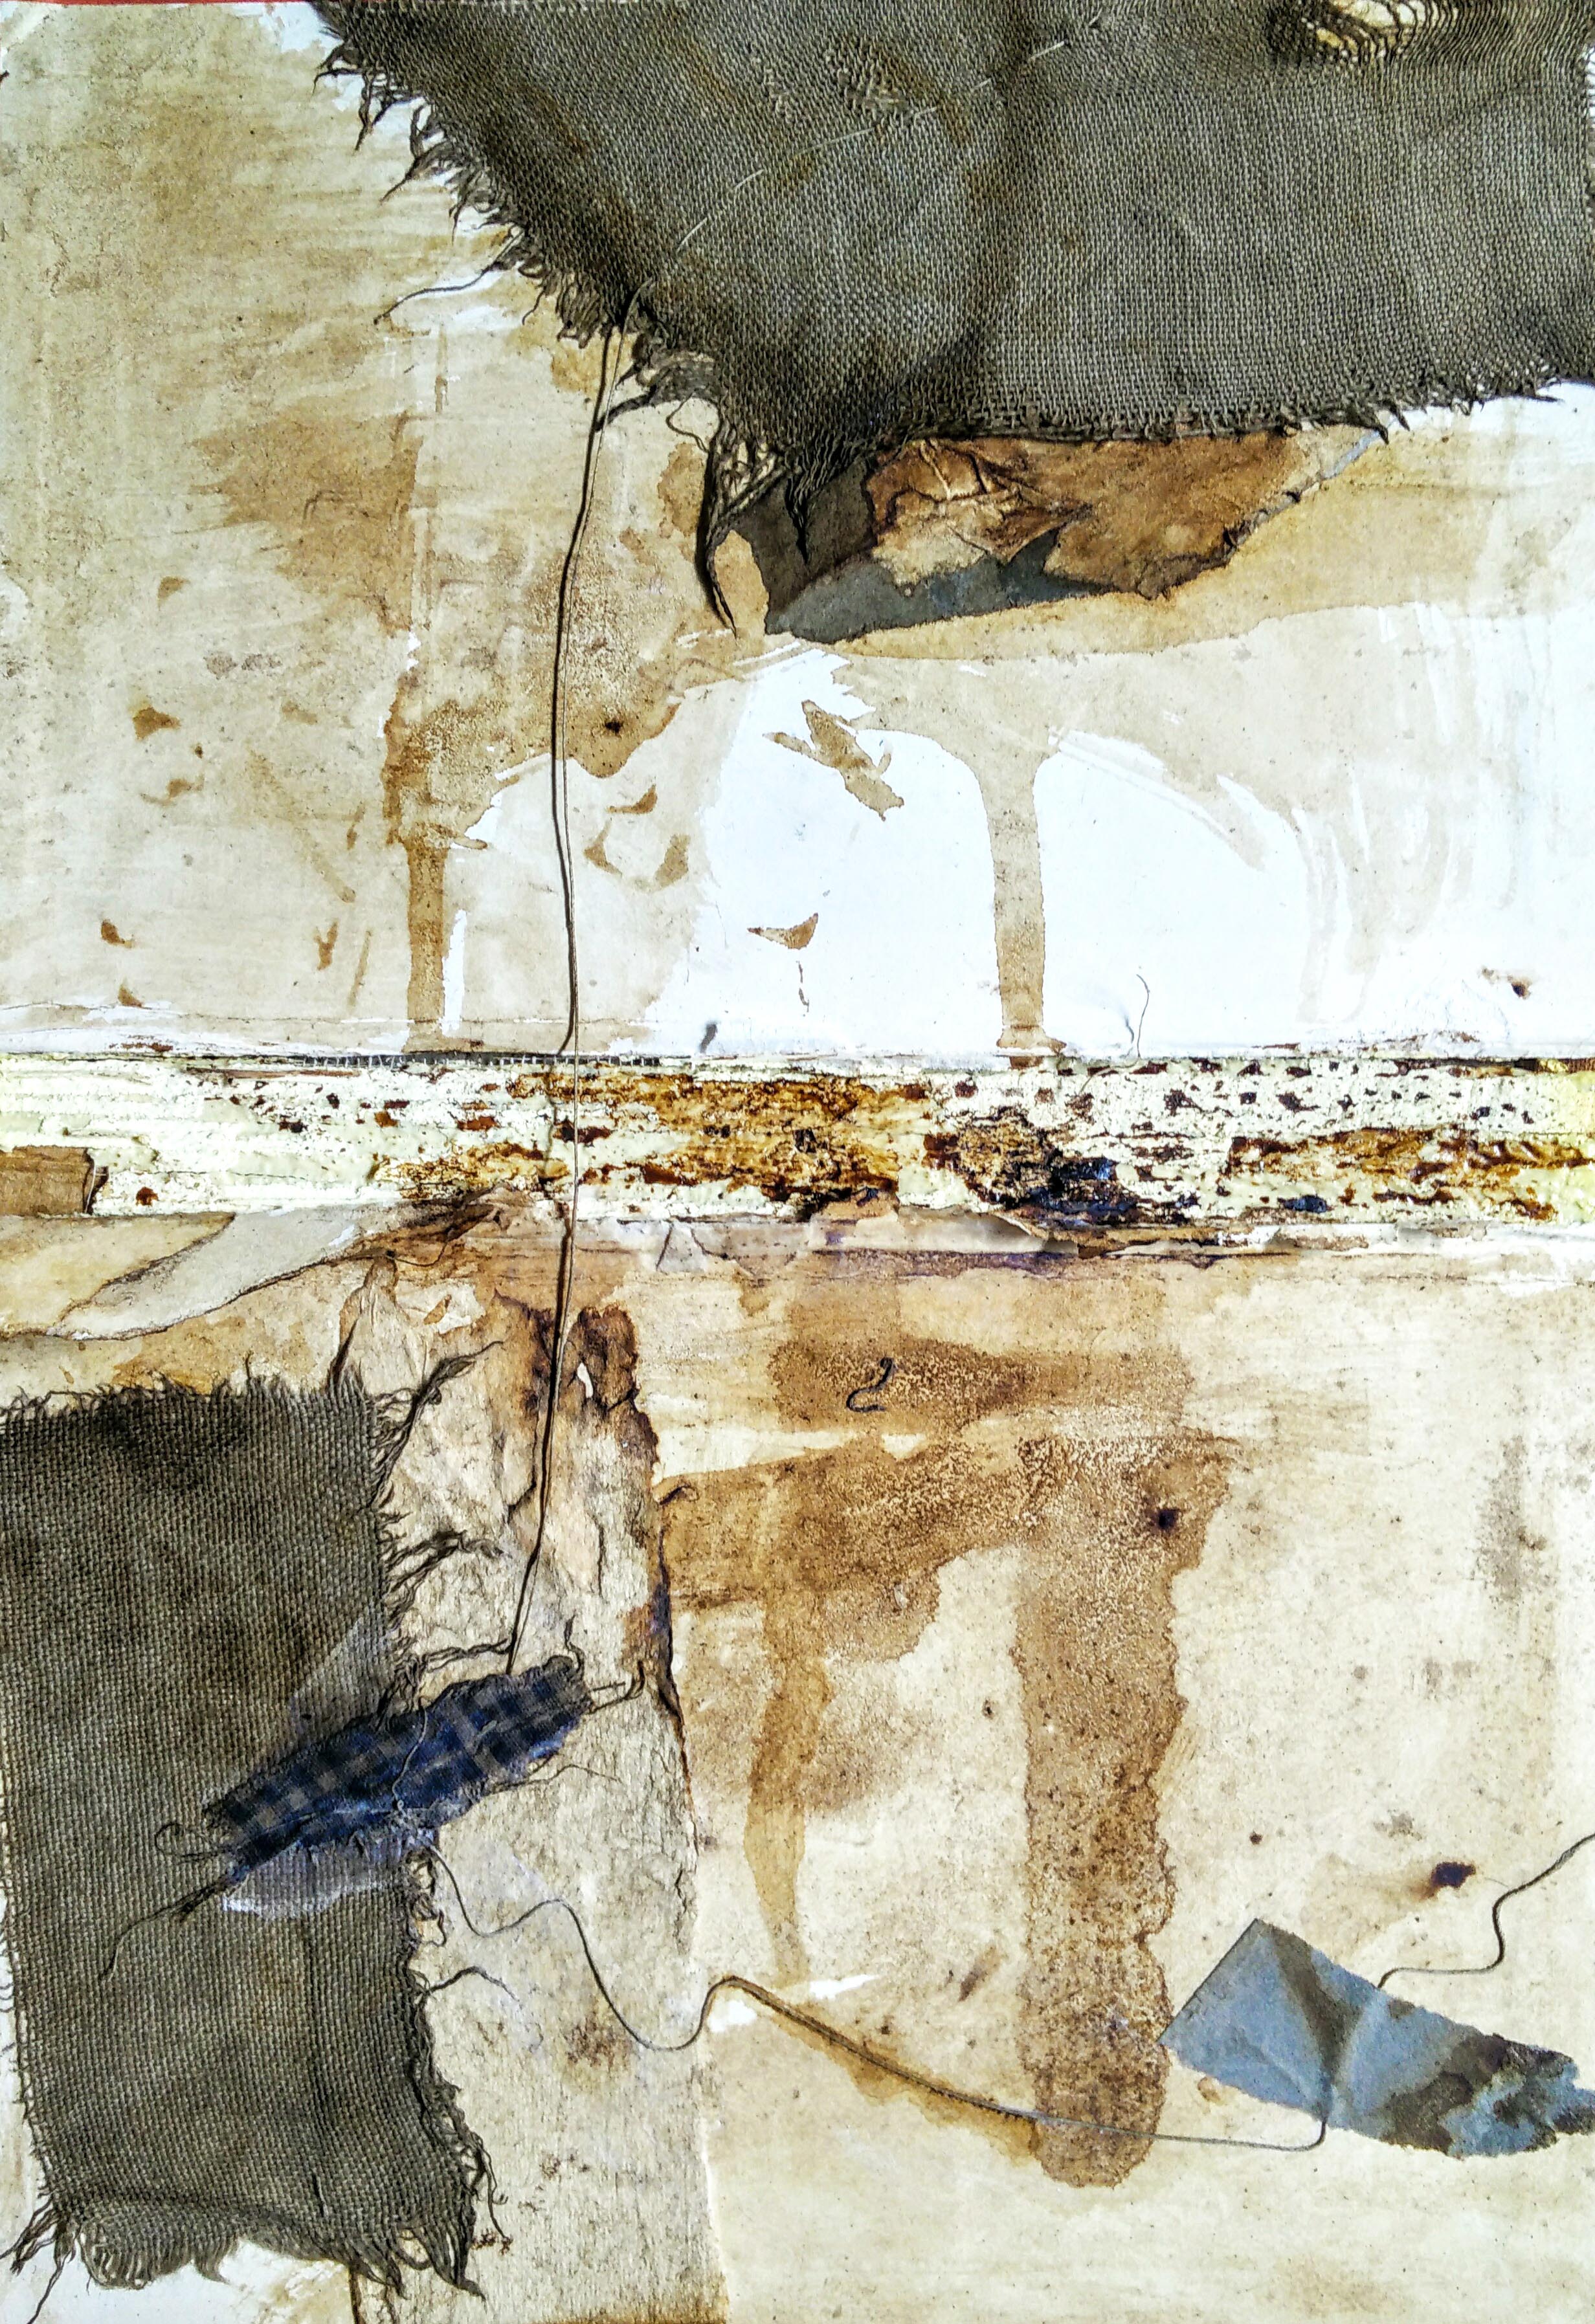
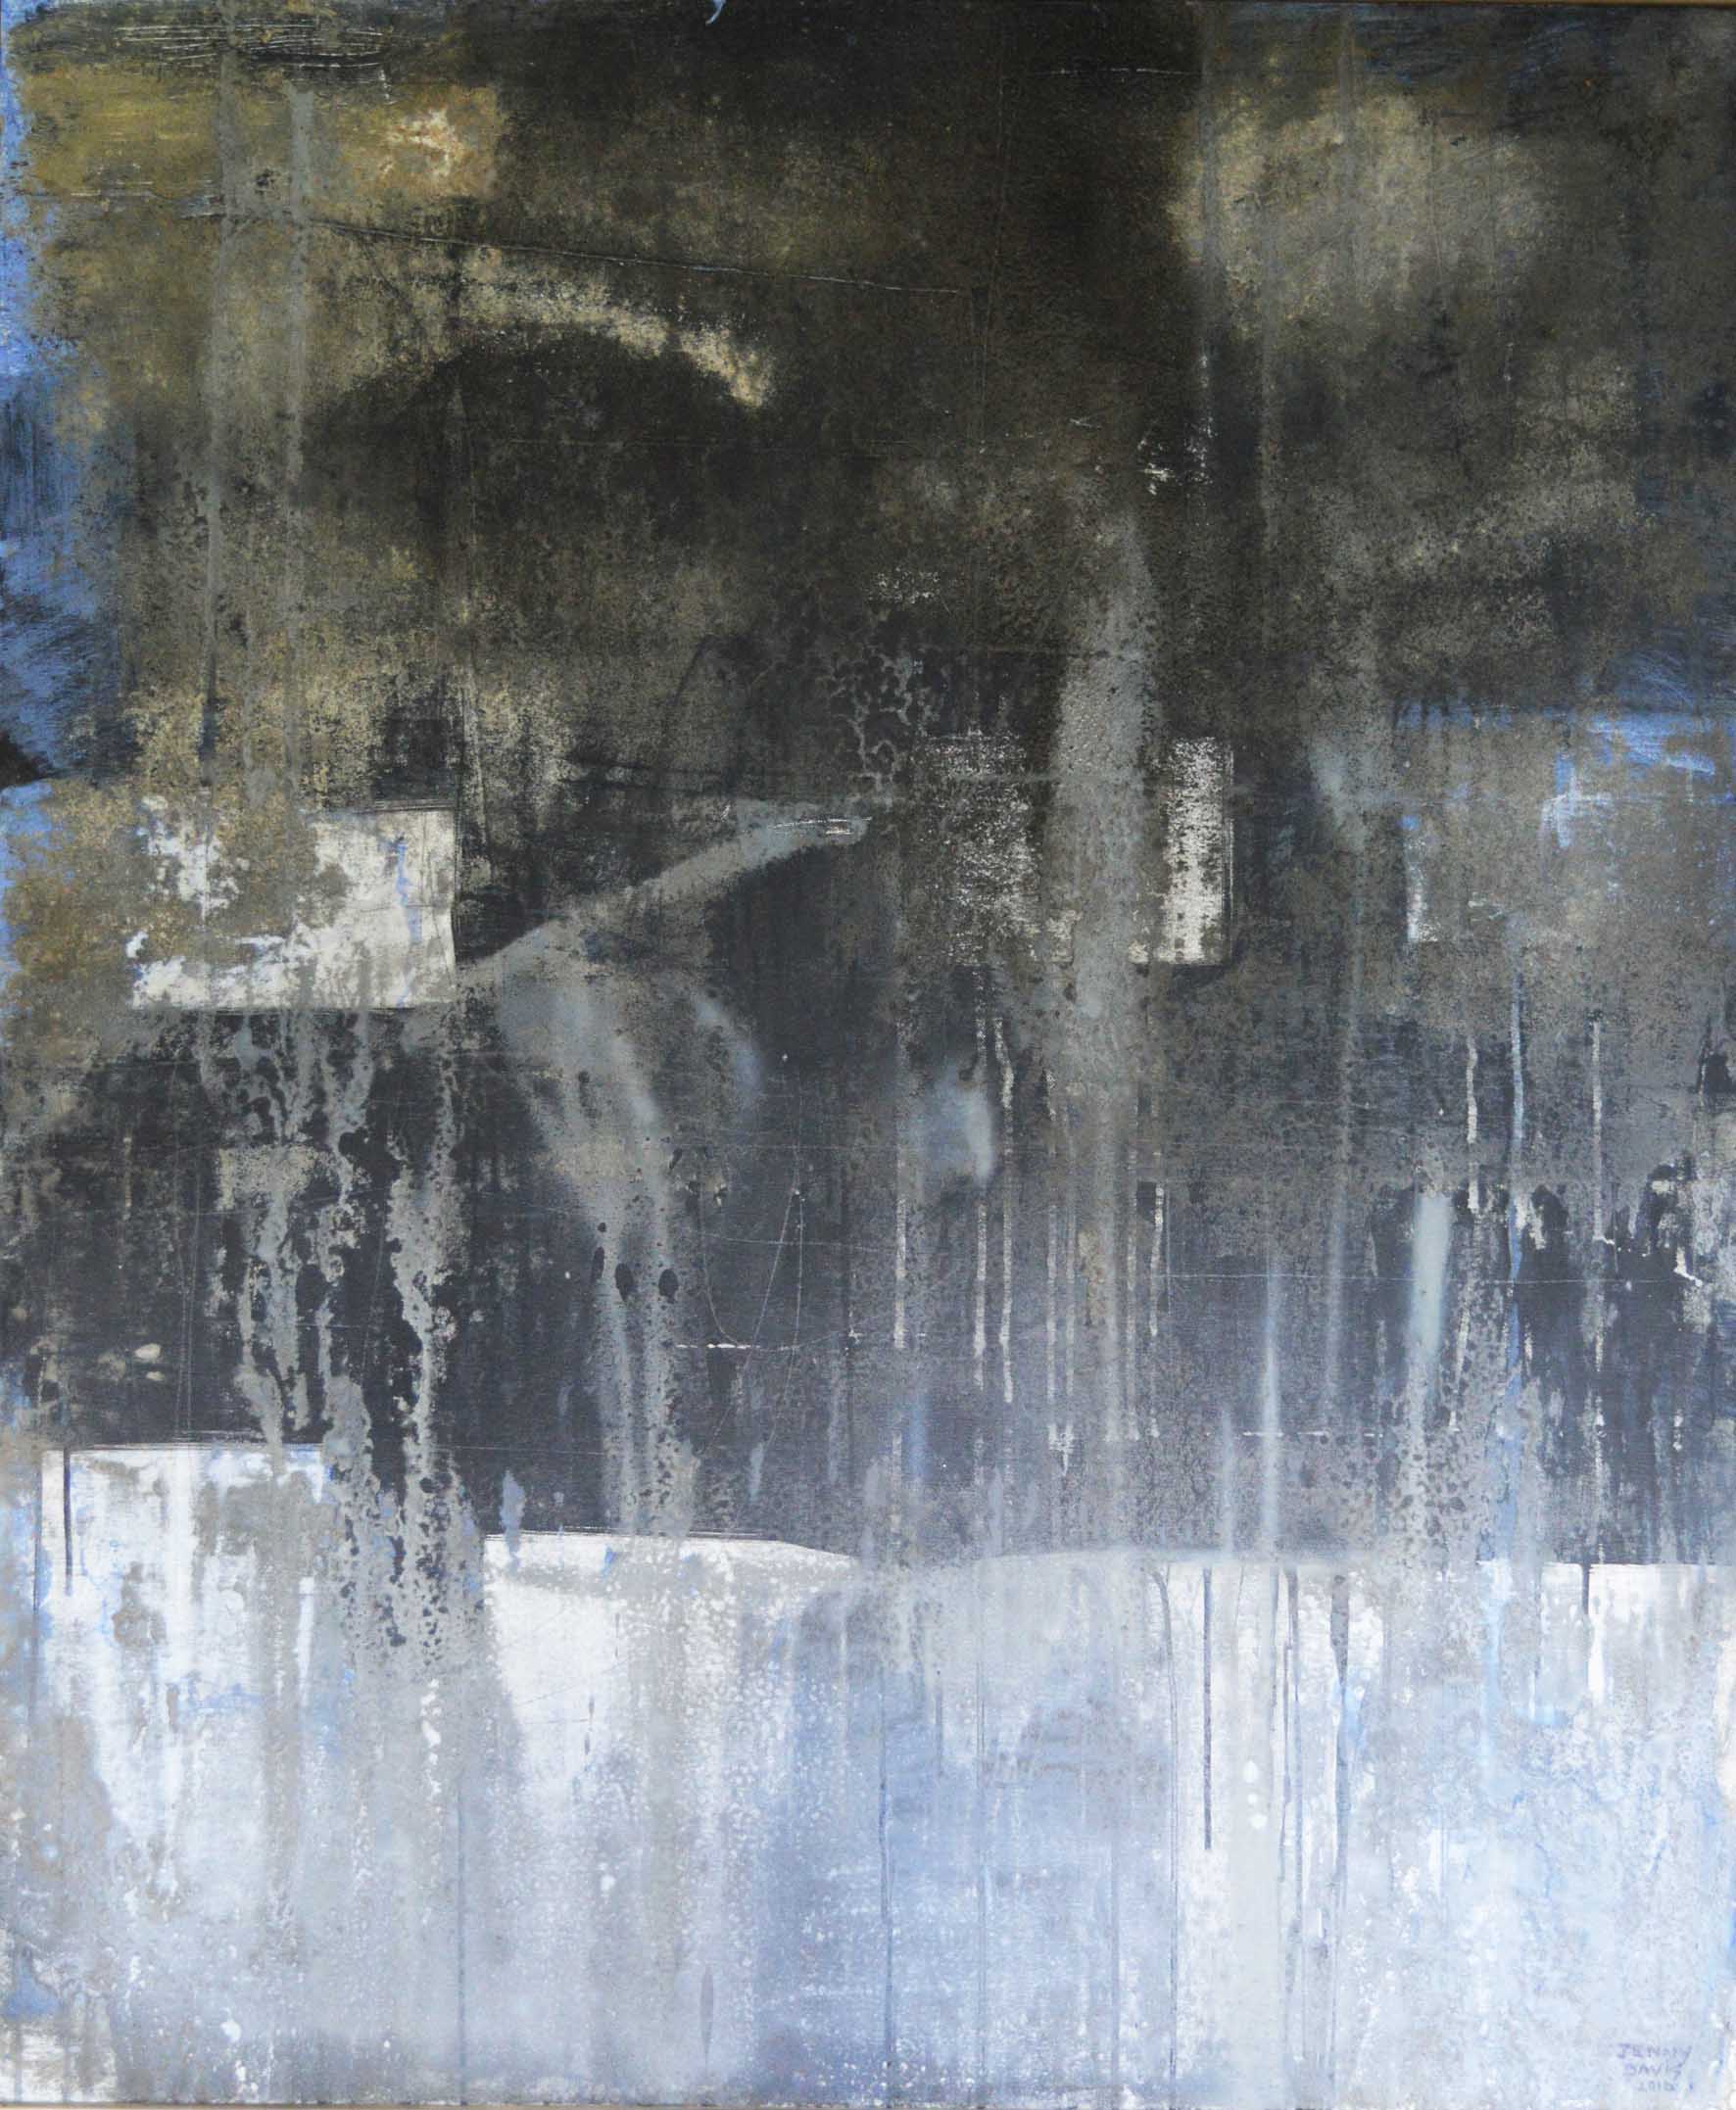
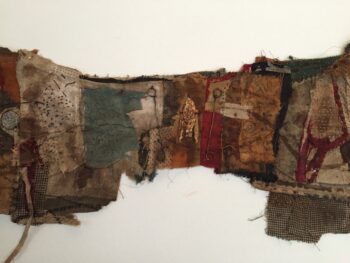
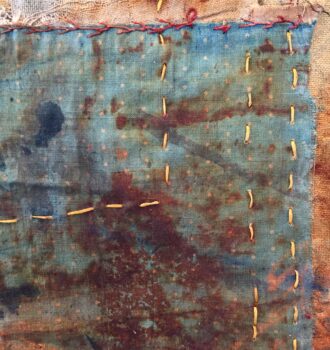
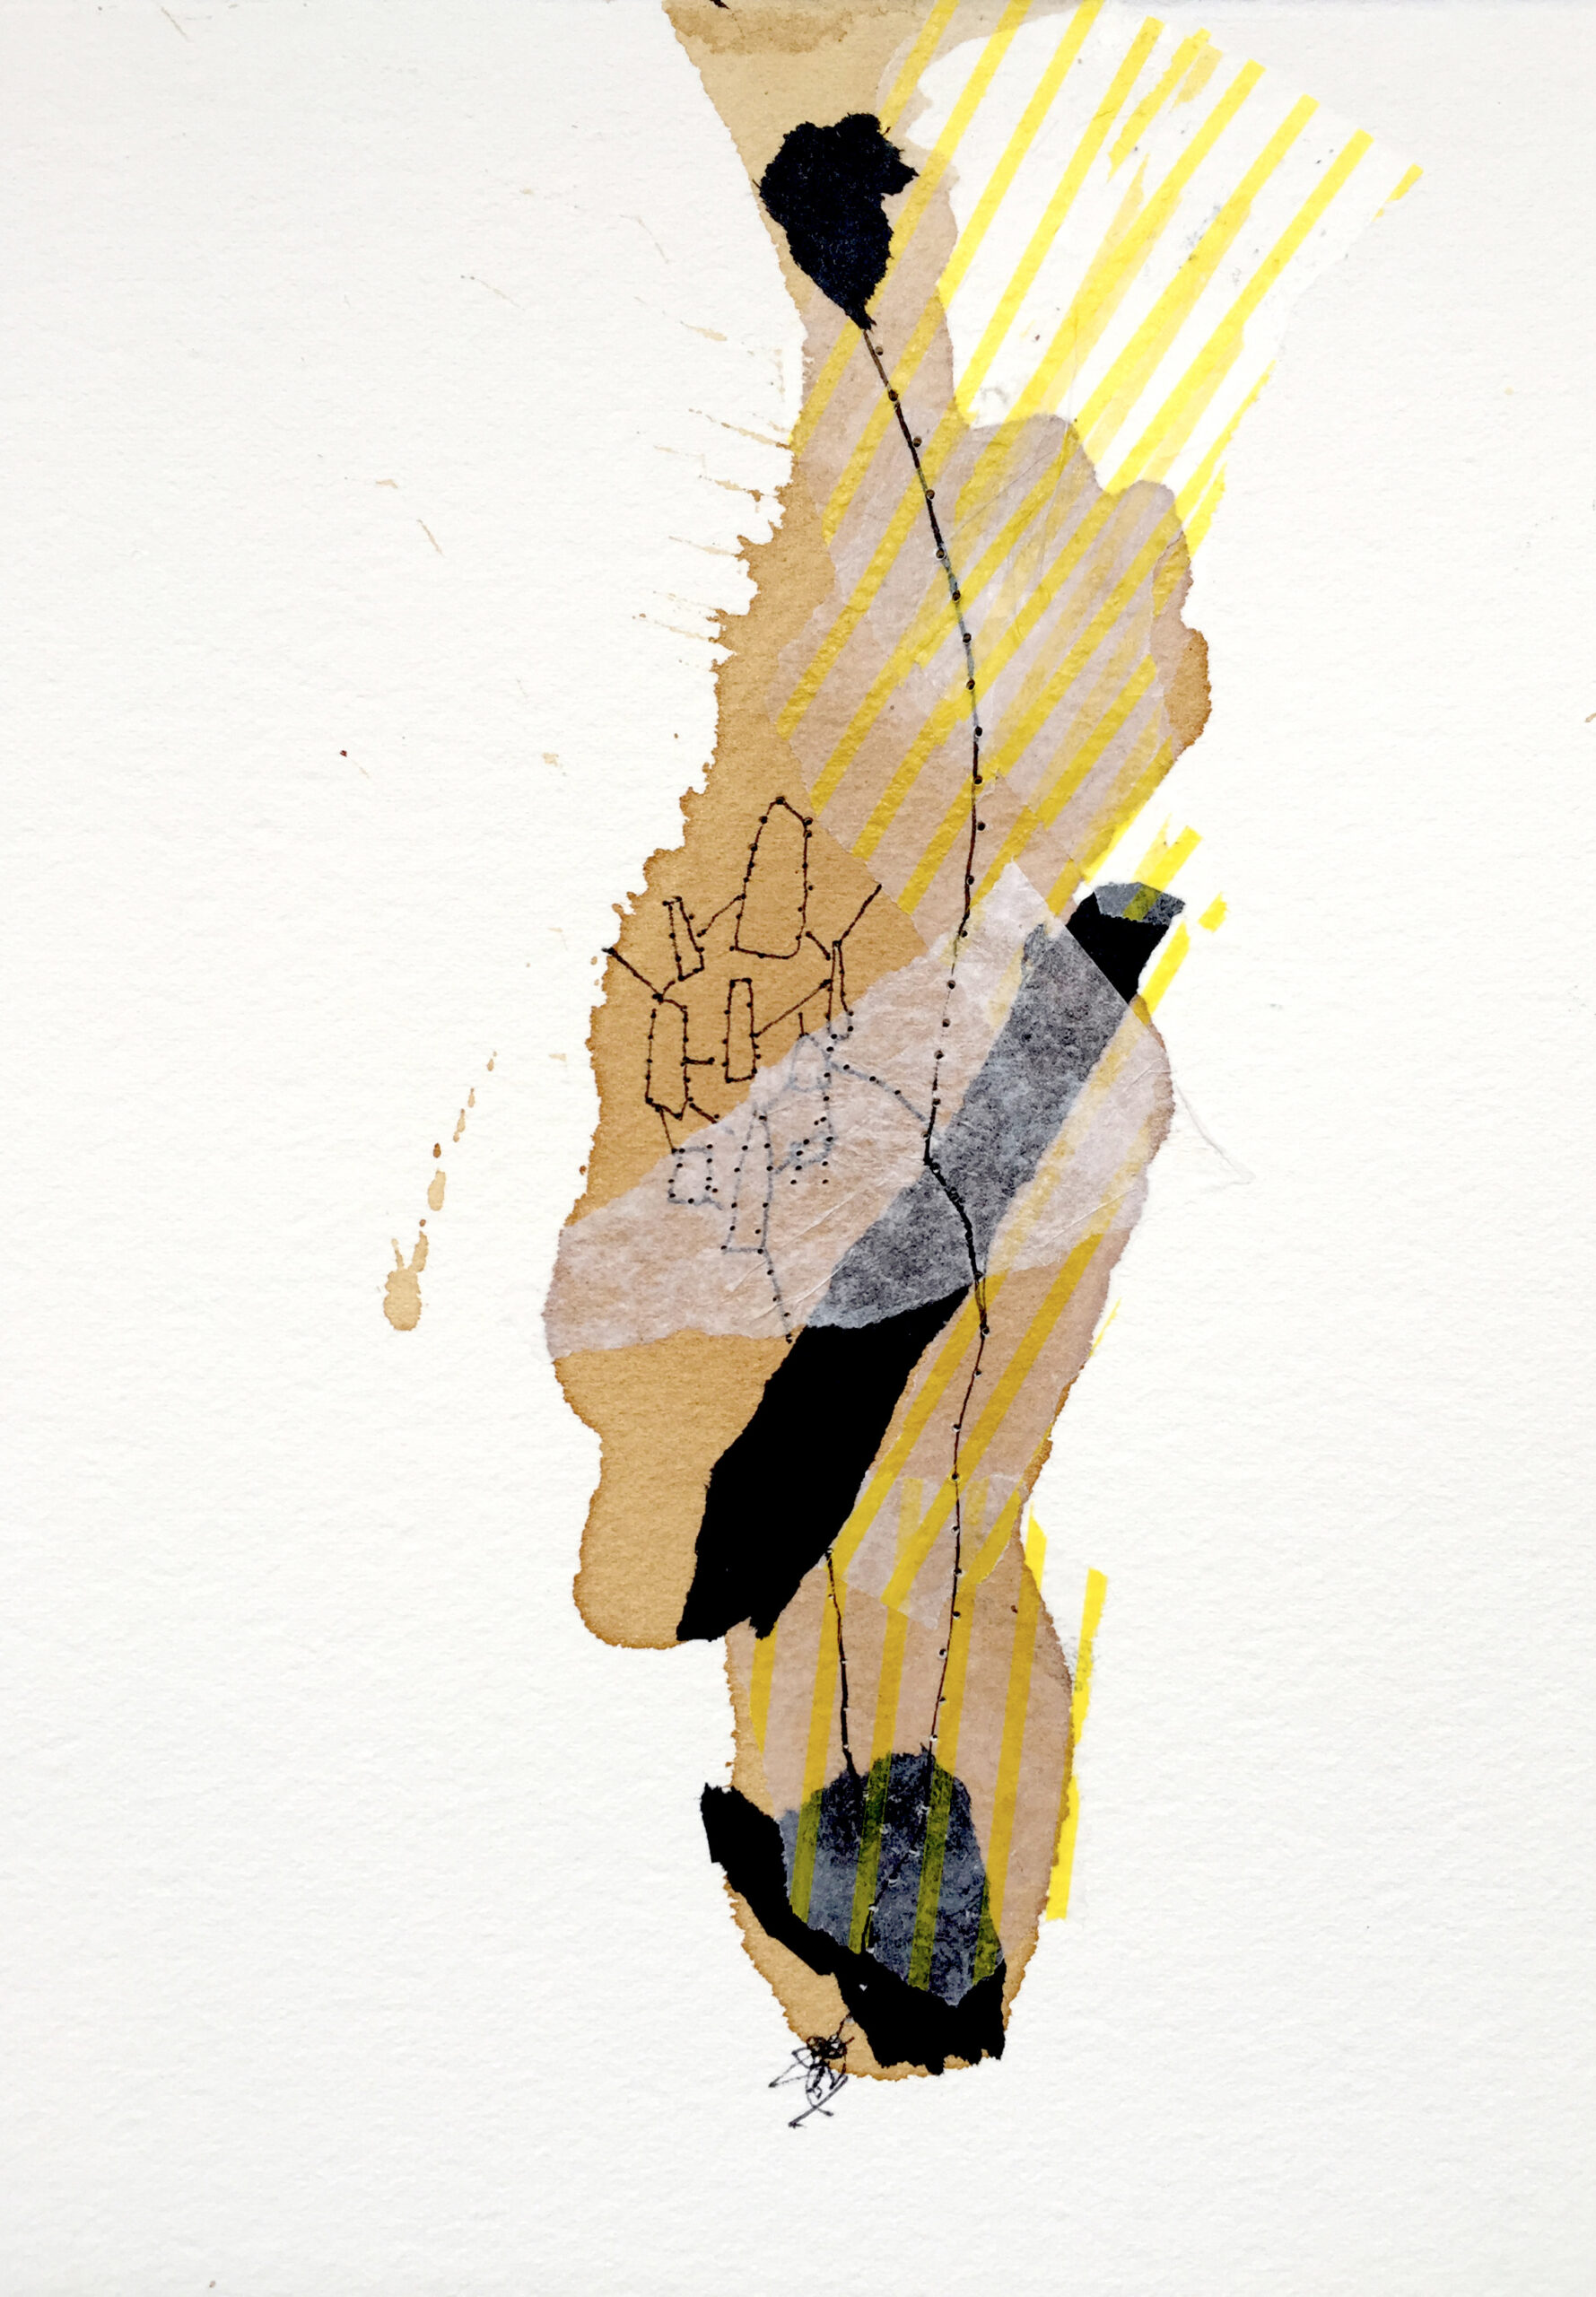
Cape Schanck Victoria 1 – 1994 Tracing the marks left behind along the coastline Landwrap Series 2023.
Cape Schanck Victoria 2 – 1994 Tracing the marks left behind along the coastline
Capturing the imperfections and traces left behind in the environment in 1994. 29 years later and still exploring the moments of change, rust and decay, as well as, the renewal and growth, in the transformation of the environment.
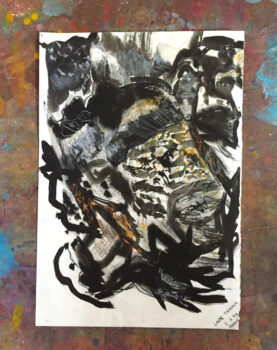
Chequered Flight – 2017 The creation of order out of chaos and the eventual return to randomness along the seine river in France.
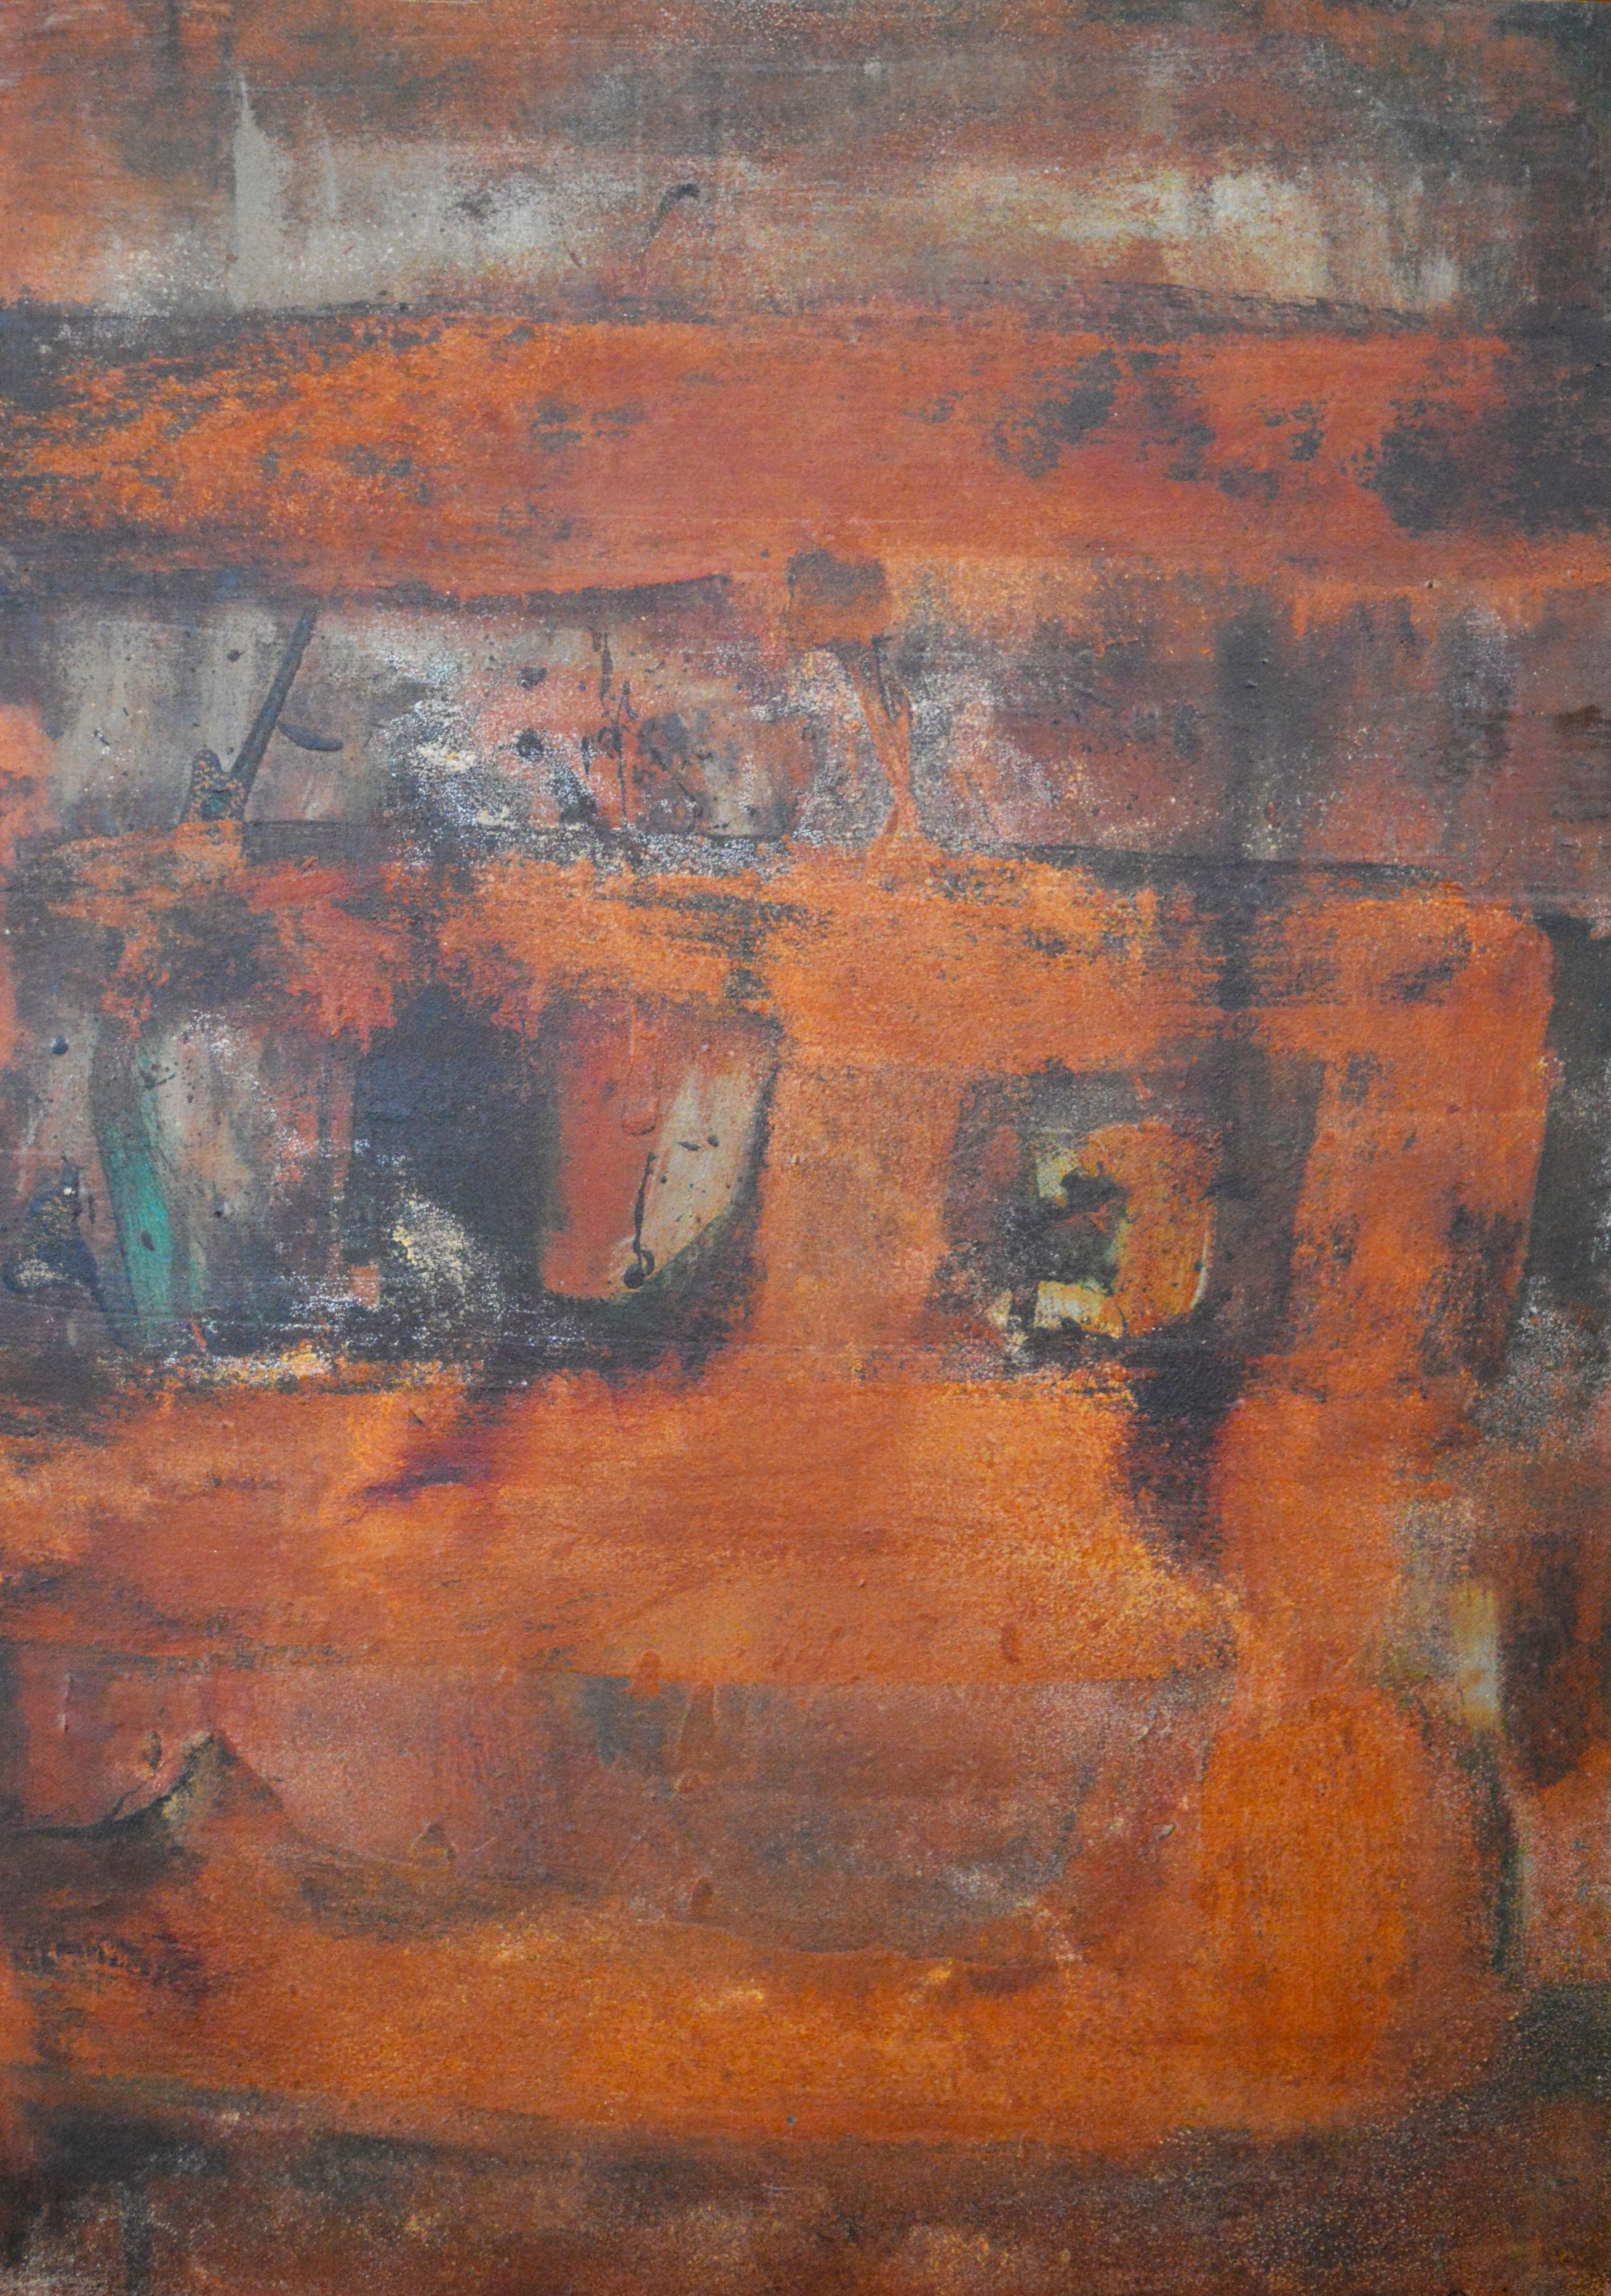
Rustmatter 16 – 2018 Marks found traveling on the Metro train system, Paris FranceEarth & Bio Dyeing
I want to engage viewers in a conversation about the relationship between our environment, our history, and the importance of embracing the beauty and raw power of the natural environment.
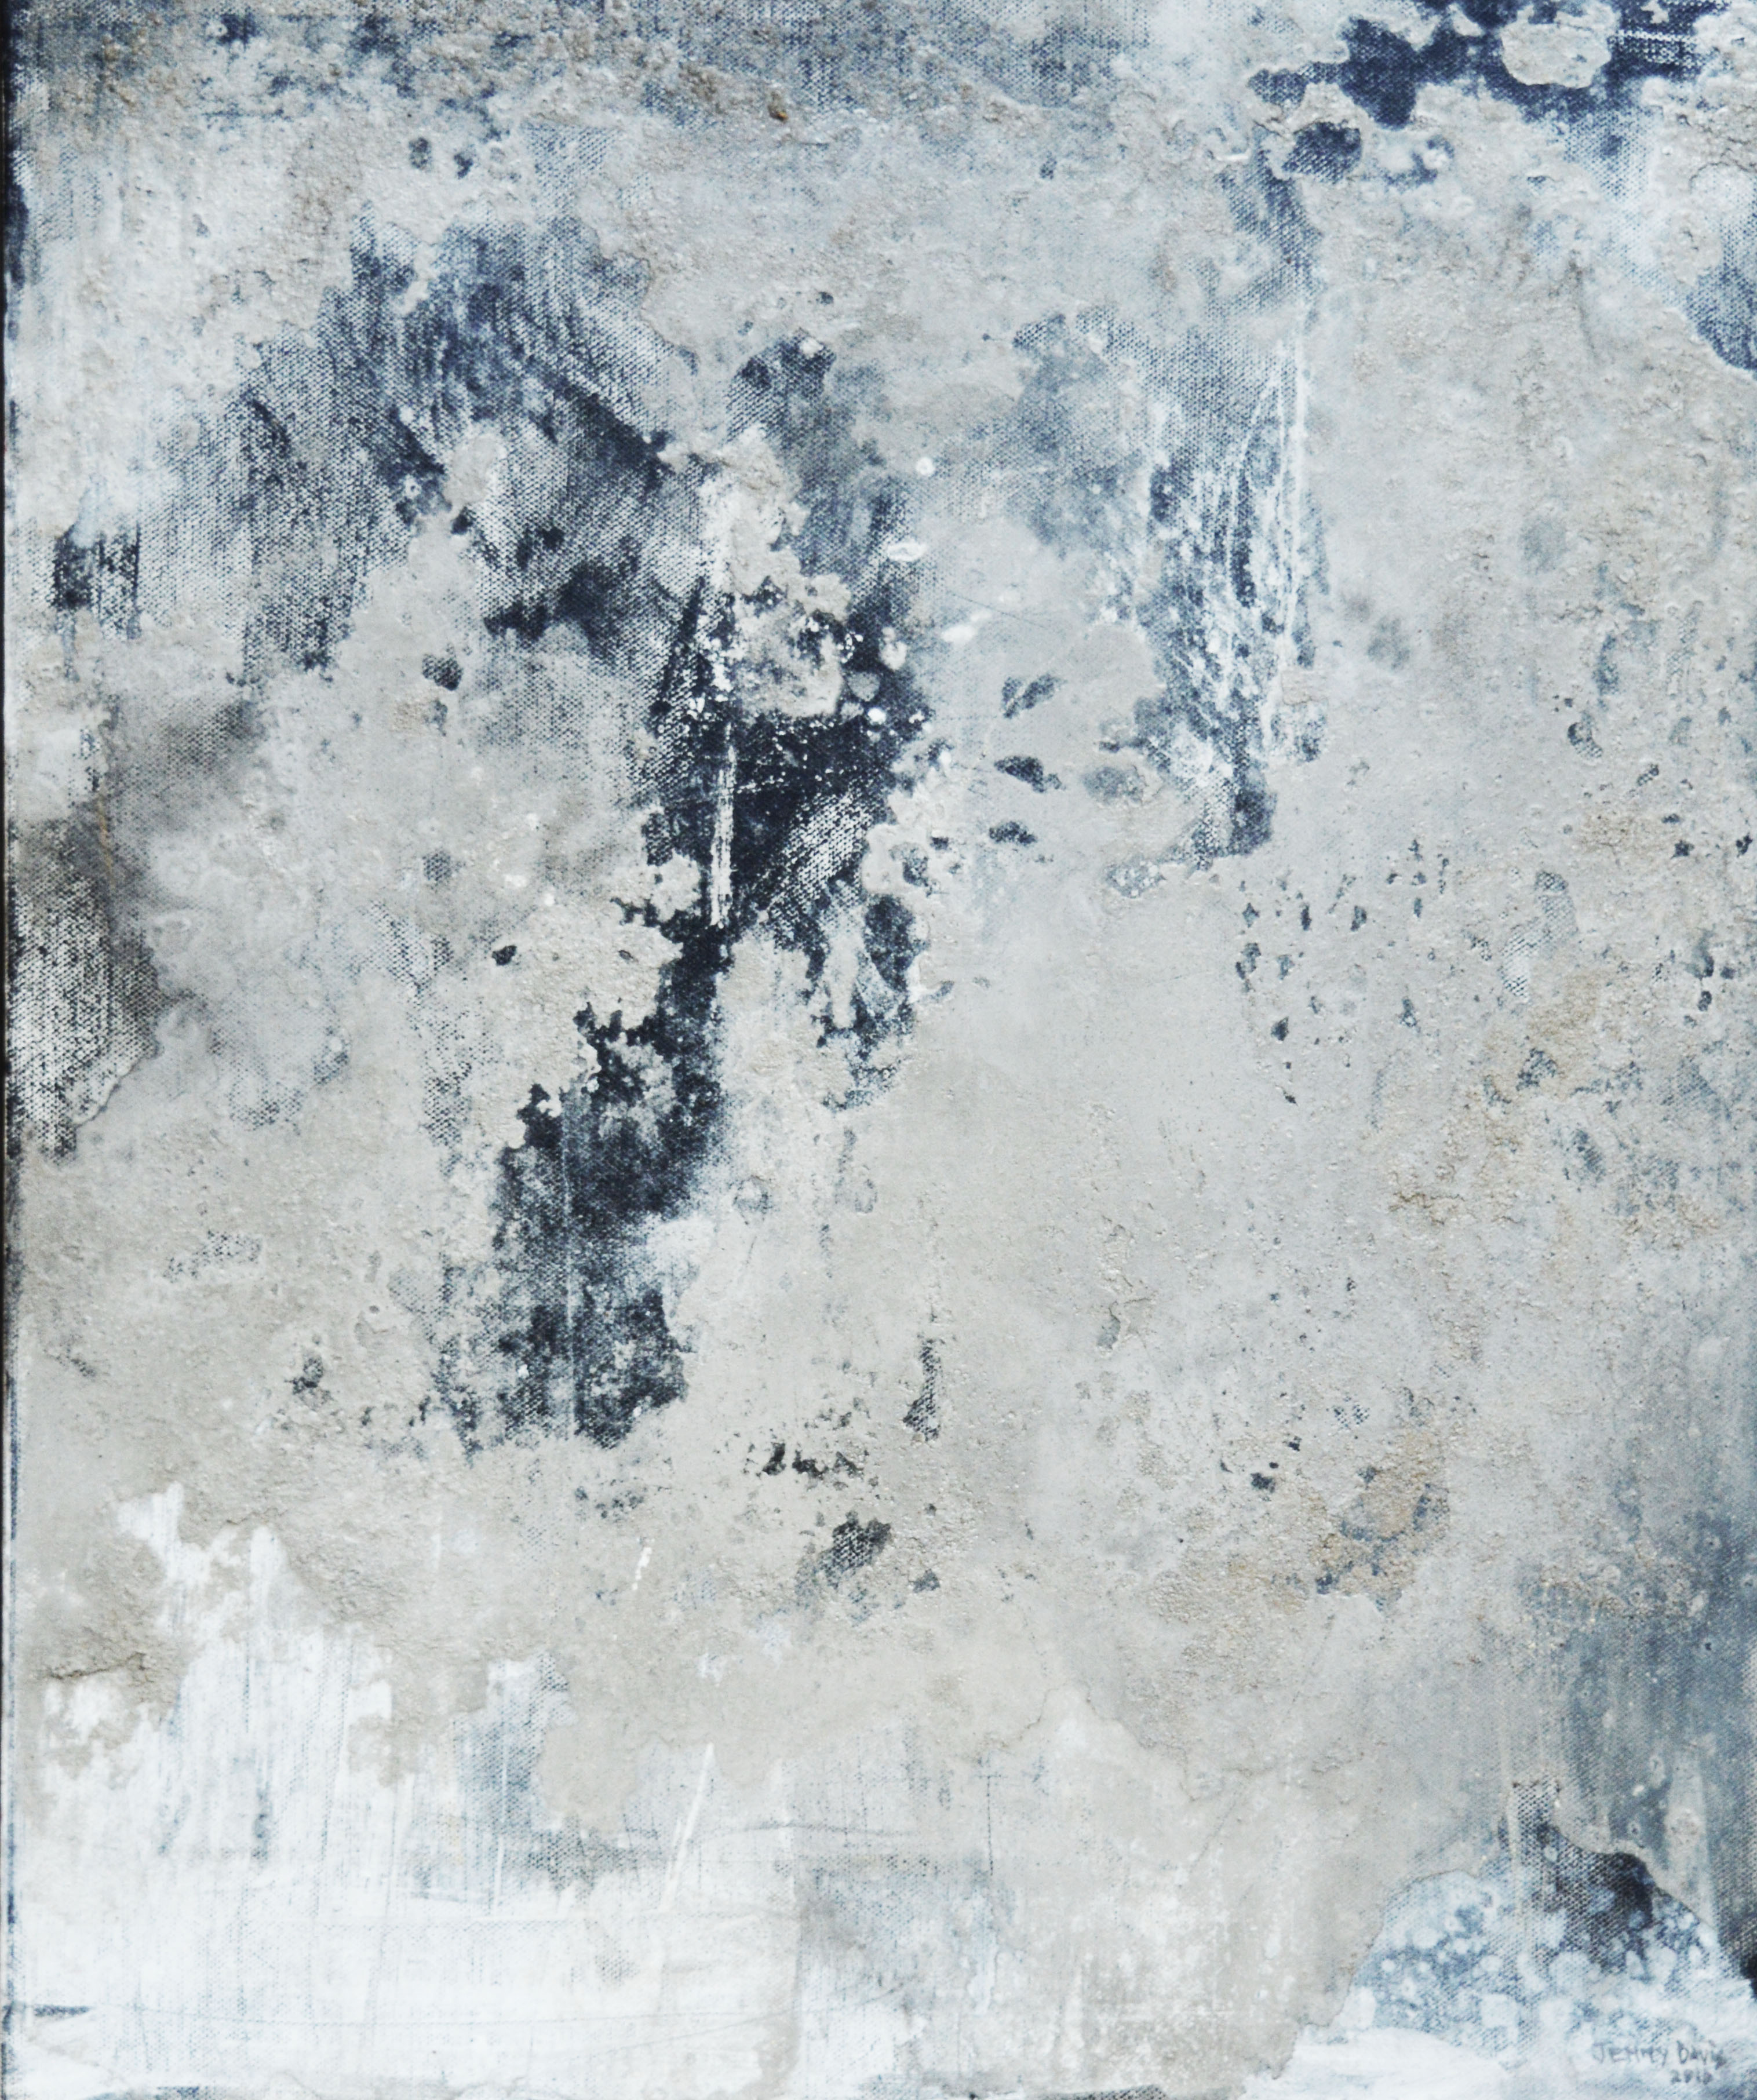
Wallmatter 8 – 2016 Connections and contrasts of imperfections, found in the urban environment, highlighting, insignificant marks and weathered surfaces
Rustmatter 14 – 2016 A visual and textural descent into the abandoned, the derelict, the vacant and the forgotten. Show Less
Wallmatter 16 – 2016 Connections and contrasts of imperfections, found in the urban environment, highlighting, insignificant marks and weathered surfaces
I work primarily with abstract painting and often focus on layering paint and mixed media materials, creating incomplete impressions – random, yet imperfect. My process involves building up and breaking down surfaces, playing with decay and renew. In my textile and found object pieces I bring in texture and rust to give depth.
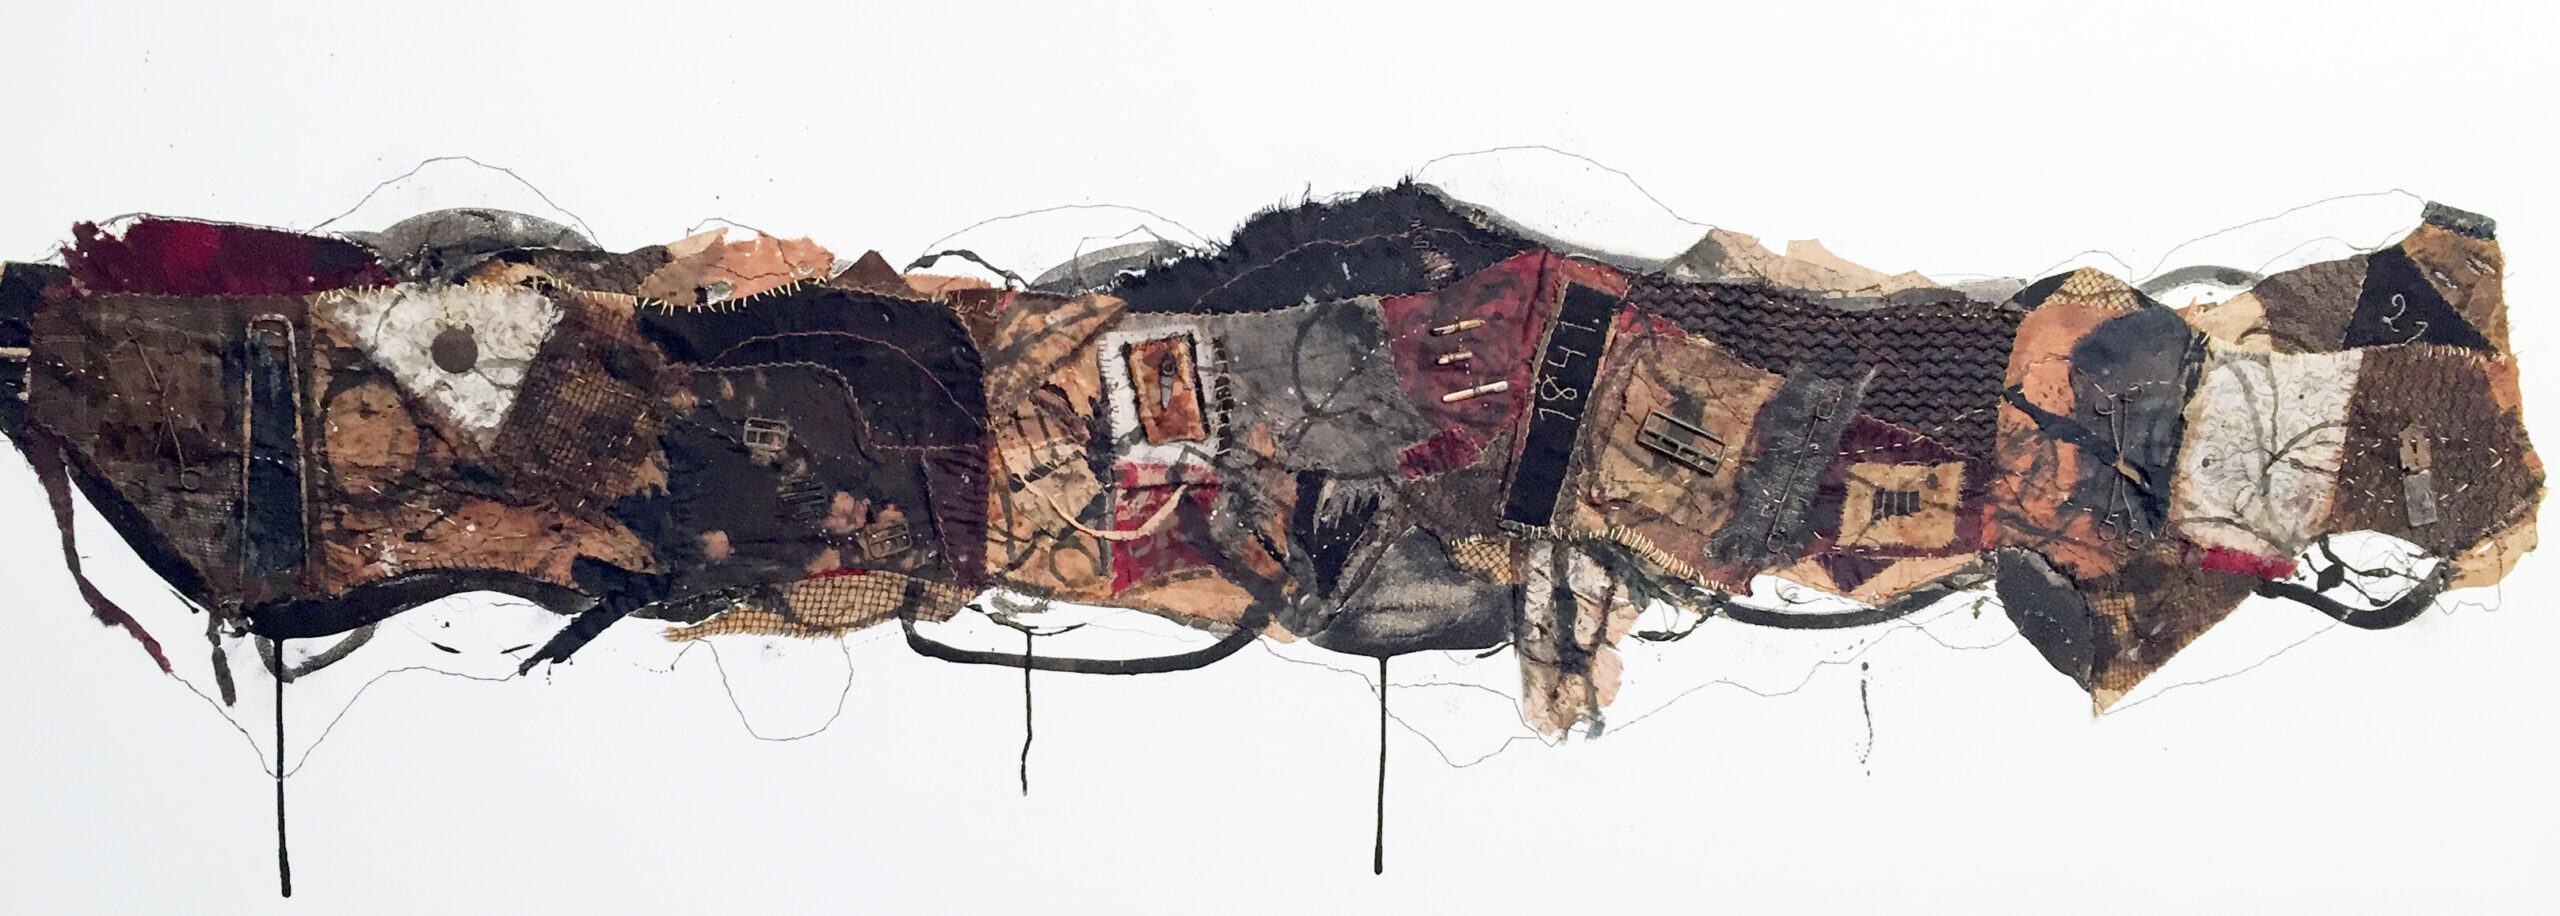
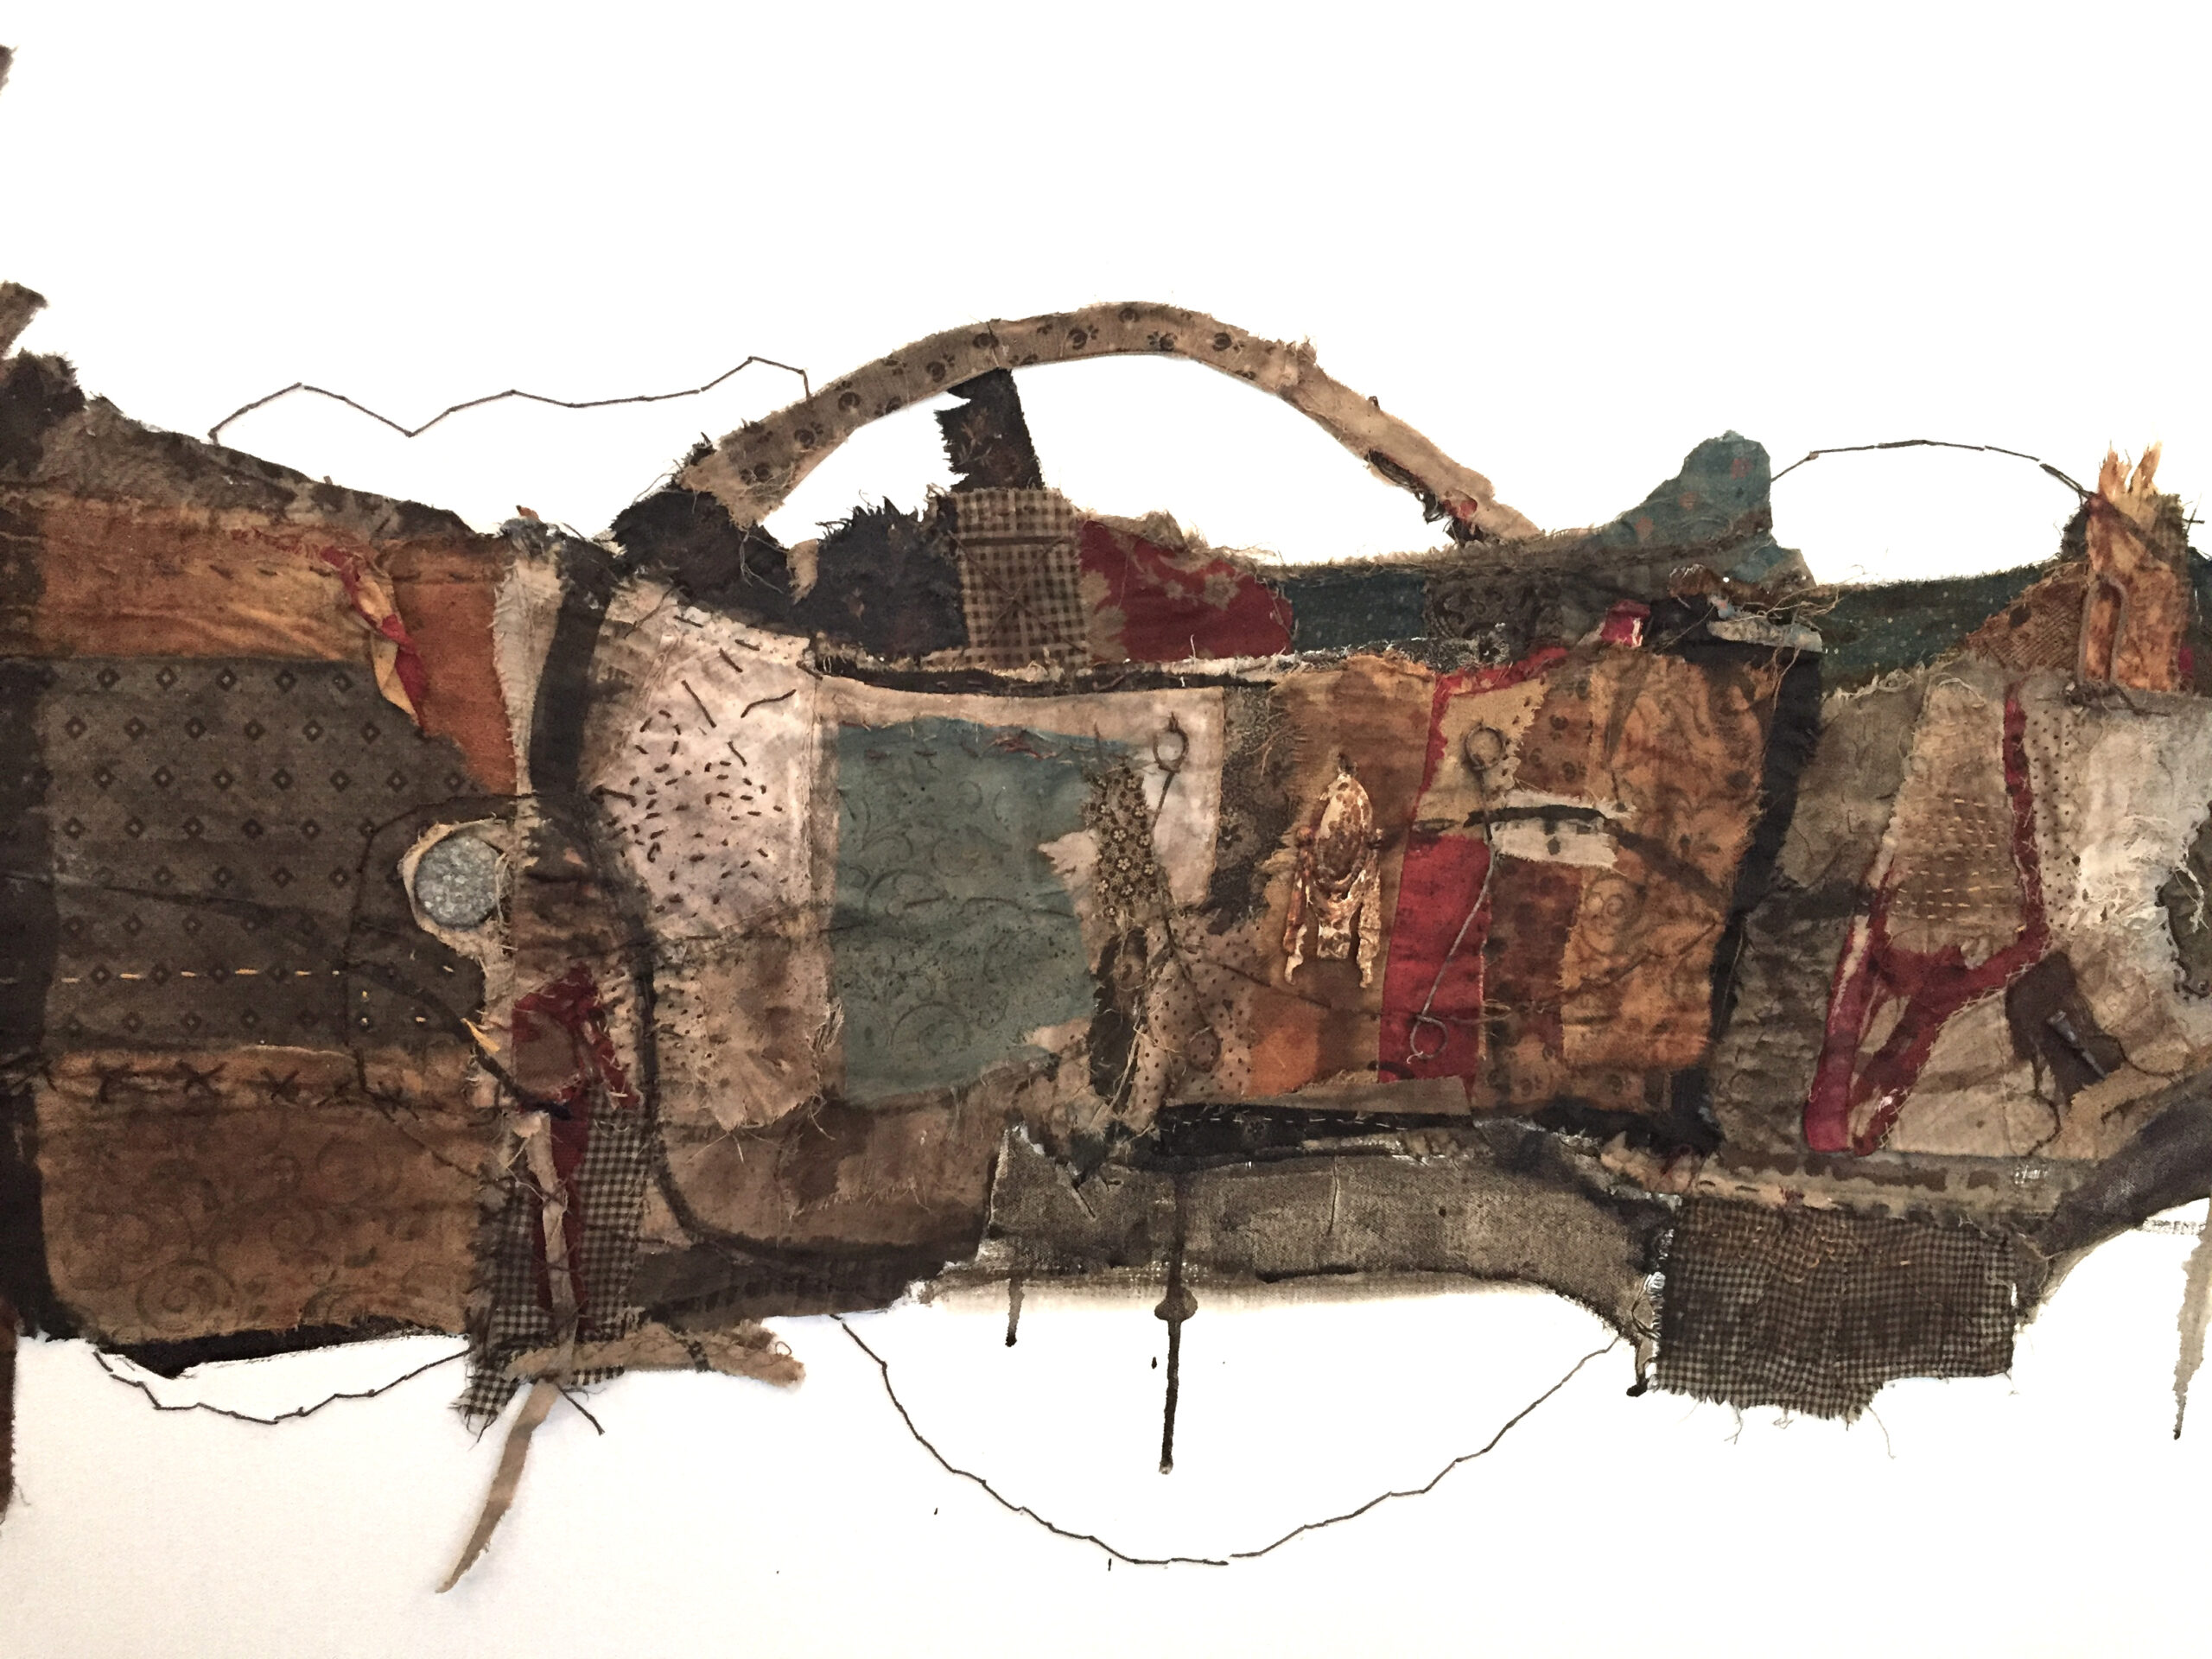
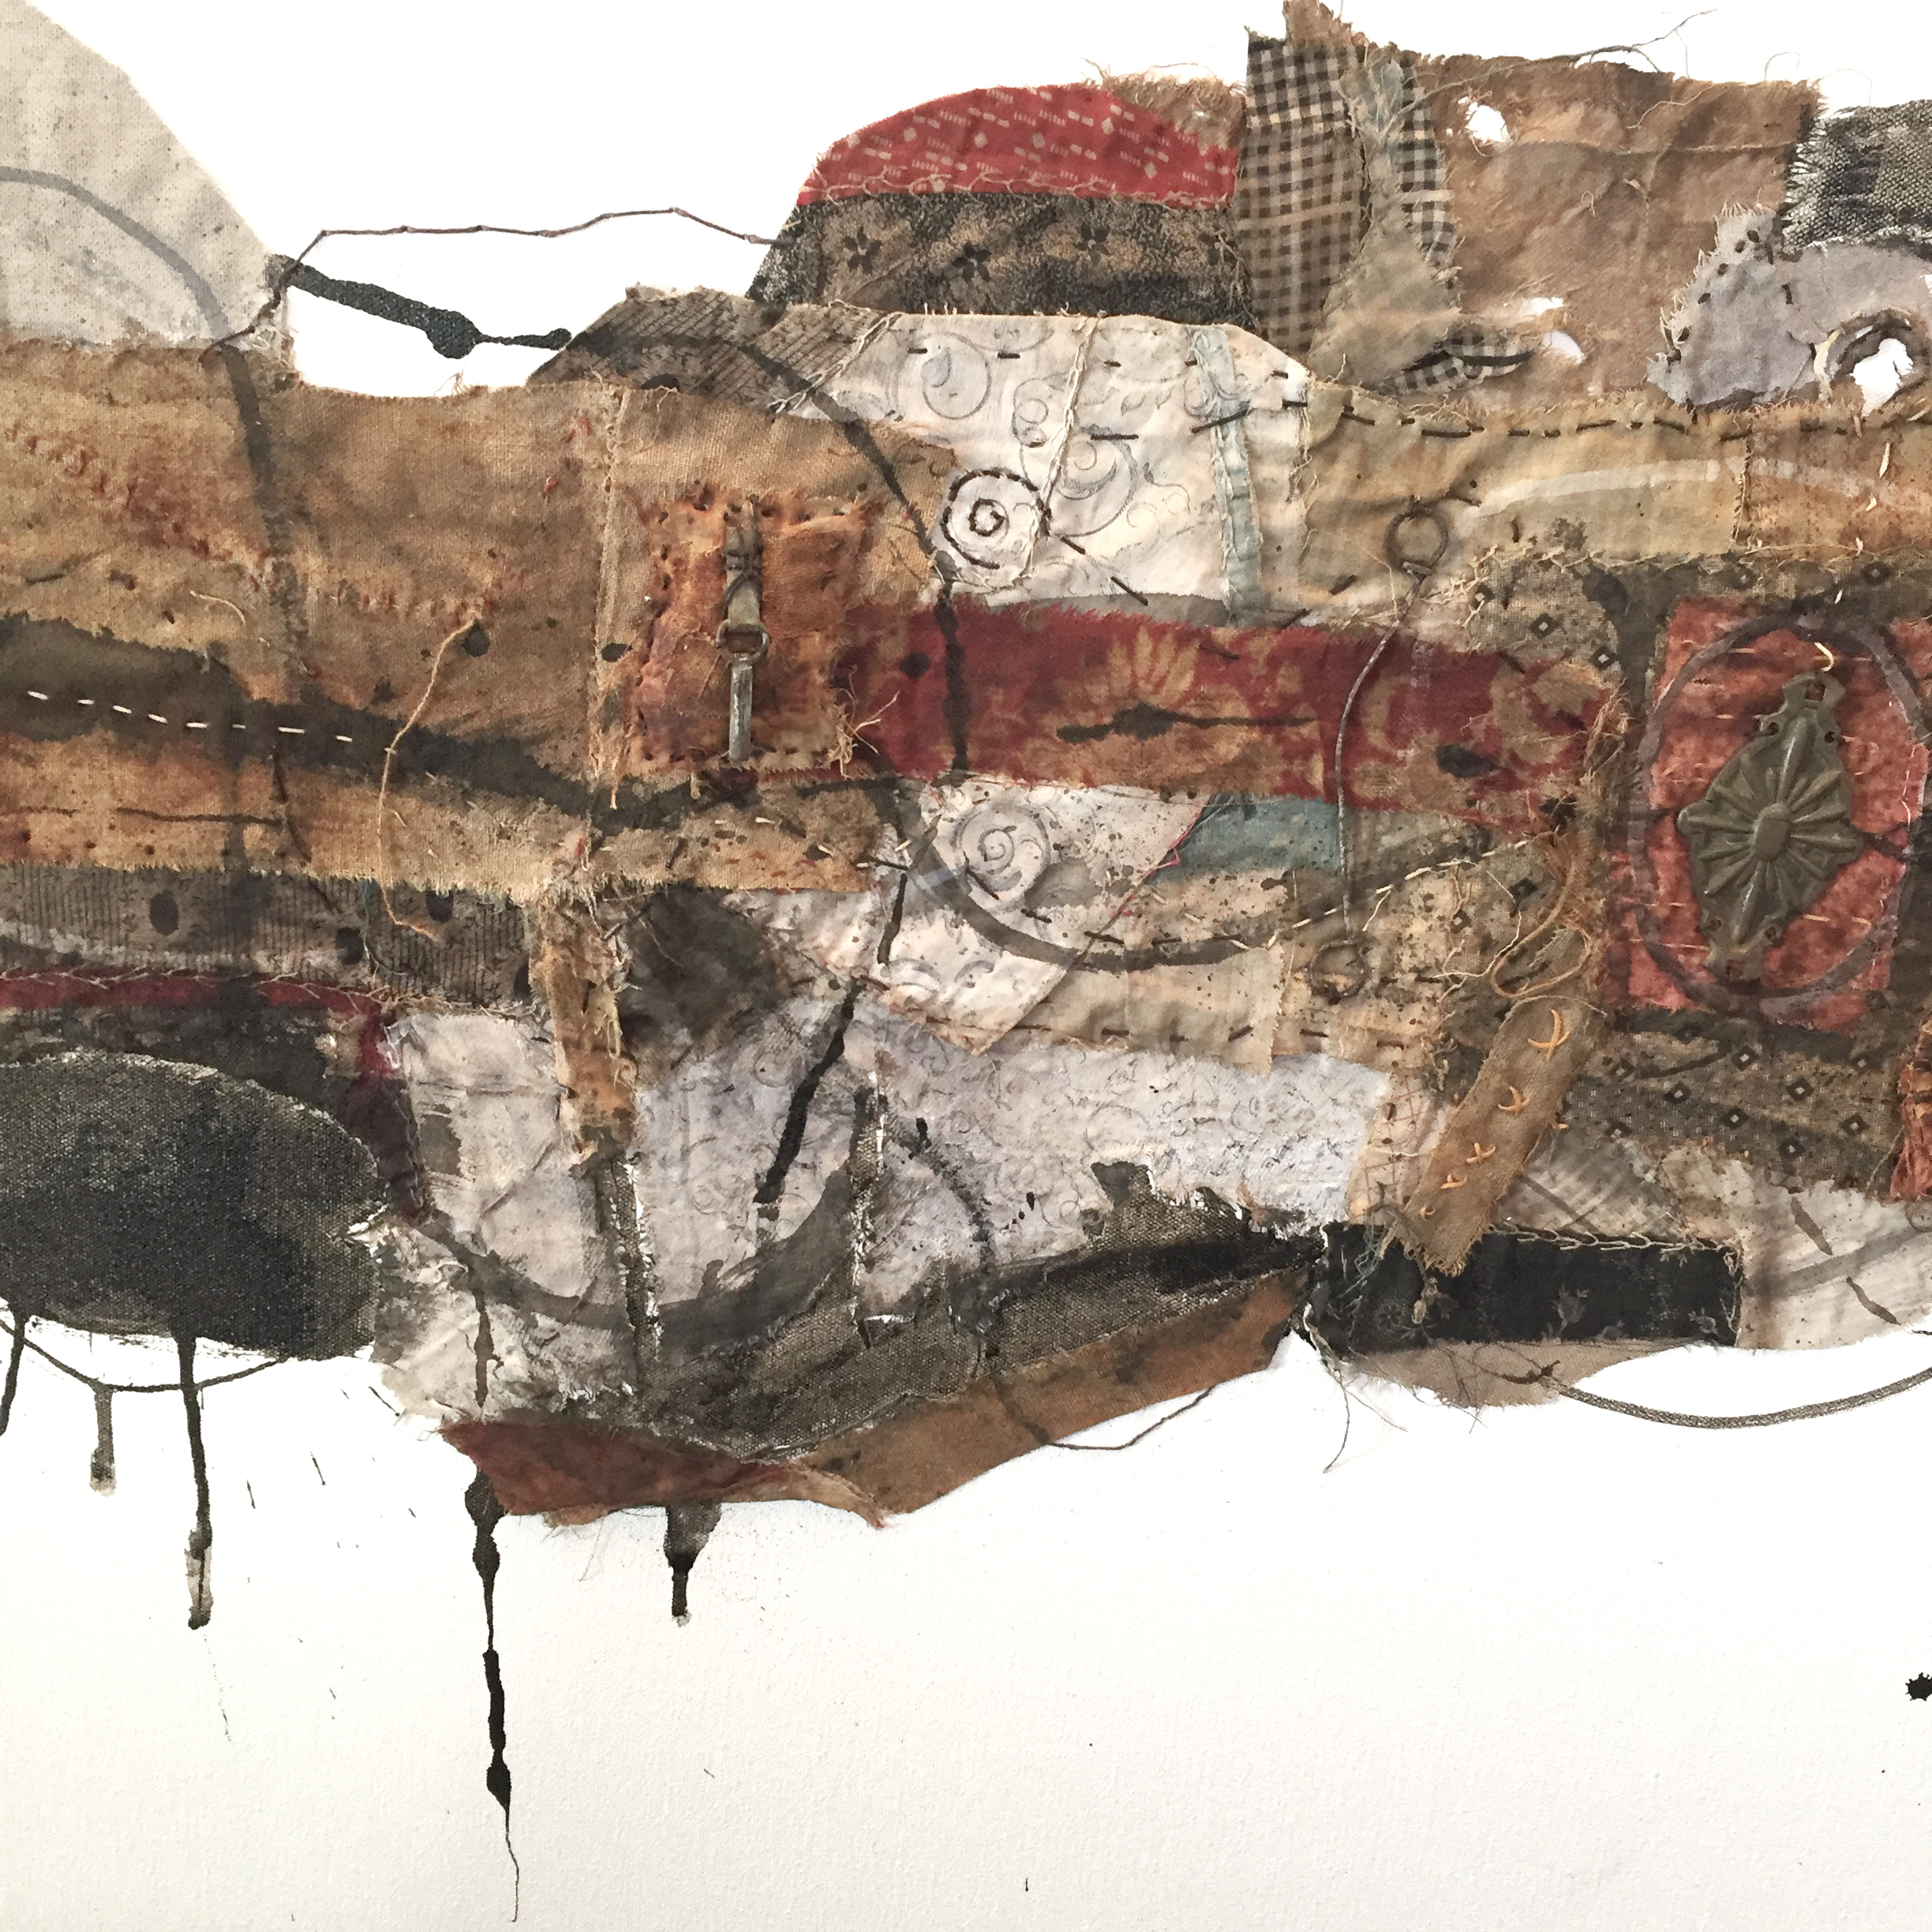
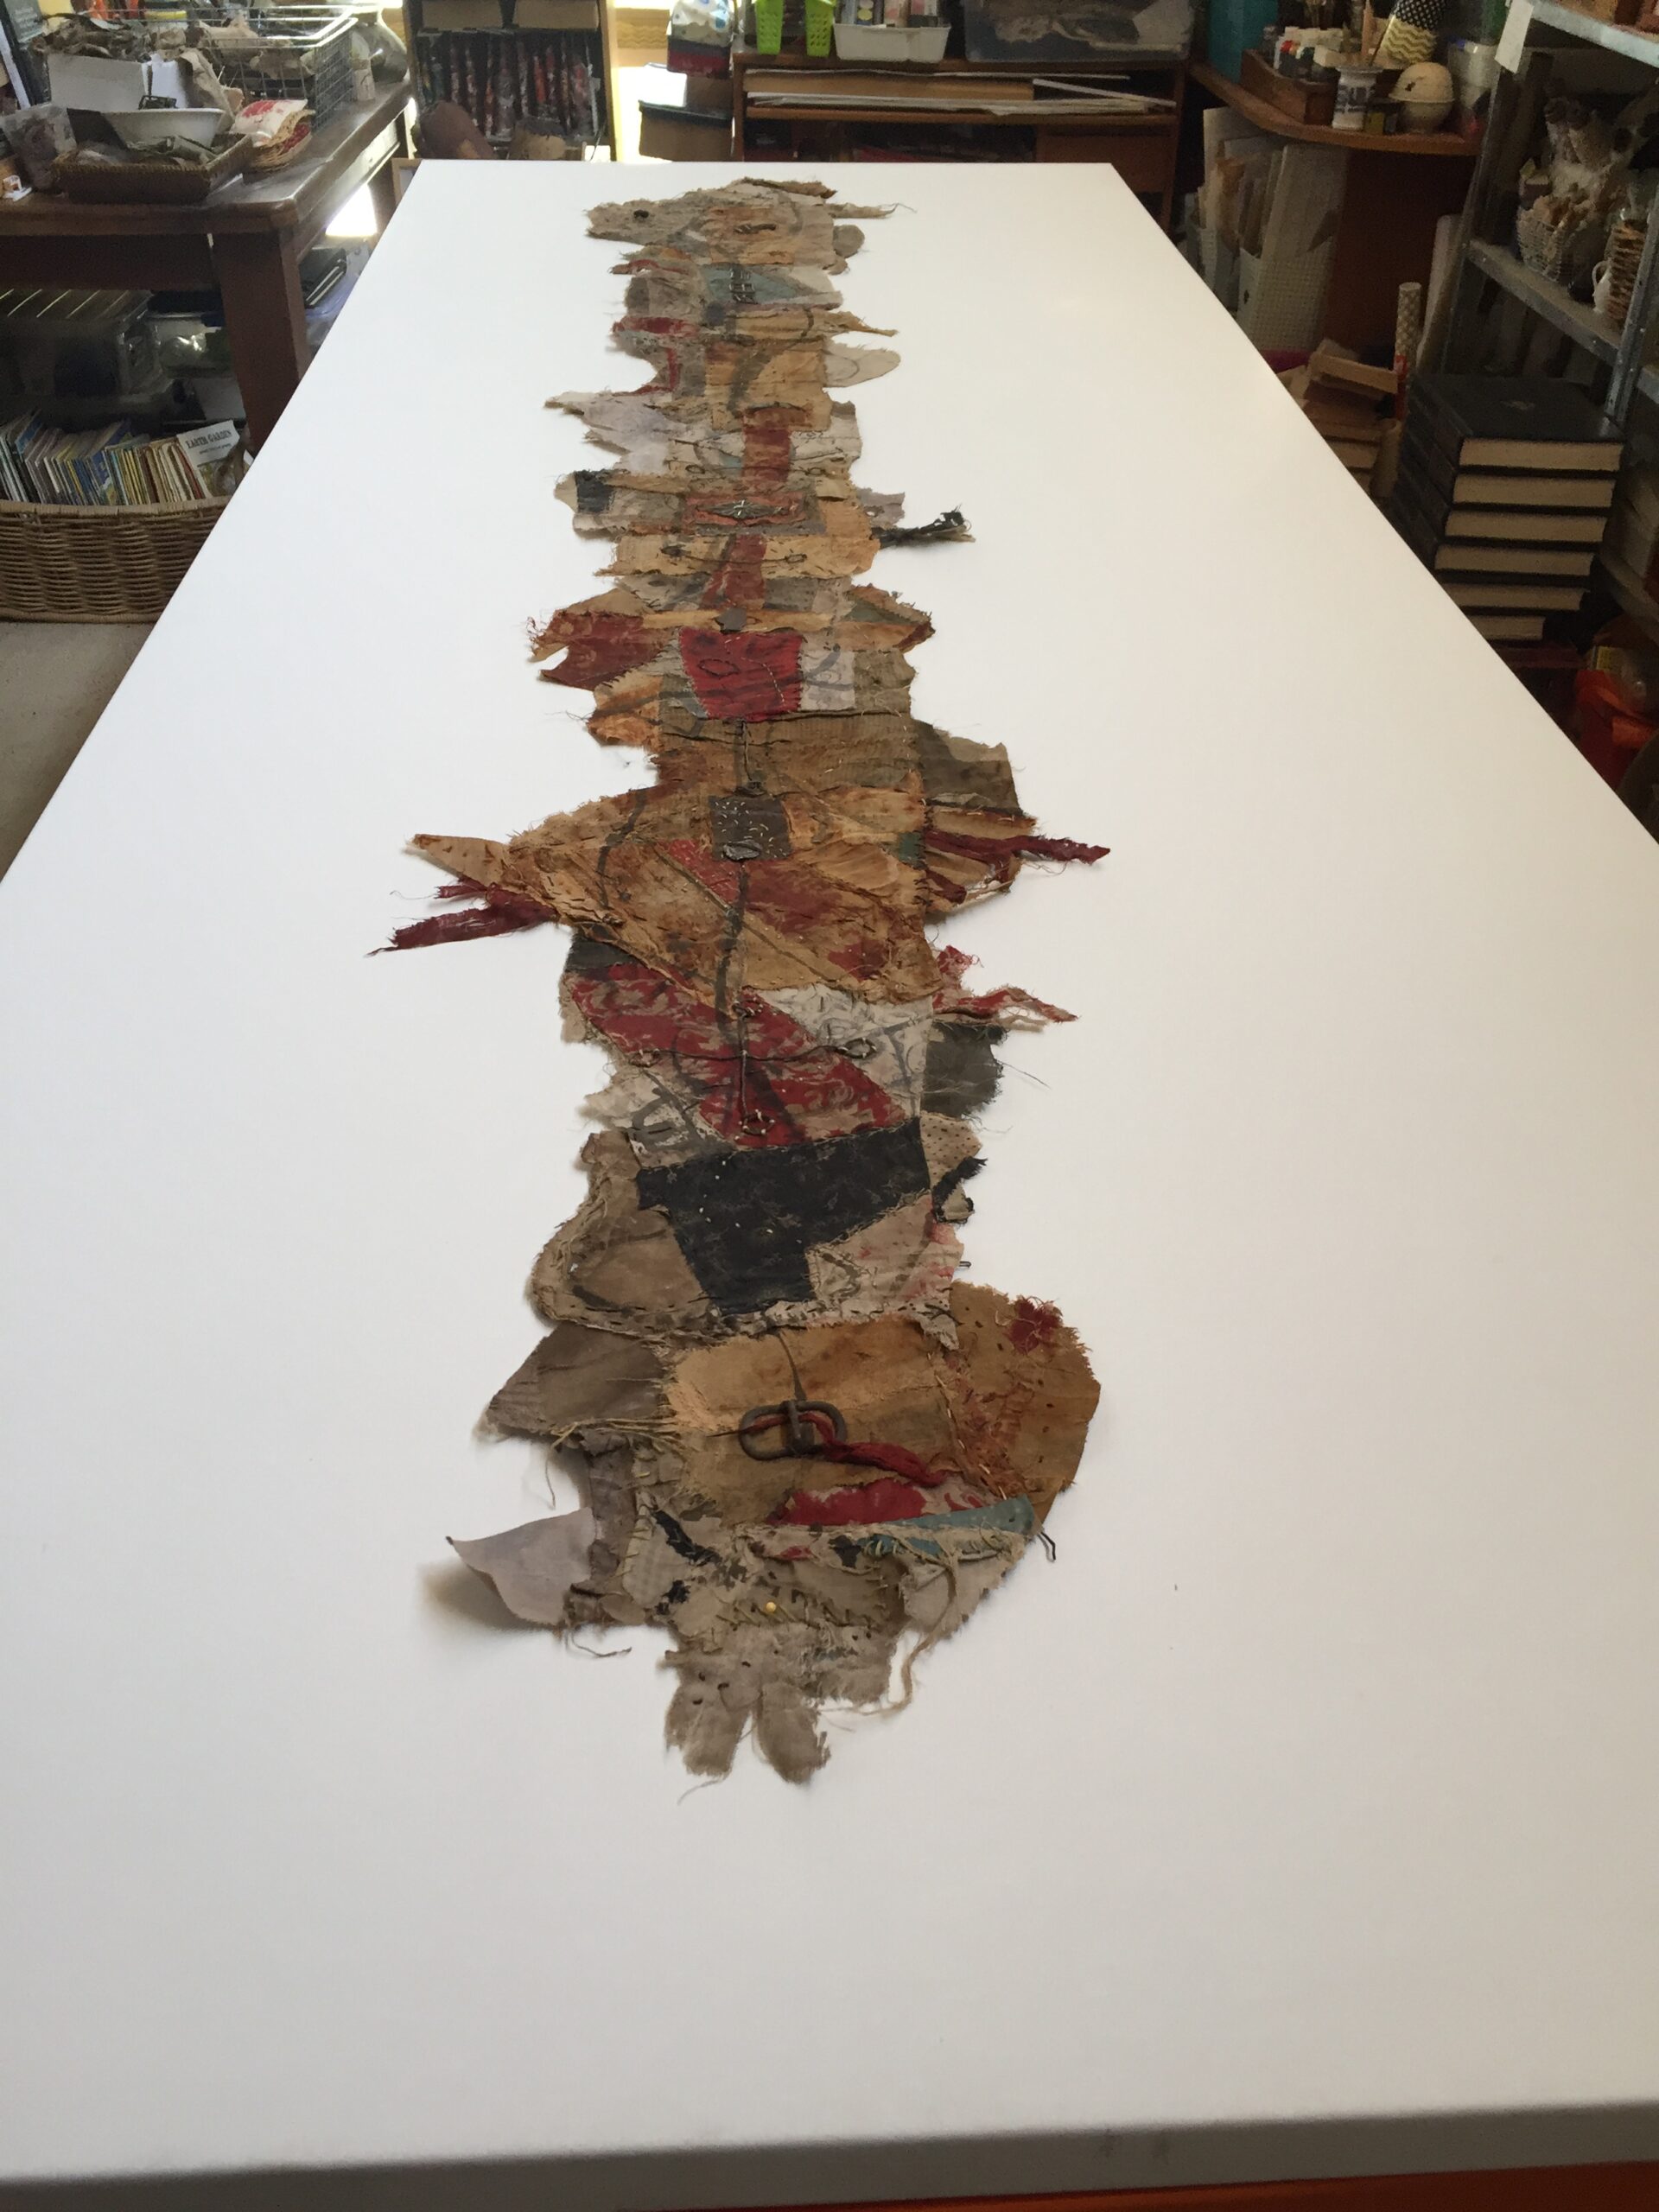
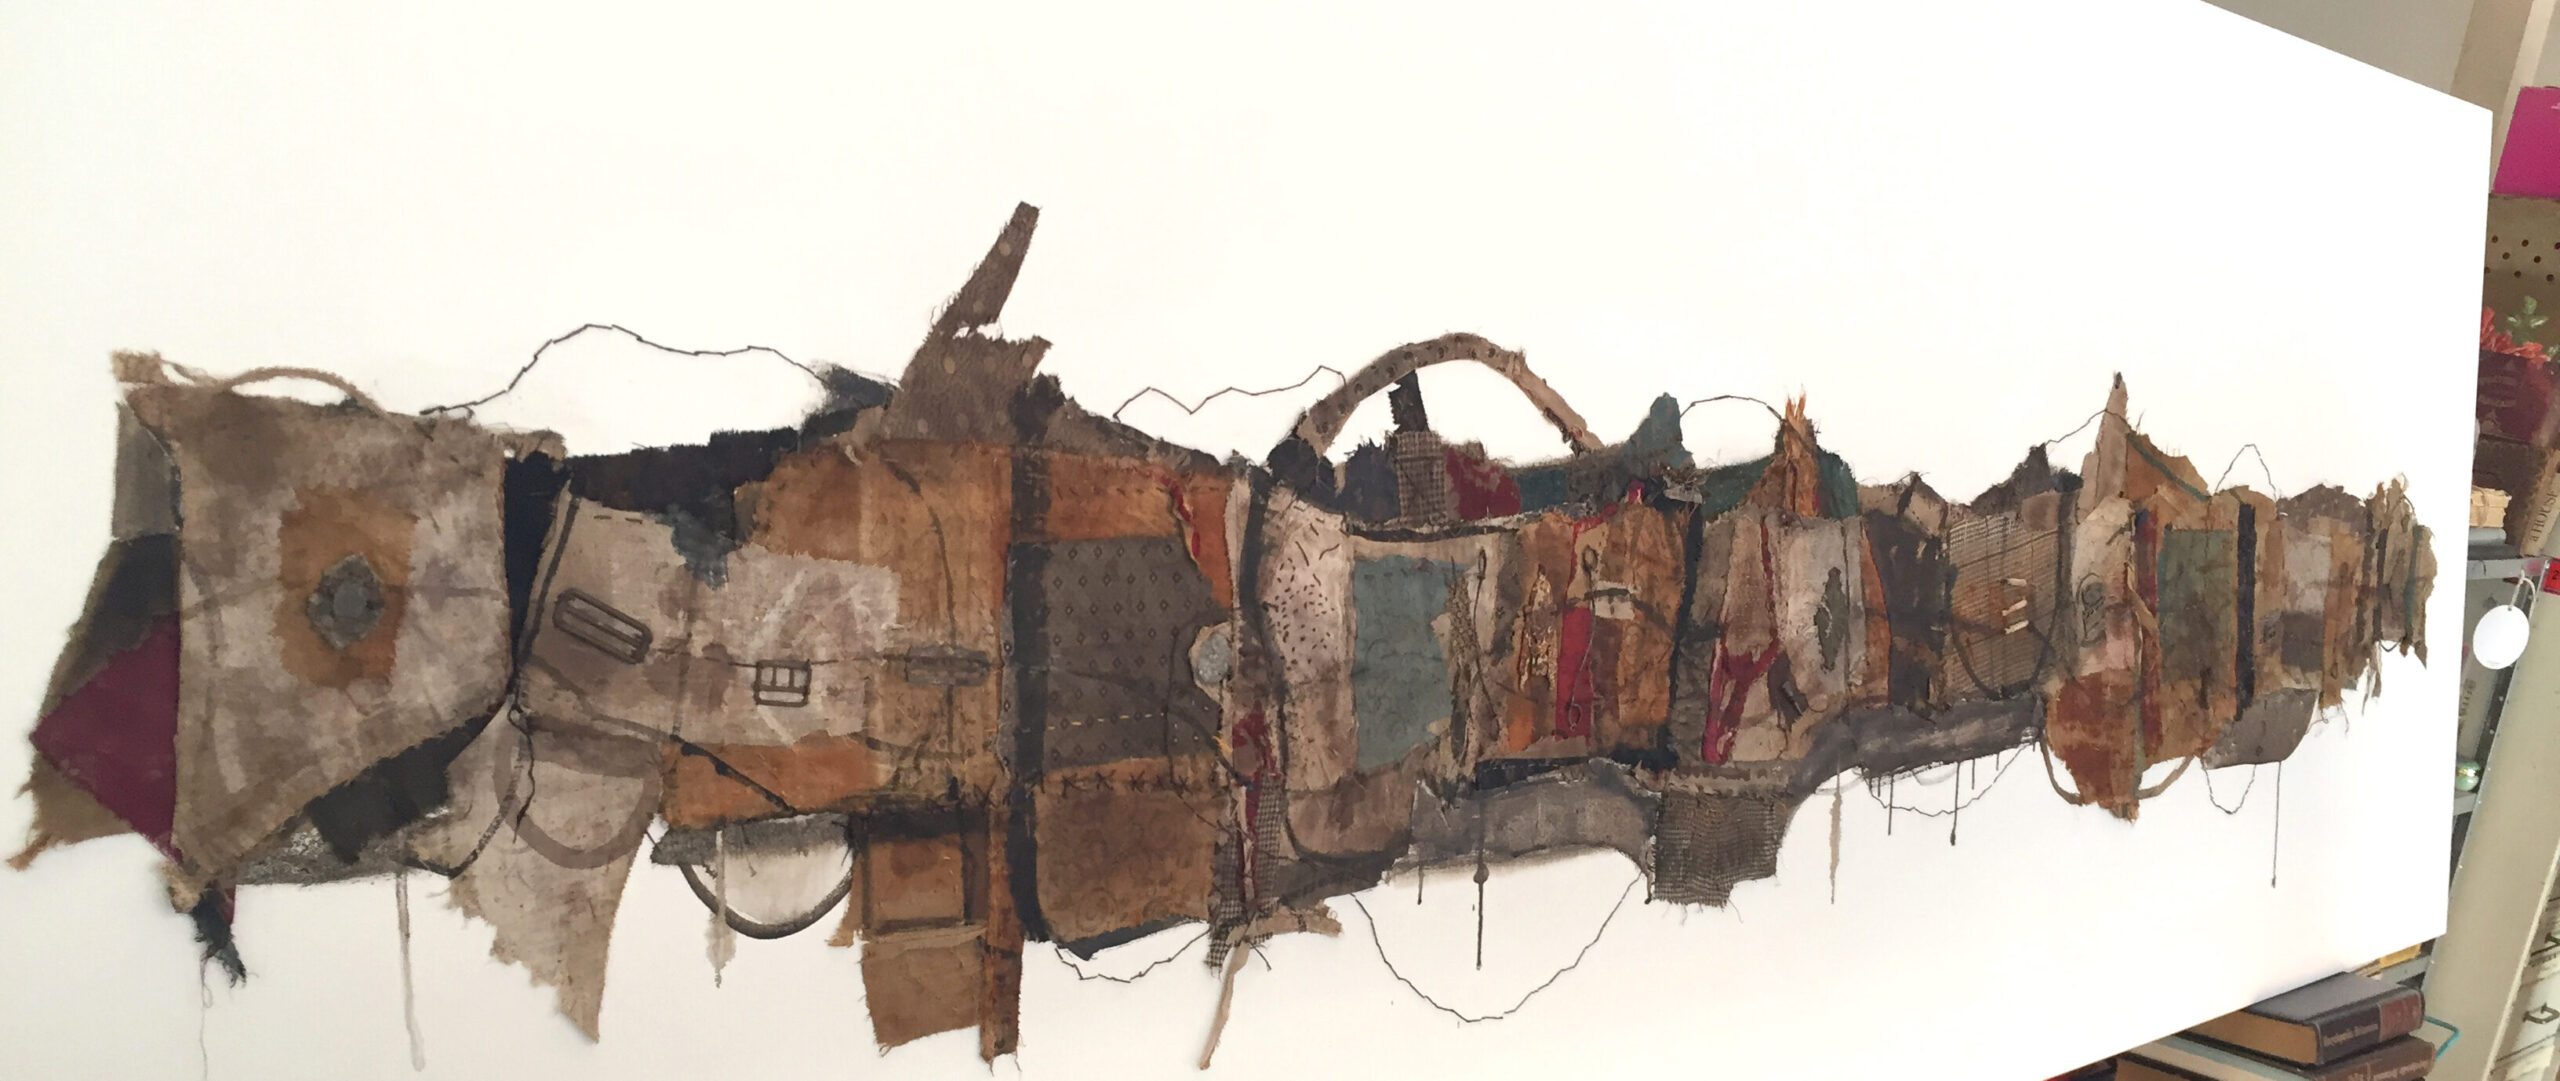
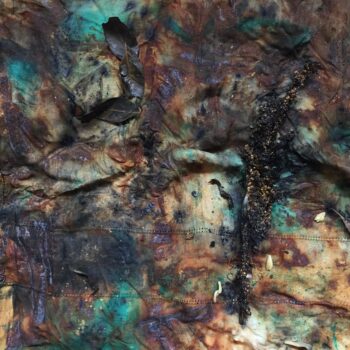
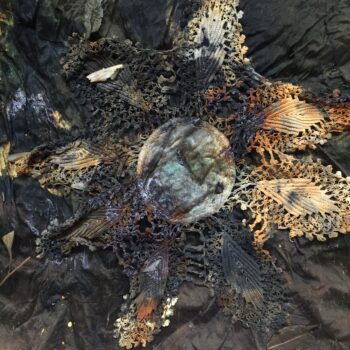
Landwrap 3 – 2023 The artworks link to the primal aerial view over Australia. Land Wrap is my relationship with the earth. A subconscious rendering of the desolate wilderness, granite landscapes, deserts, forests, waterholes and walking tracks of Australia. Being a primal source of the earth , once one is cloaked in “Land Wrap” it gives protection and wisdom for our future survival.
At the core of my work remains the act of intuitive and experimental marks, smudges and scratches that reference my relationship with the environment and moments in History. I hope my works will ignite the imagination and evoke an honest and curious connection to the environment. Jenny Davis 2023
Early last year in 2022, I was commissioned by Janet Graham Interiors Sydney, to create a series of large scale artworks for the lobby and penthouse of the Rydges CBD Hotel in Melbourne.
My artworks are now finished and shortly, I will send out information where you can view my artworks and other artists on permanent display in the hotel. The hotel reopens in late July 2023.
There will be artwork in the public areas, guestrooms and corridors that celebrates the best of local artists. Interior designer Janet Graham spent many months researching and engaging with the local Victorian art community to compile a list of artists’ works on mixed mediums to enhance the guest’s local experience.
My practice fuses together the aspects of both the traditional and the contemporary ideas to explore themes of history, environment, and women’s history through abstract painting, mark making, intuitive hand stitching, and found objects to create a unique visual vocabulary
Through my use of mixed media, I use spontaneous mark making techniques, created intuitively and randomly, exploring the imperfections and incompleteness of space and unseen marks to convey my ideas. Inmy latest works I celebrate the beauty of the rust, random stitching, and the ever-evolving act of recycling, re-discovering and re-purposing in our current cultural context.
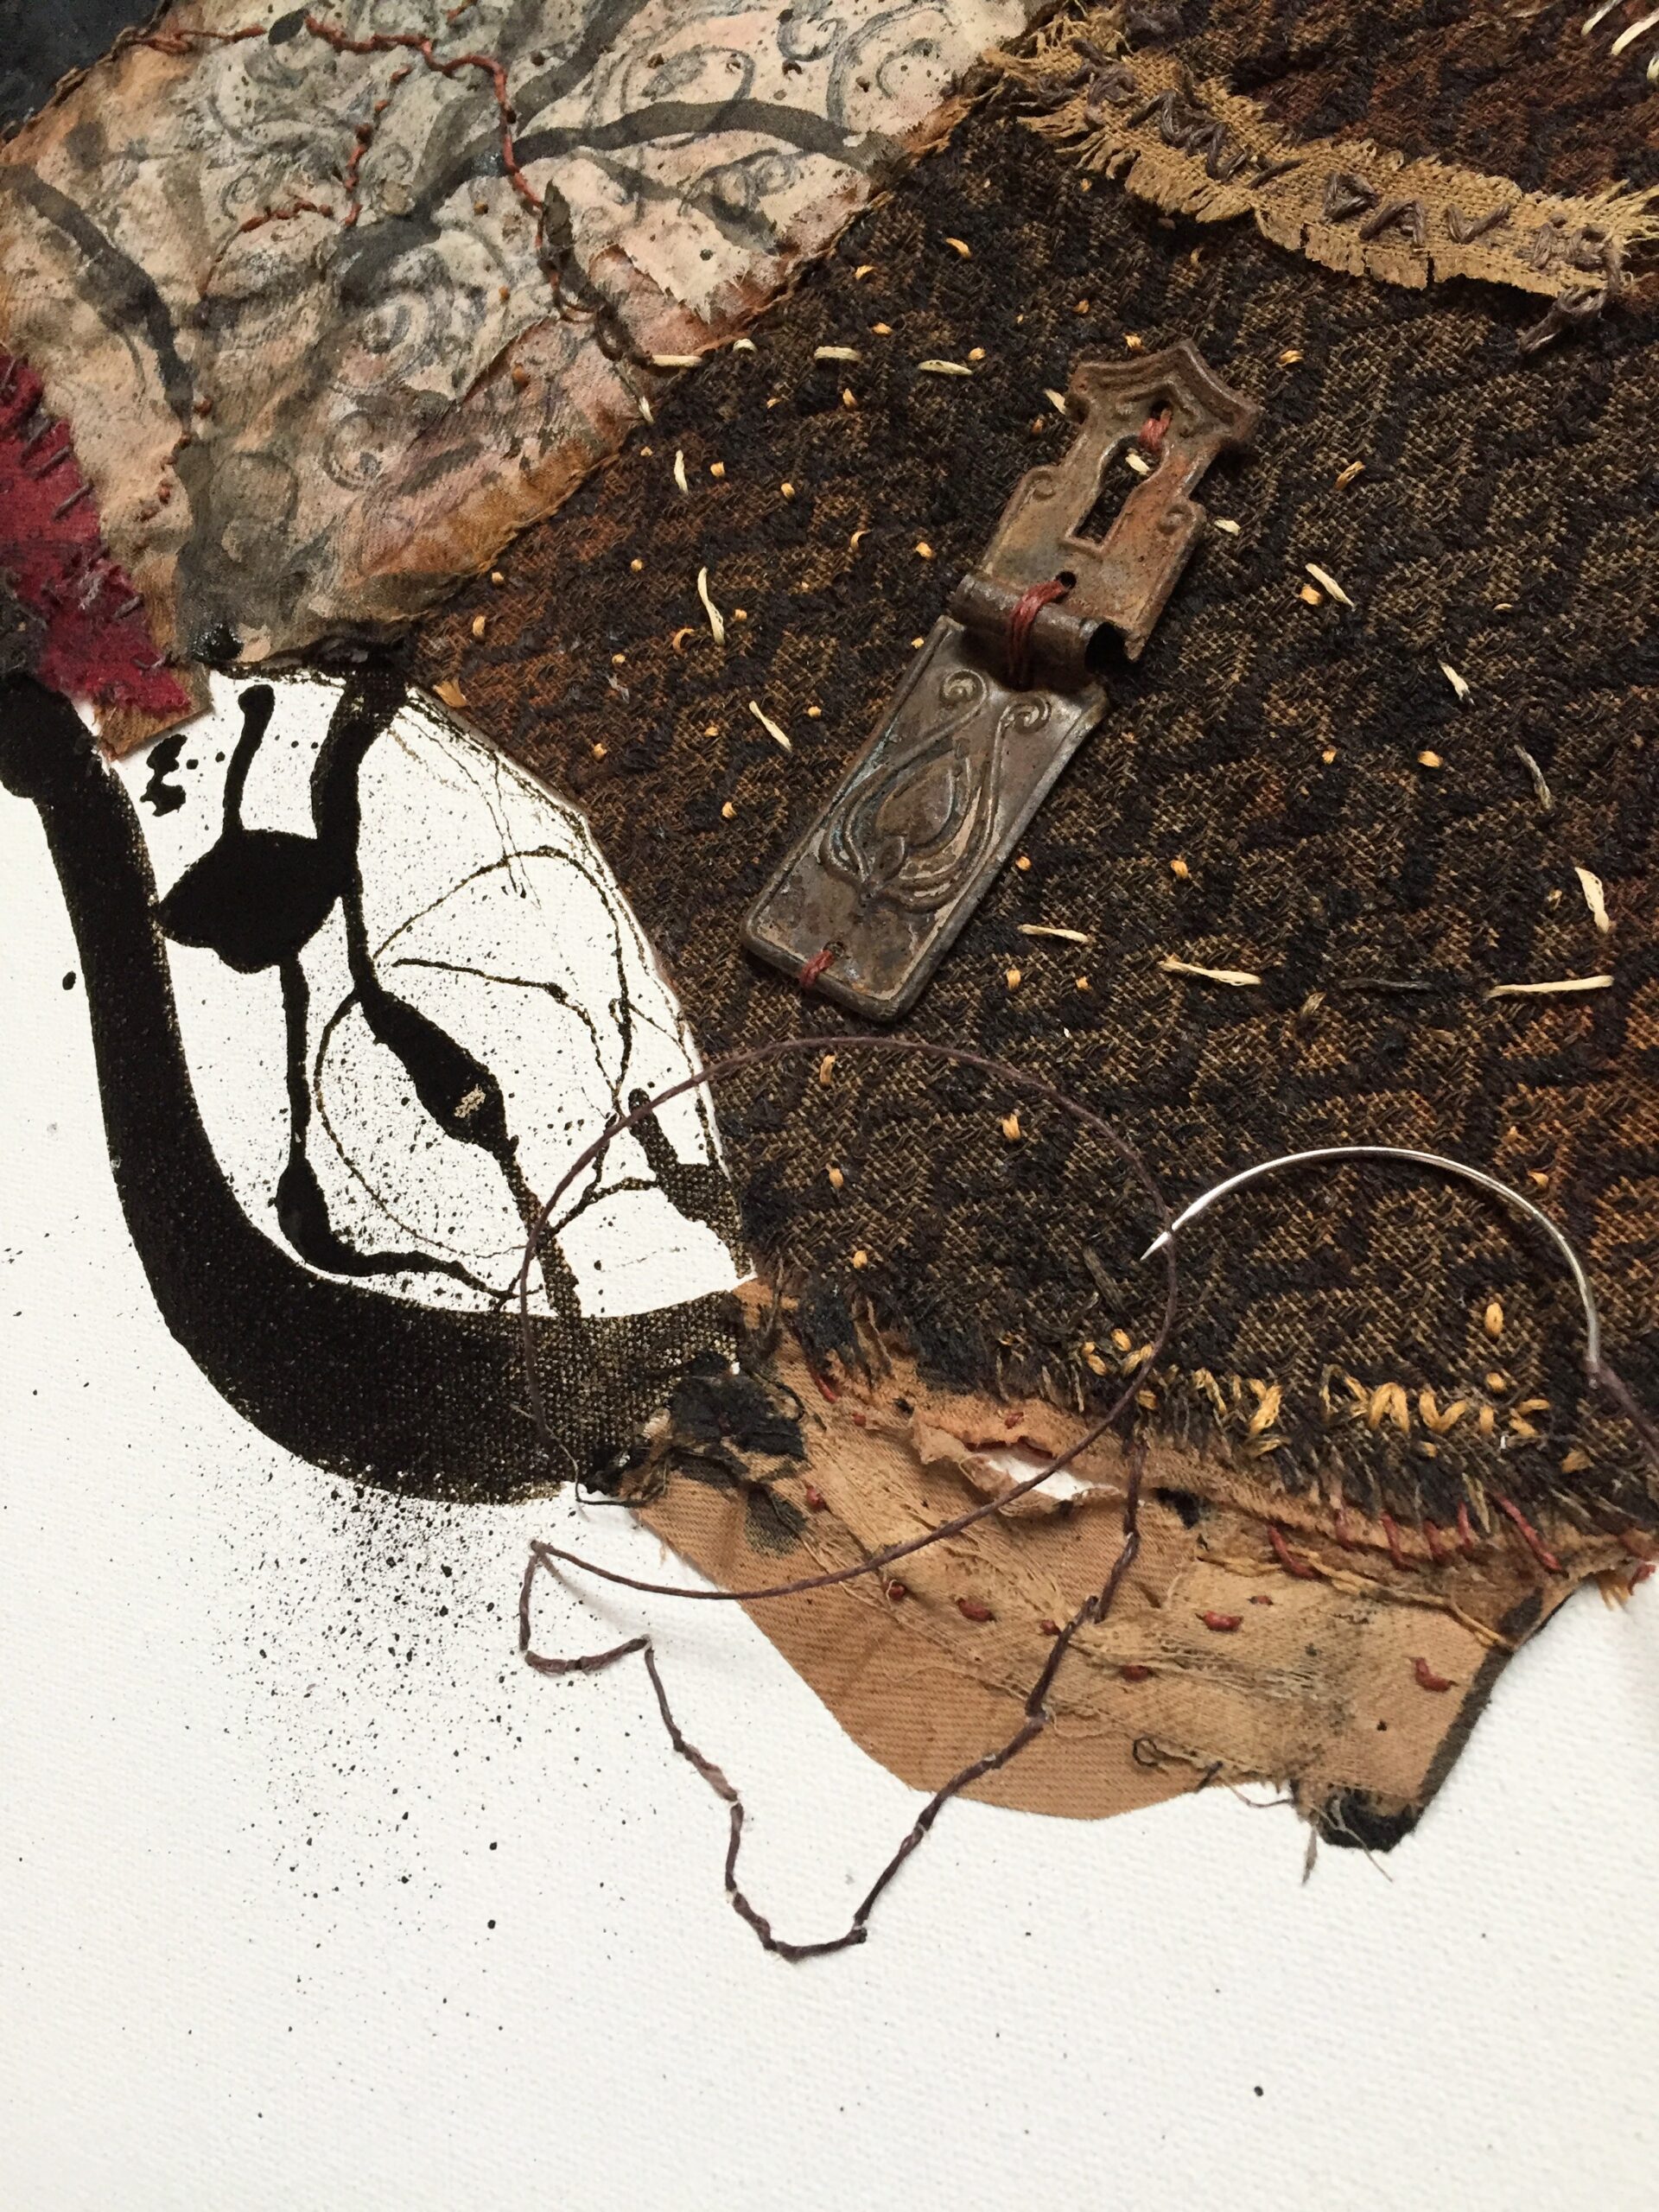
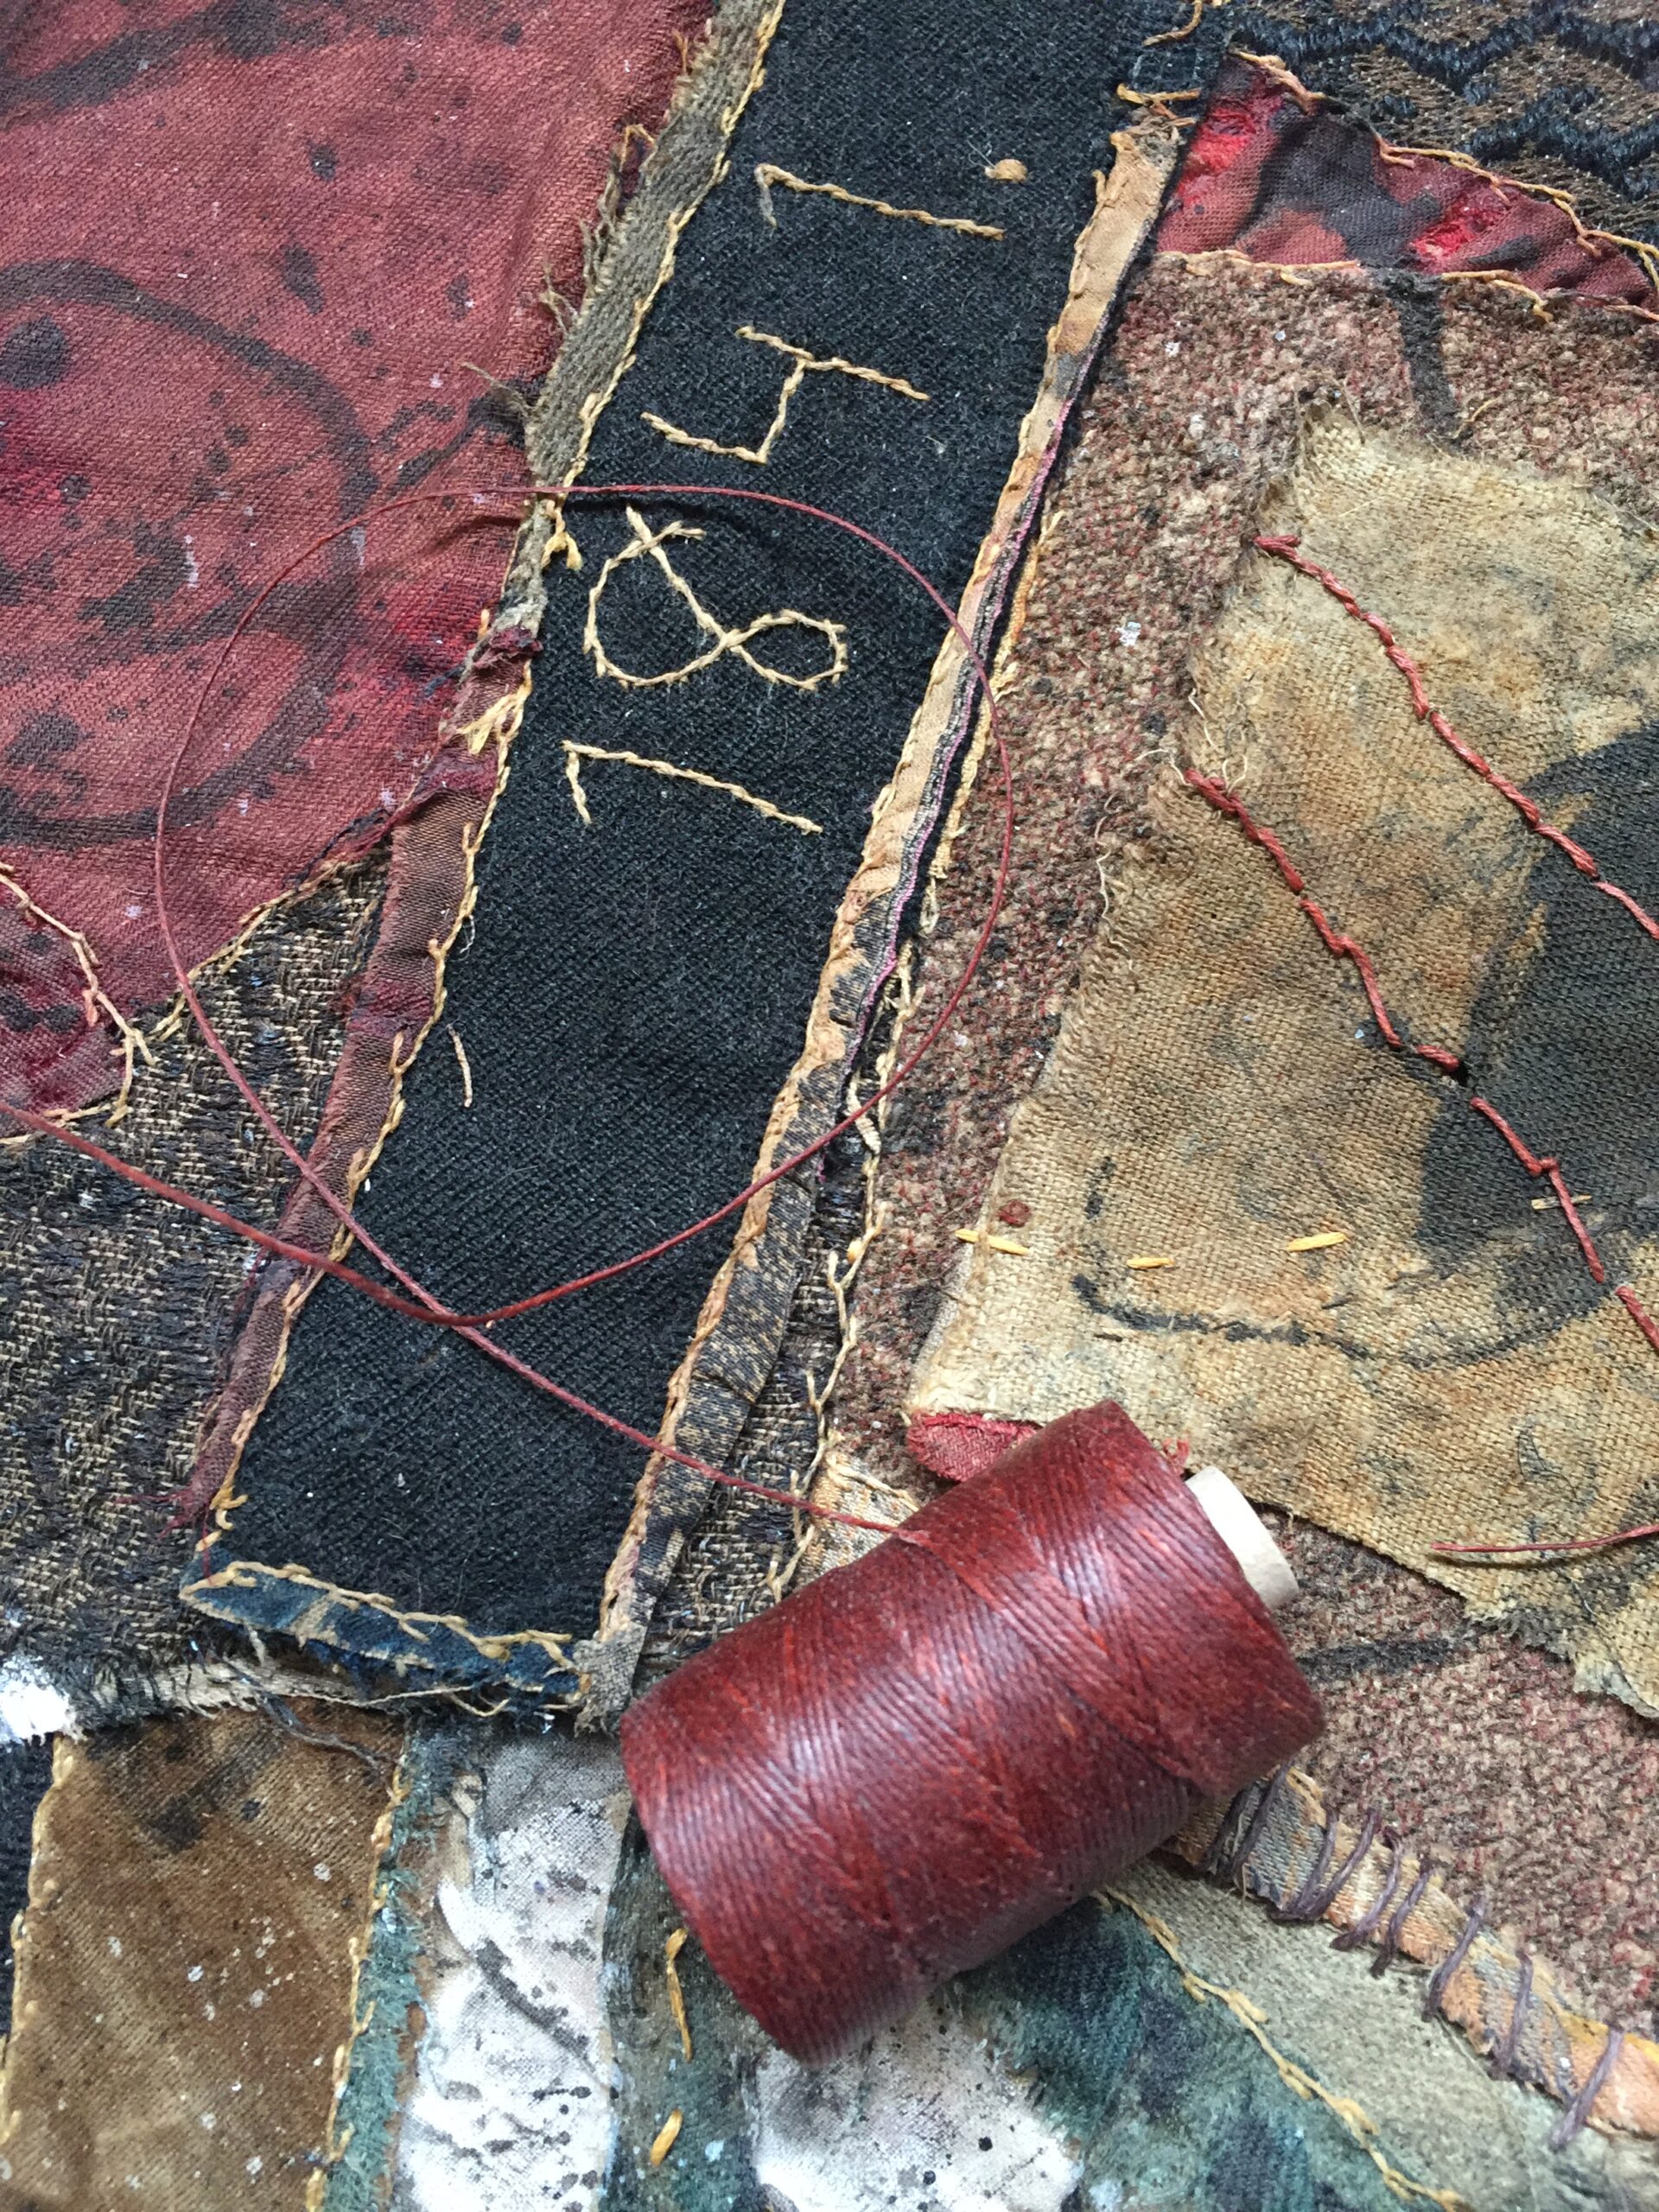
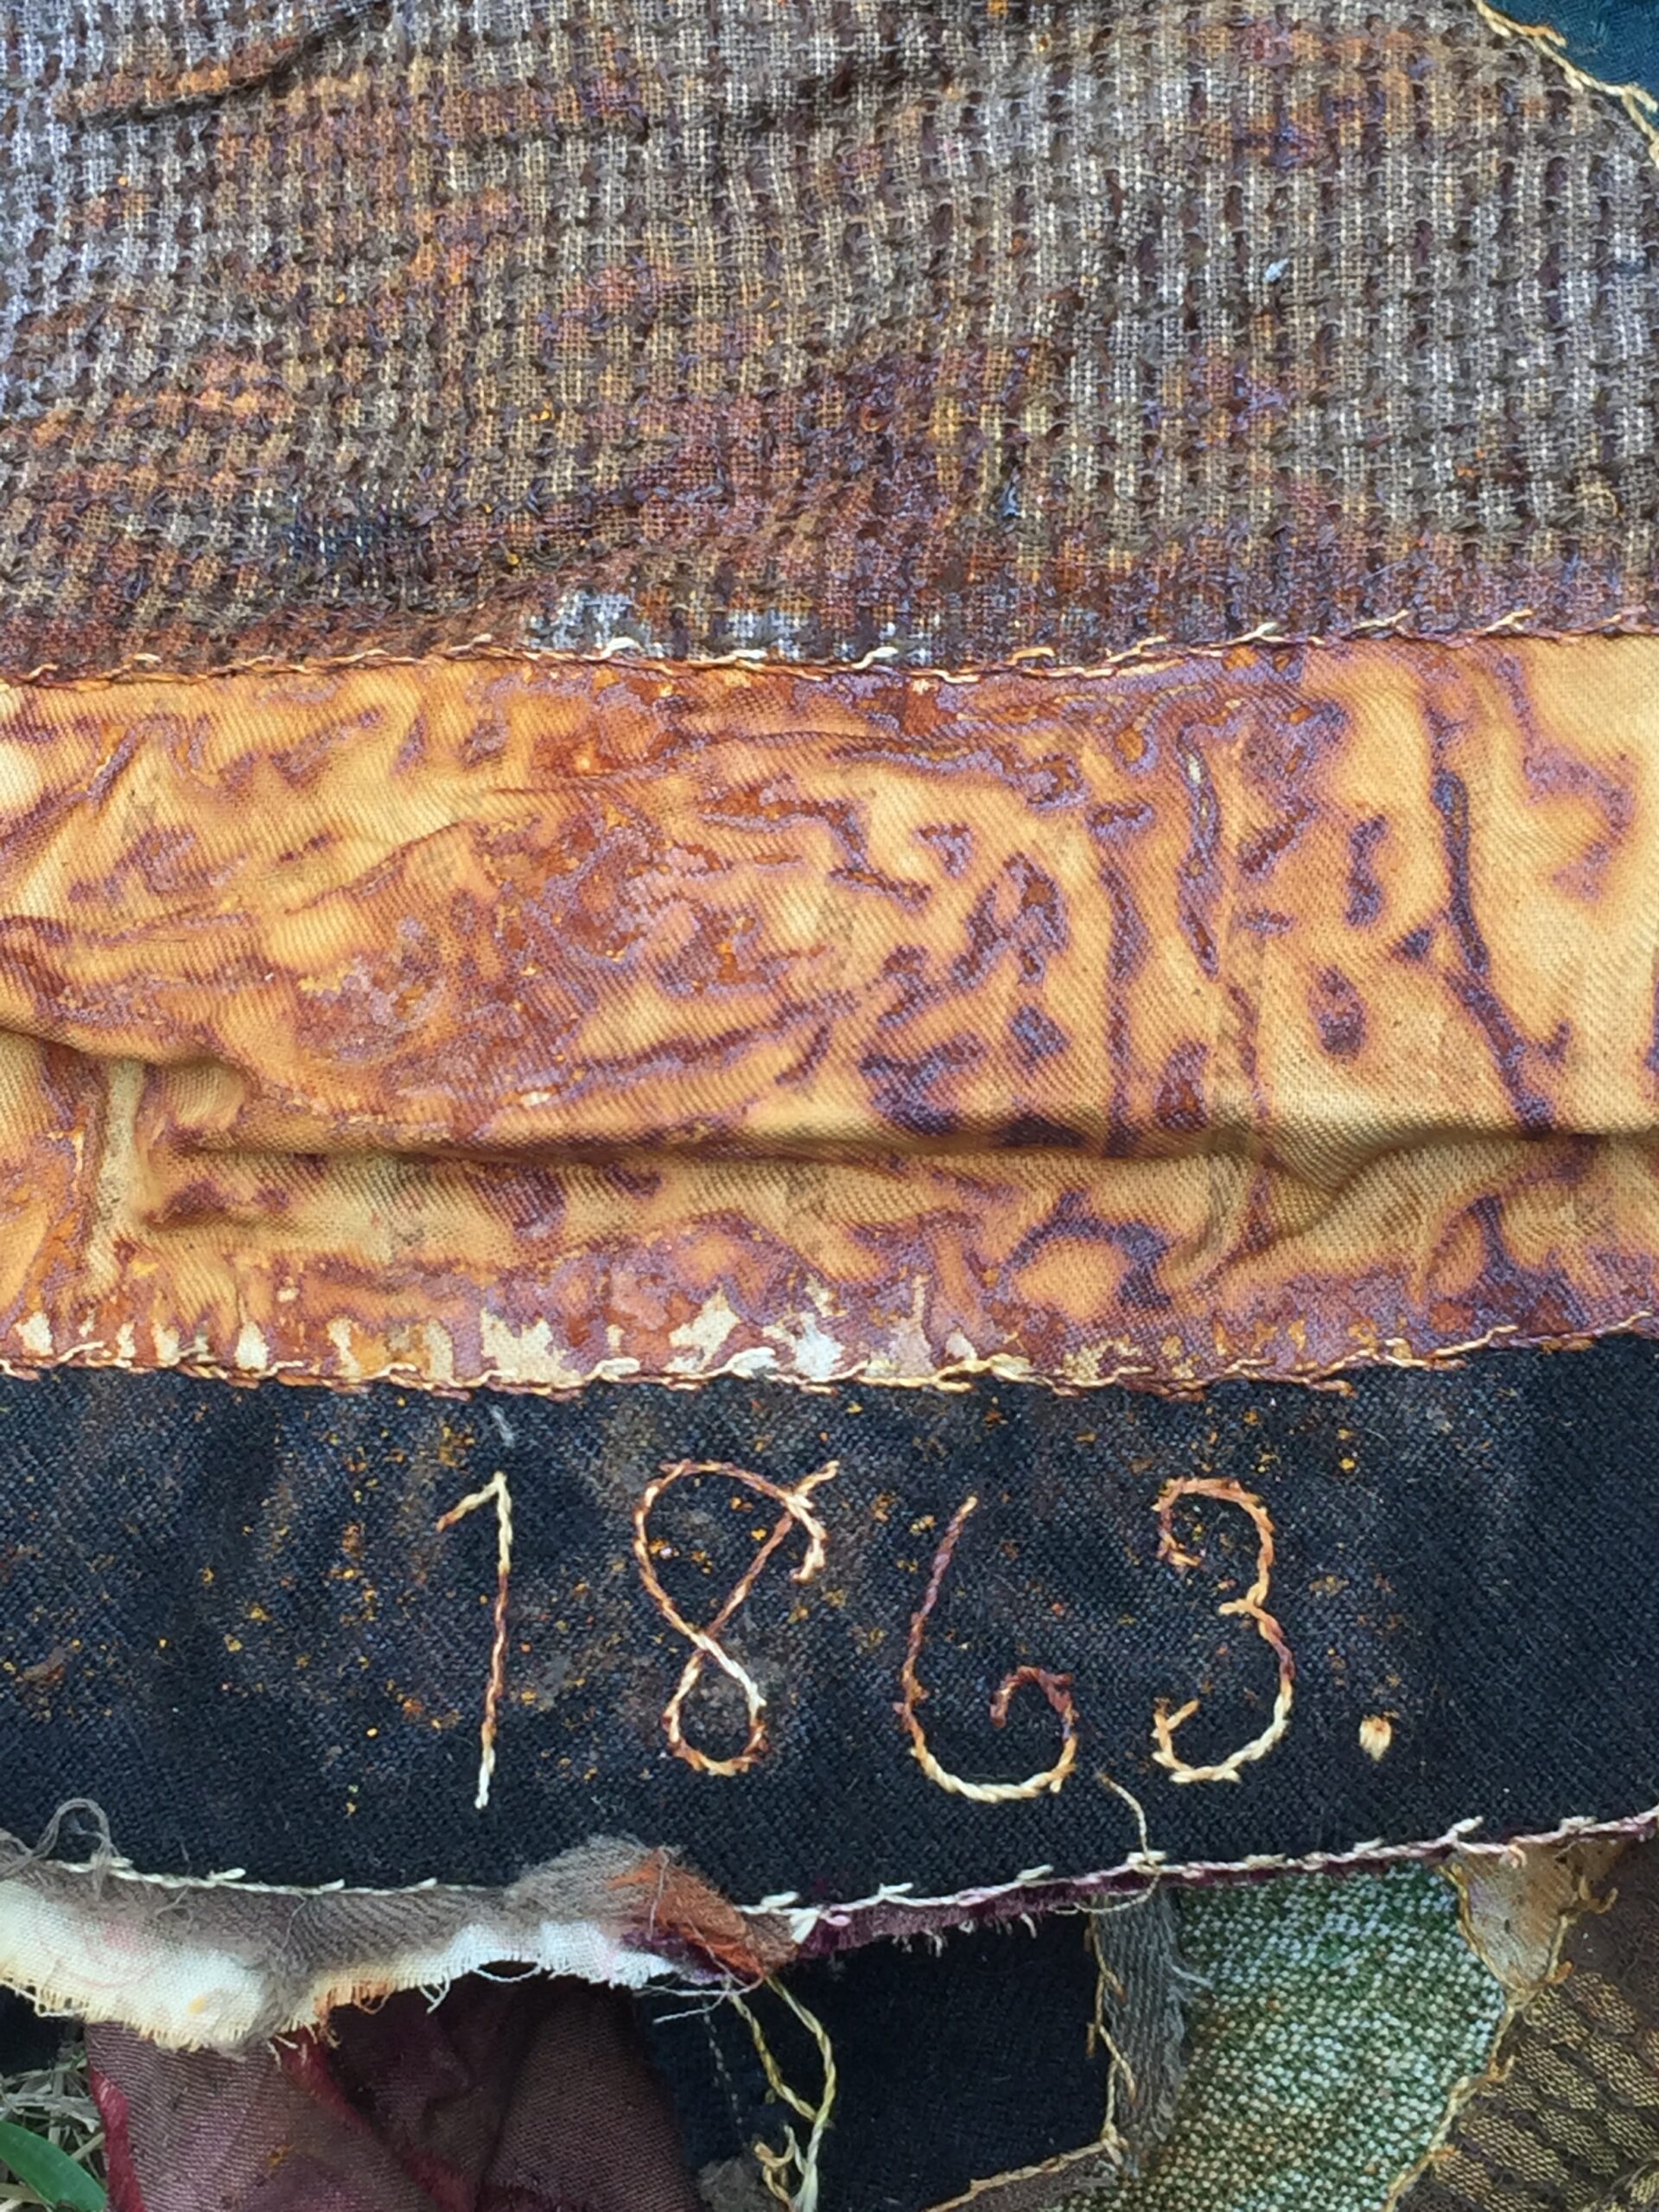
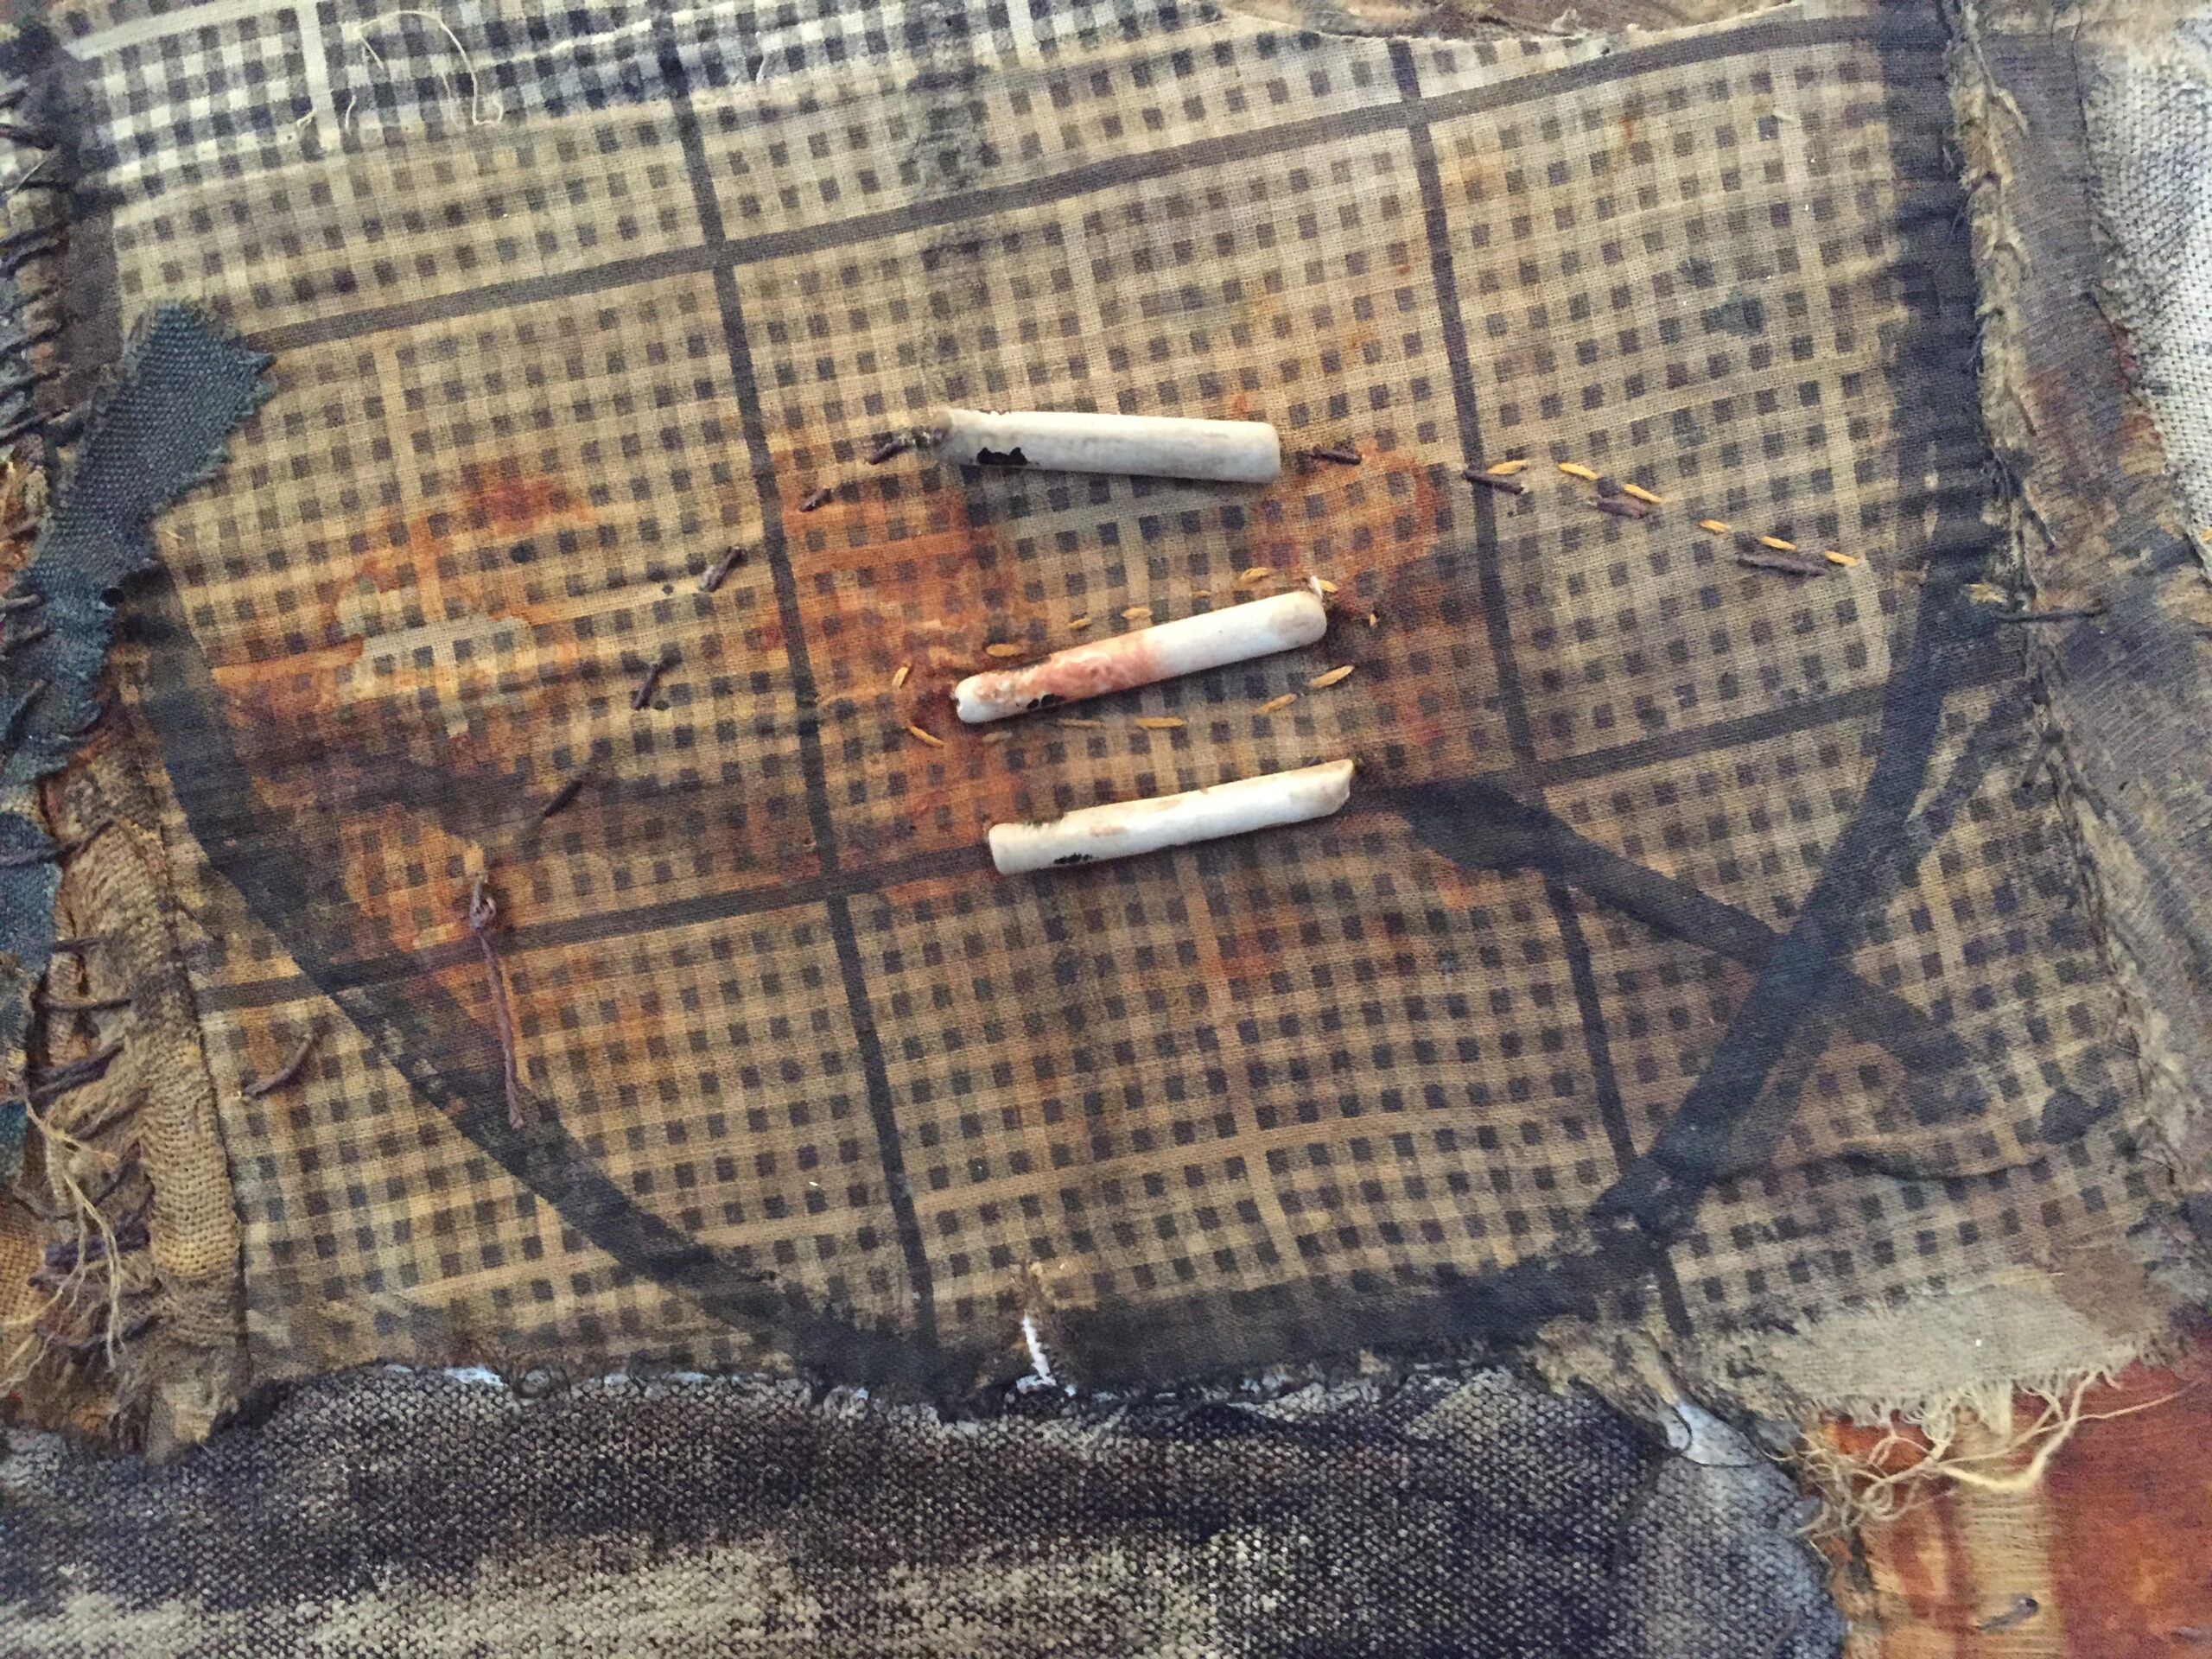
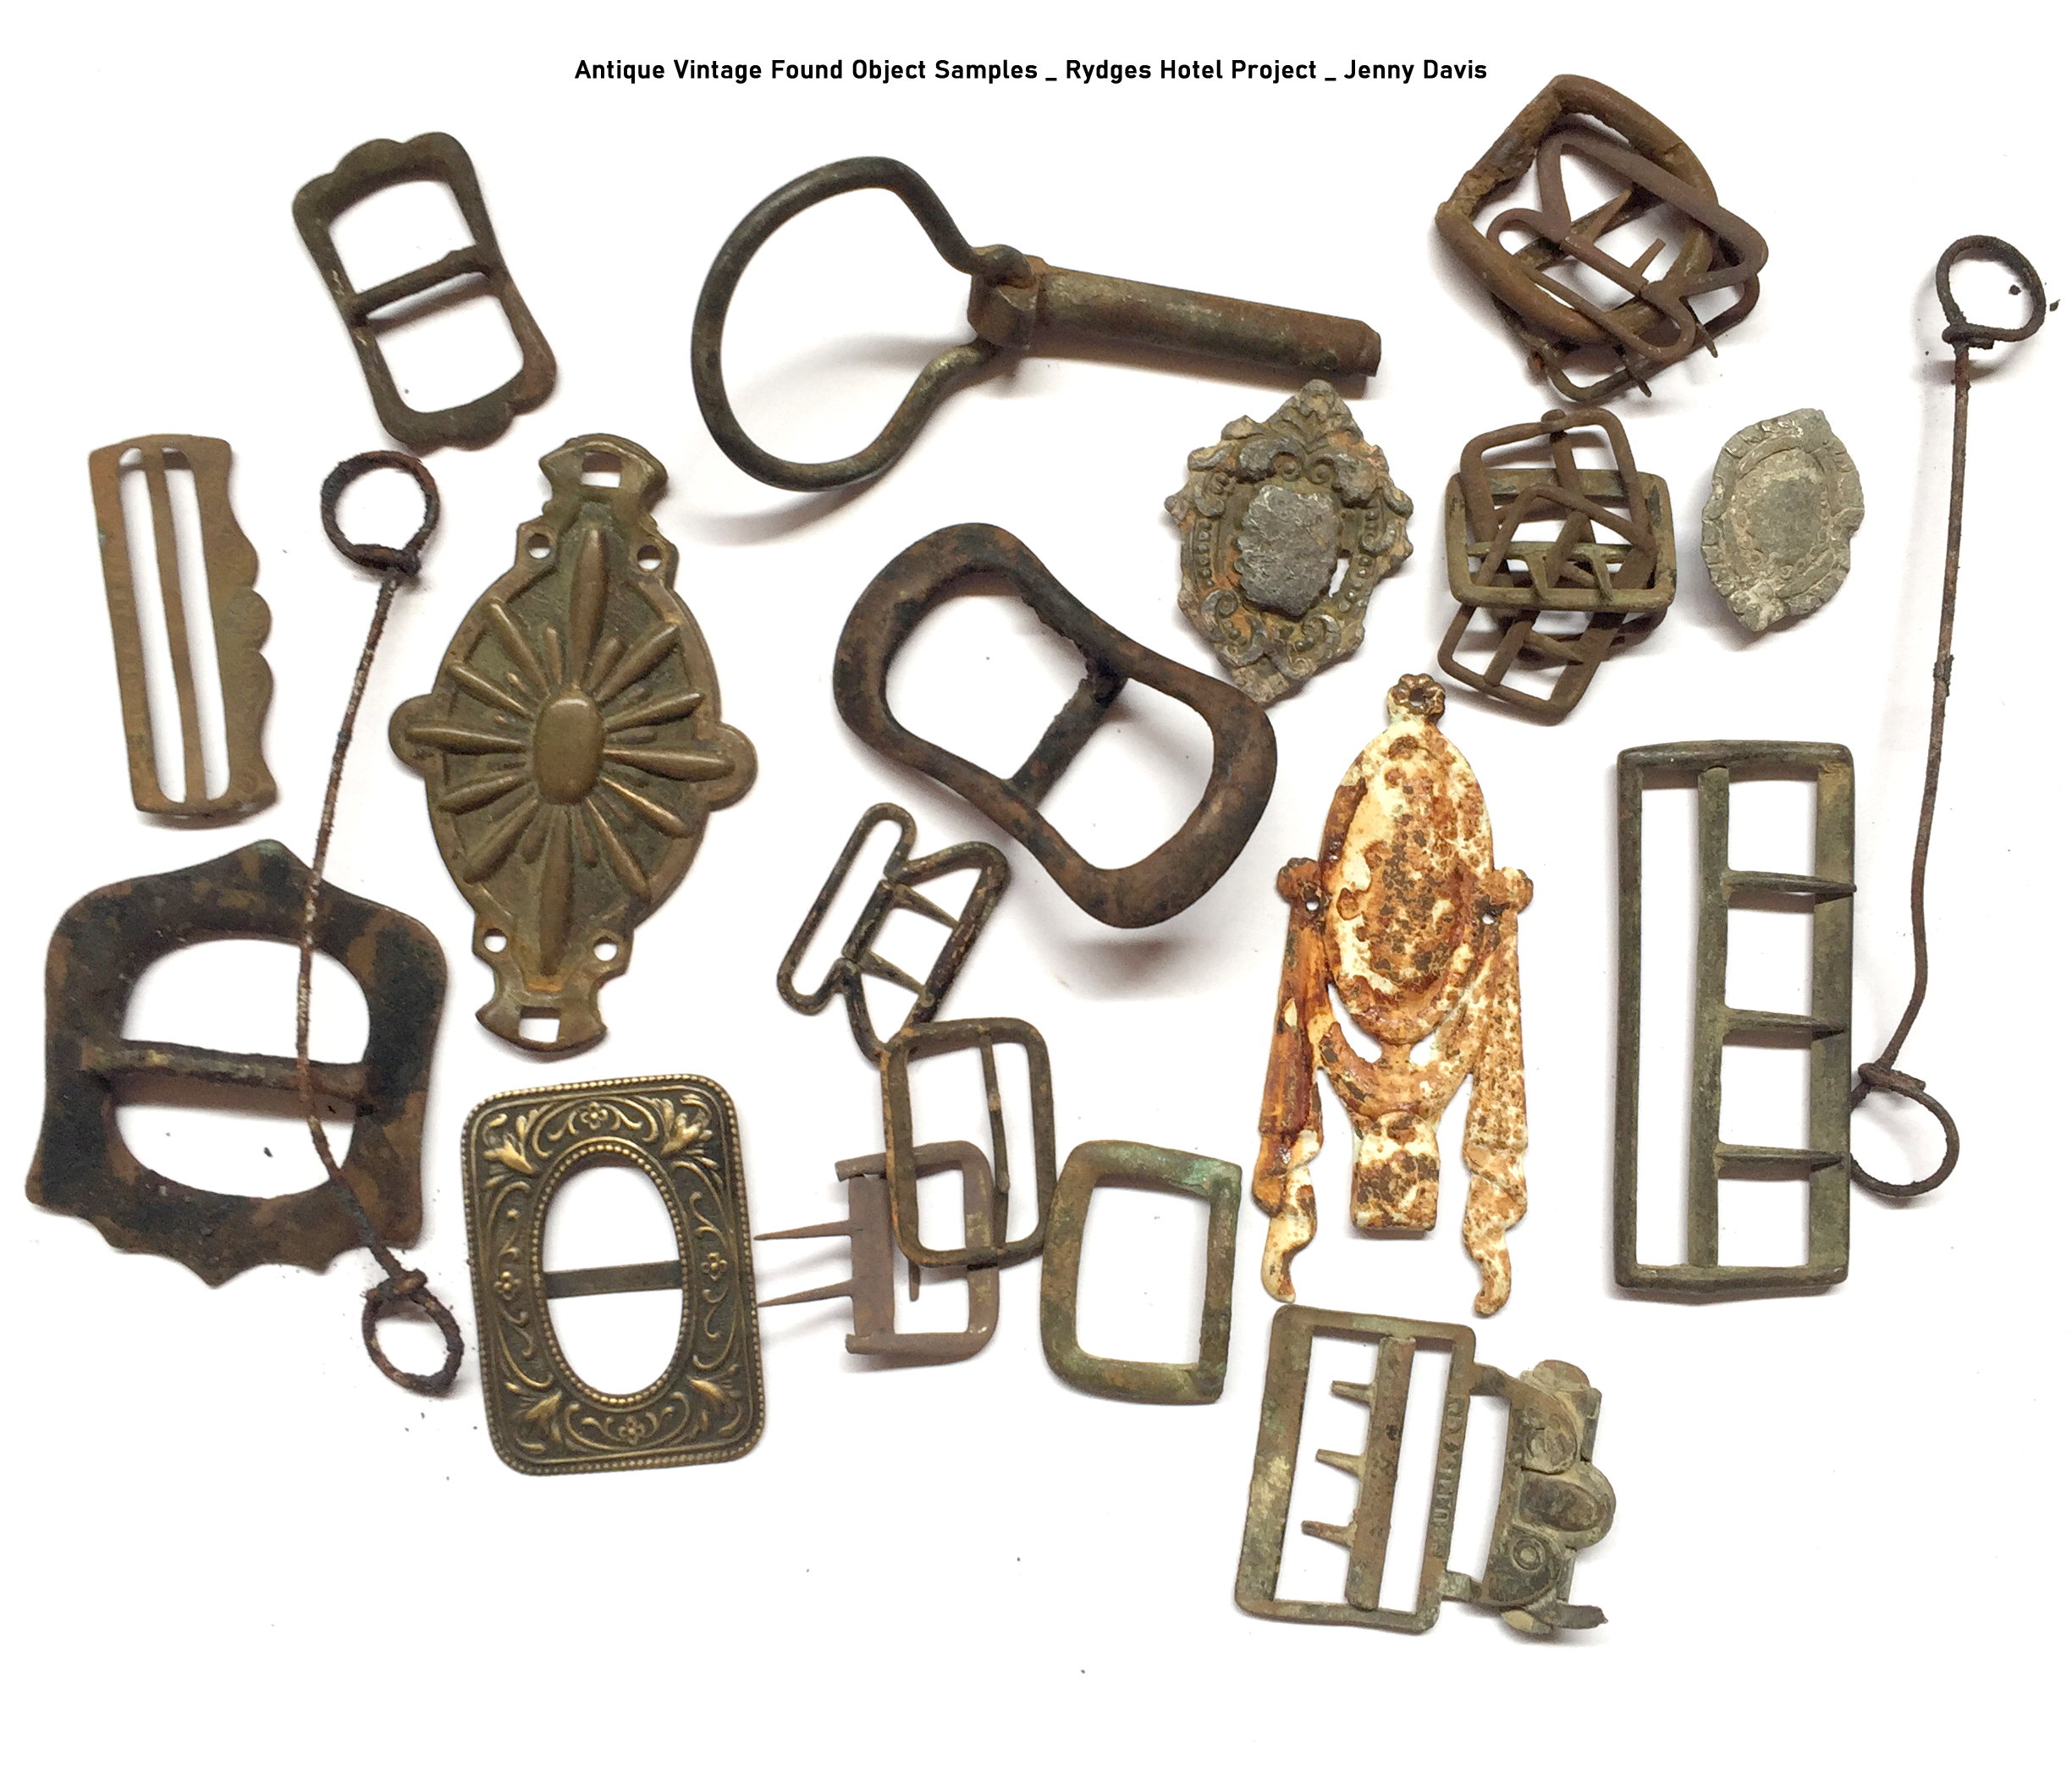
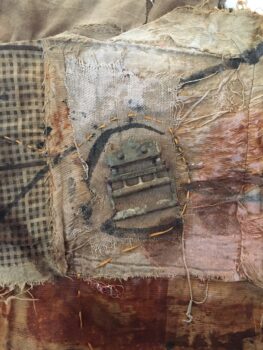
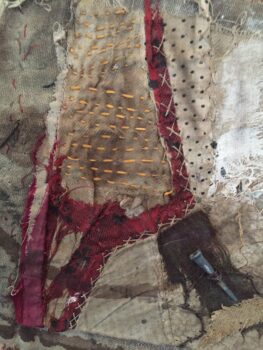
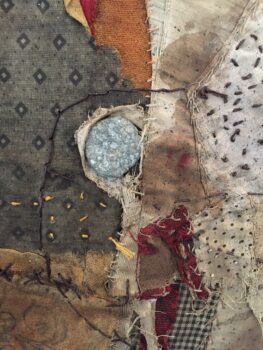
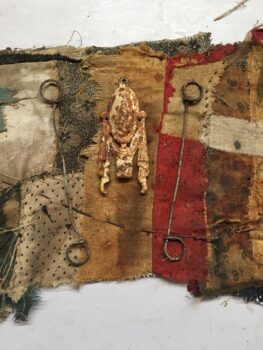
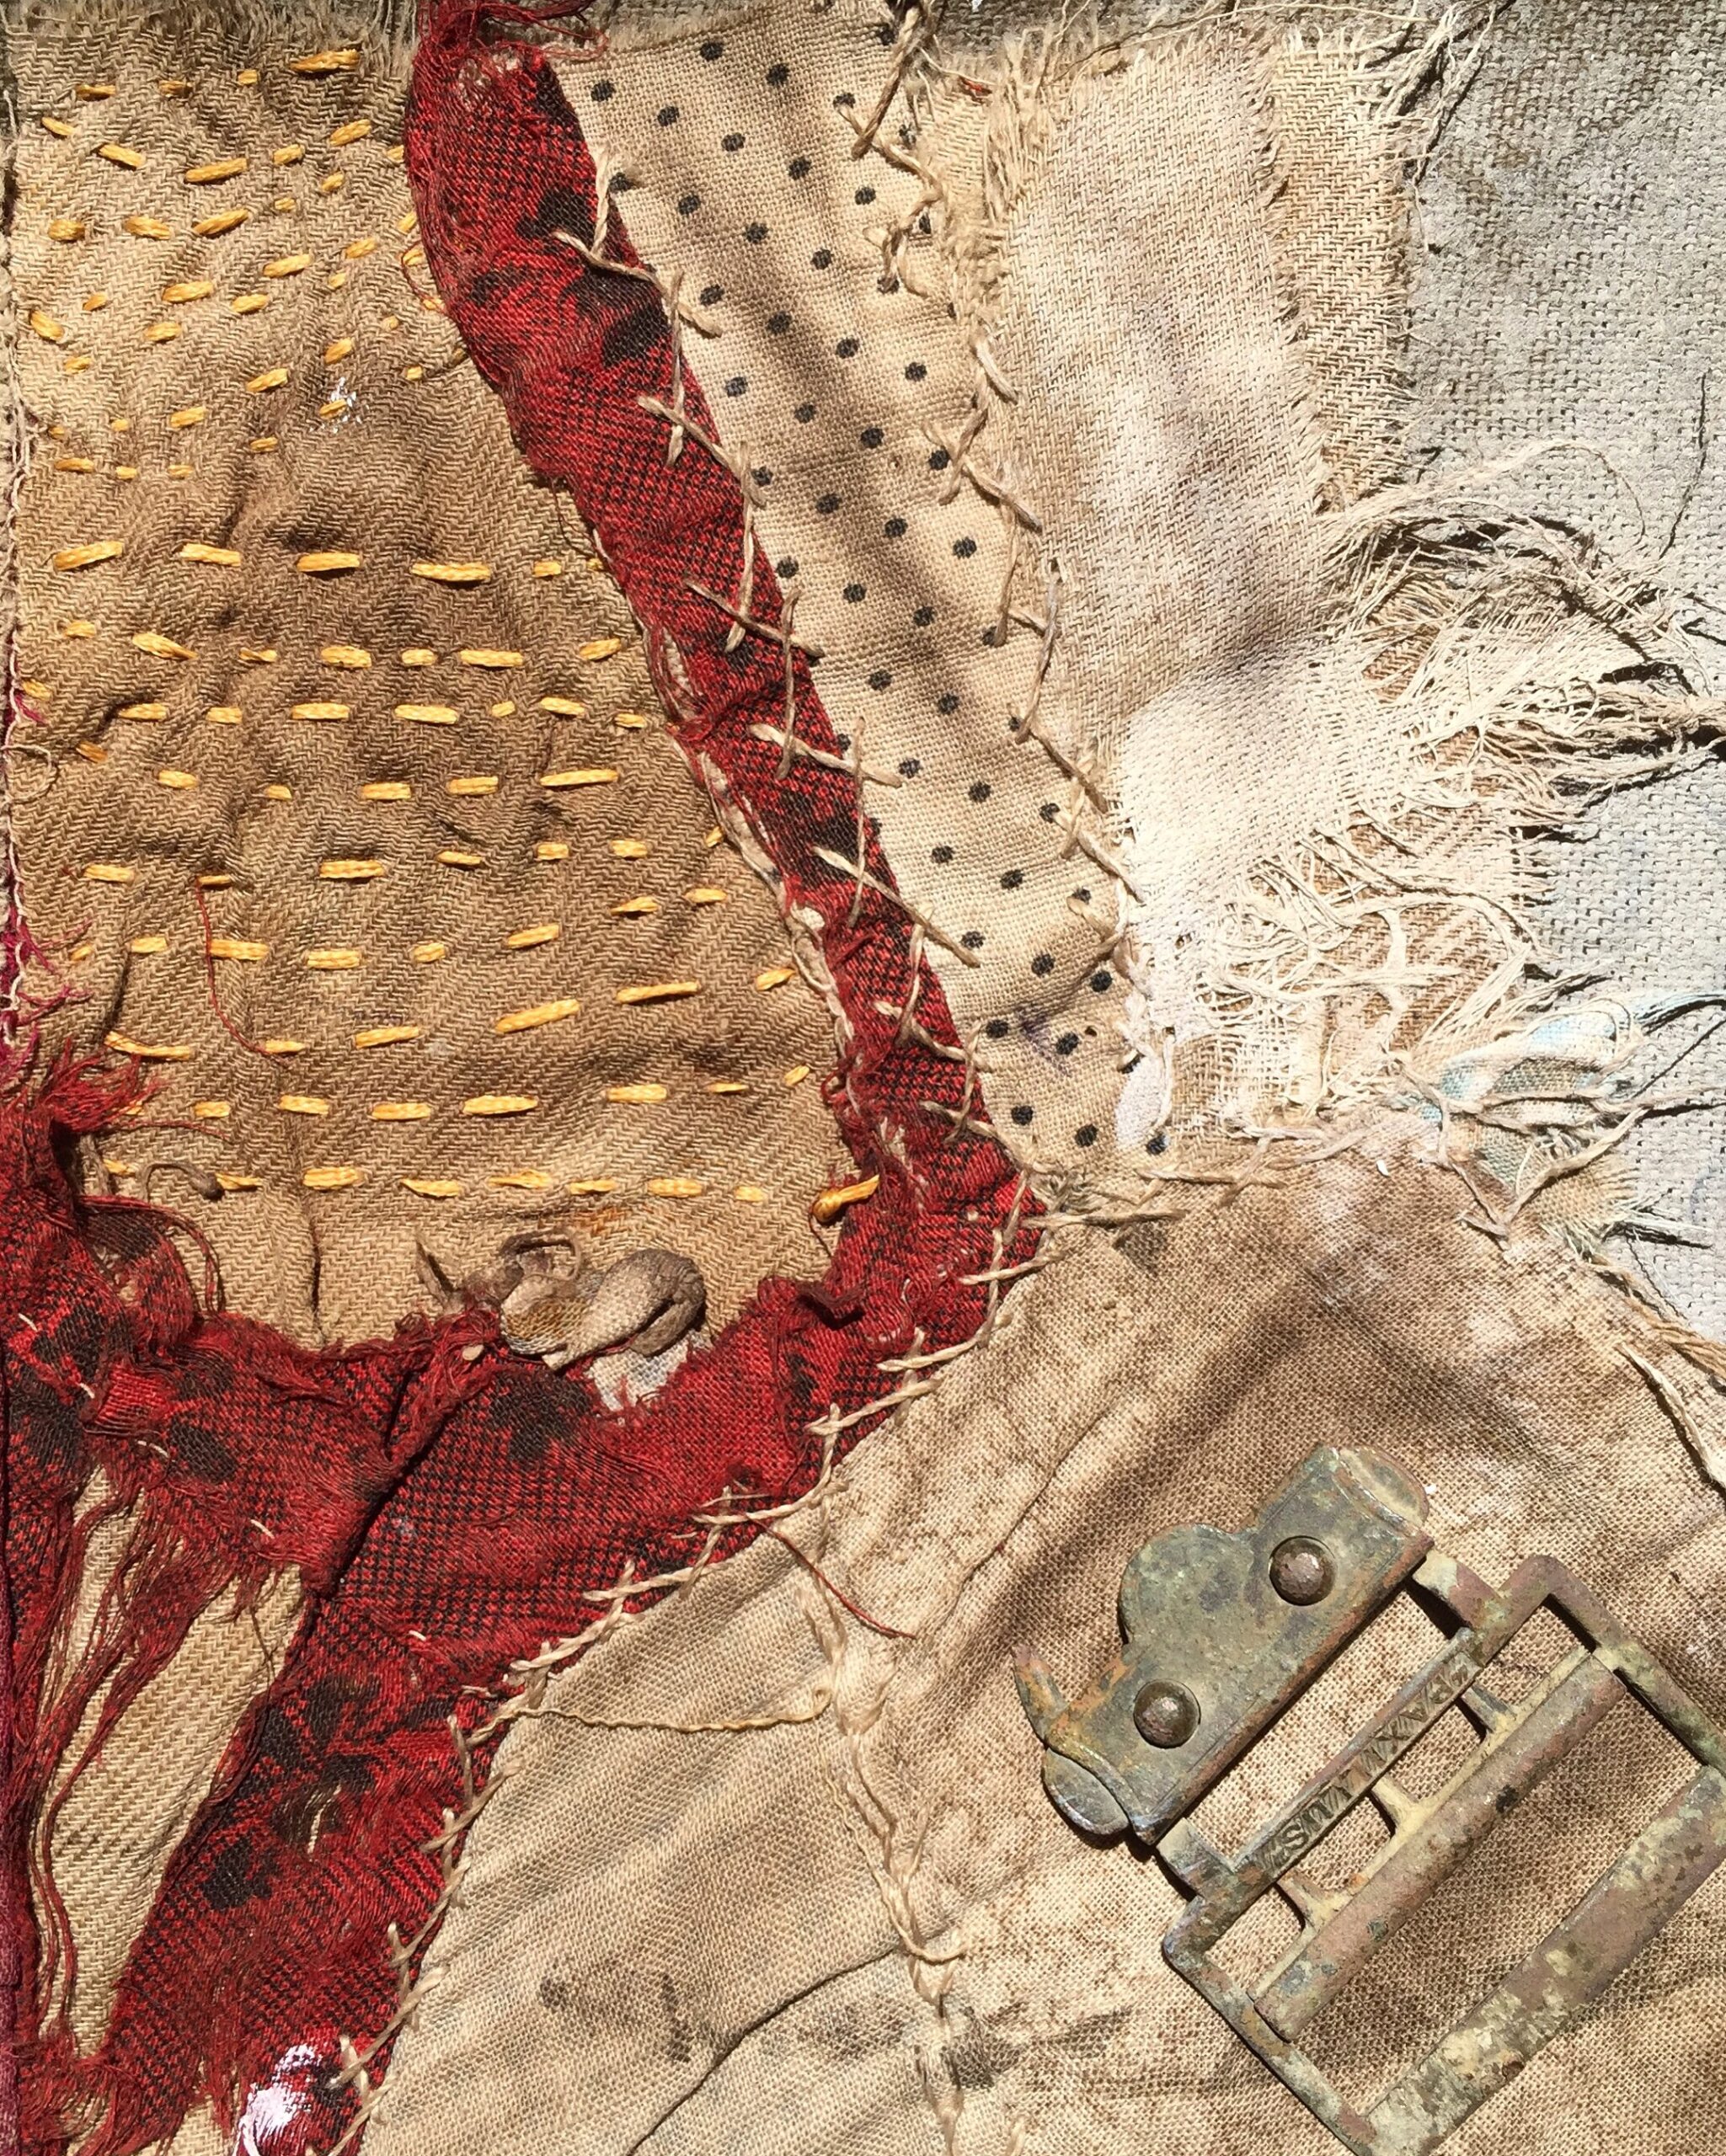
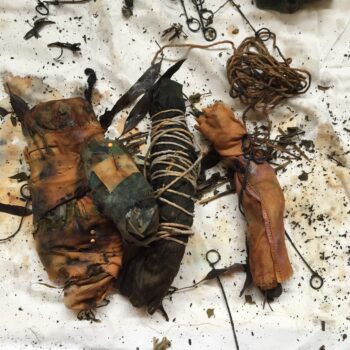
Each Landwrap piece is full of history with antique textiles, rust, sepia inks and found objects… rusty fence droppers from outback Australia, 200yr old textiles, metal detector finds from goldfields, in Victoria, 1800’s suspender buckles and 17th century smoking pipe fragments dug up from the Thames in London & more.
Landwrap Statement
The artworks link to the primal aerial view over Australia. Land Wrap is my relationship with the earth. A subconscious rendering of the desolate wilderness, granite landscapes, deserts, forests, waterholes and walking tracks of Australia. Being a primal source of the earth , once one is cloaked in “Land Wrap” it gives protection and wisdom for our future survival.
About Antique Textiles
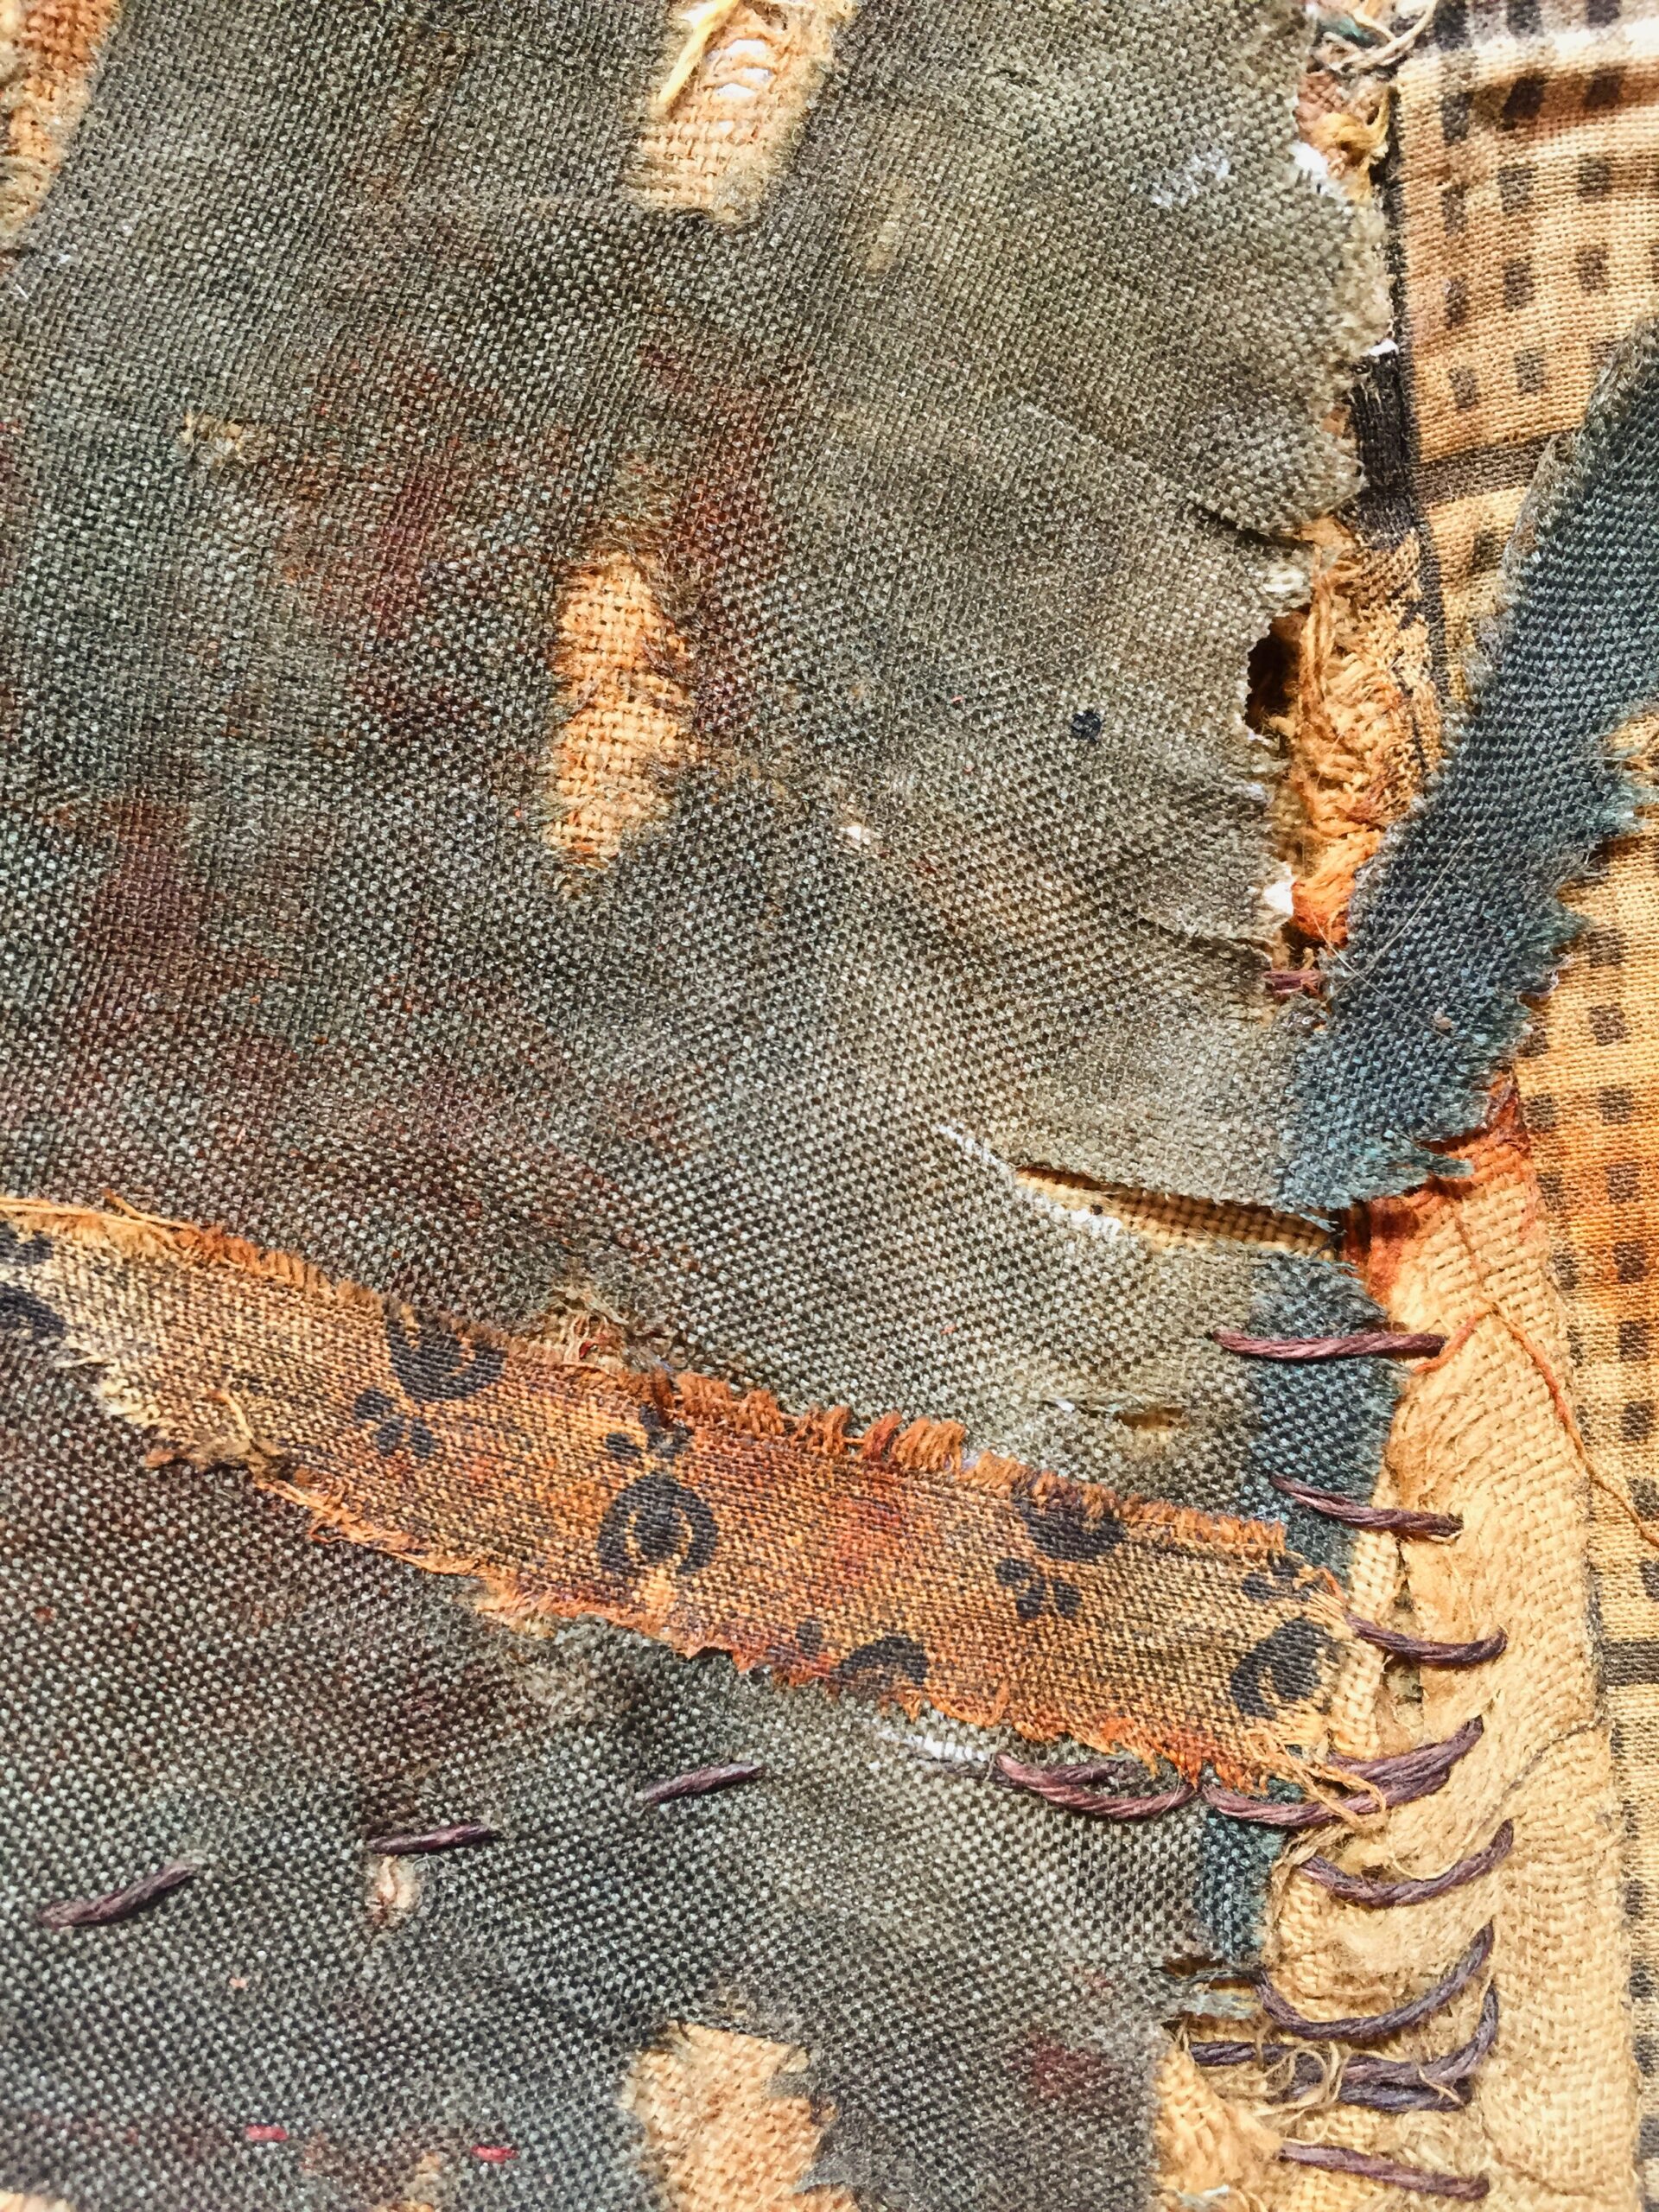
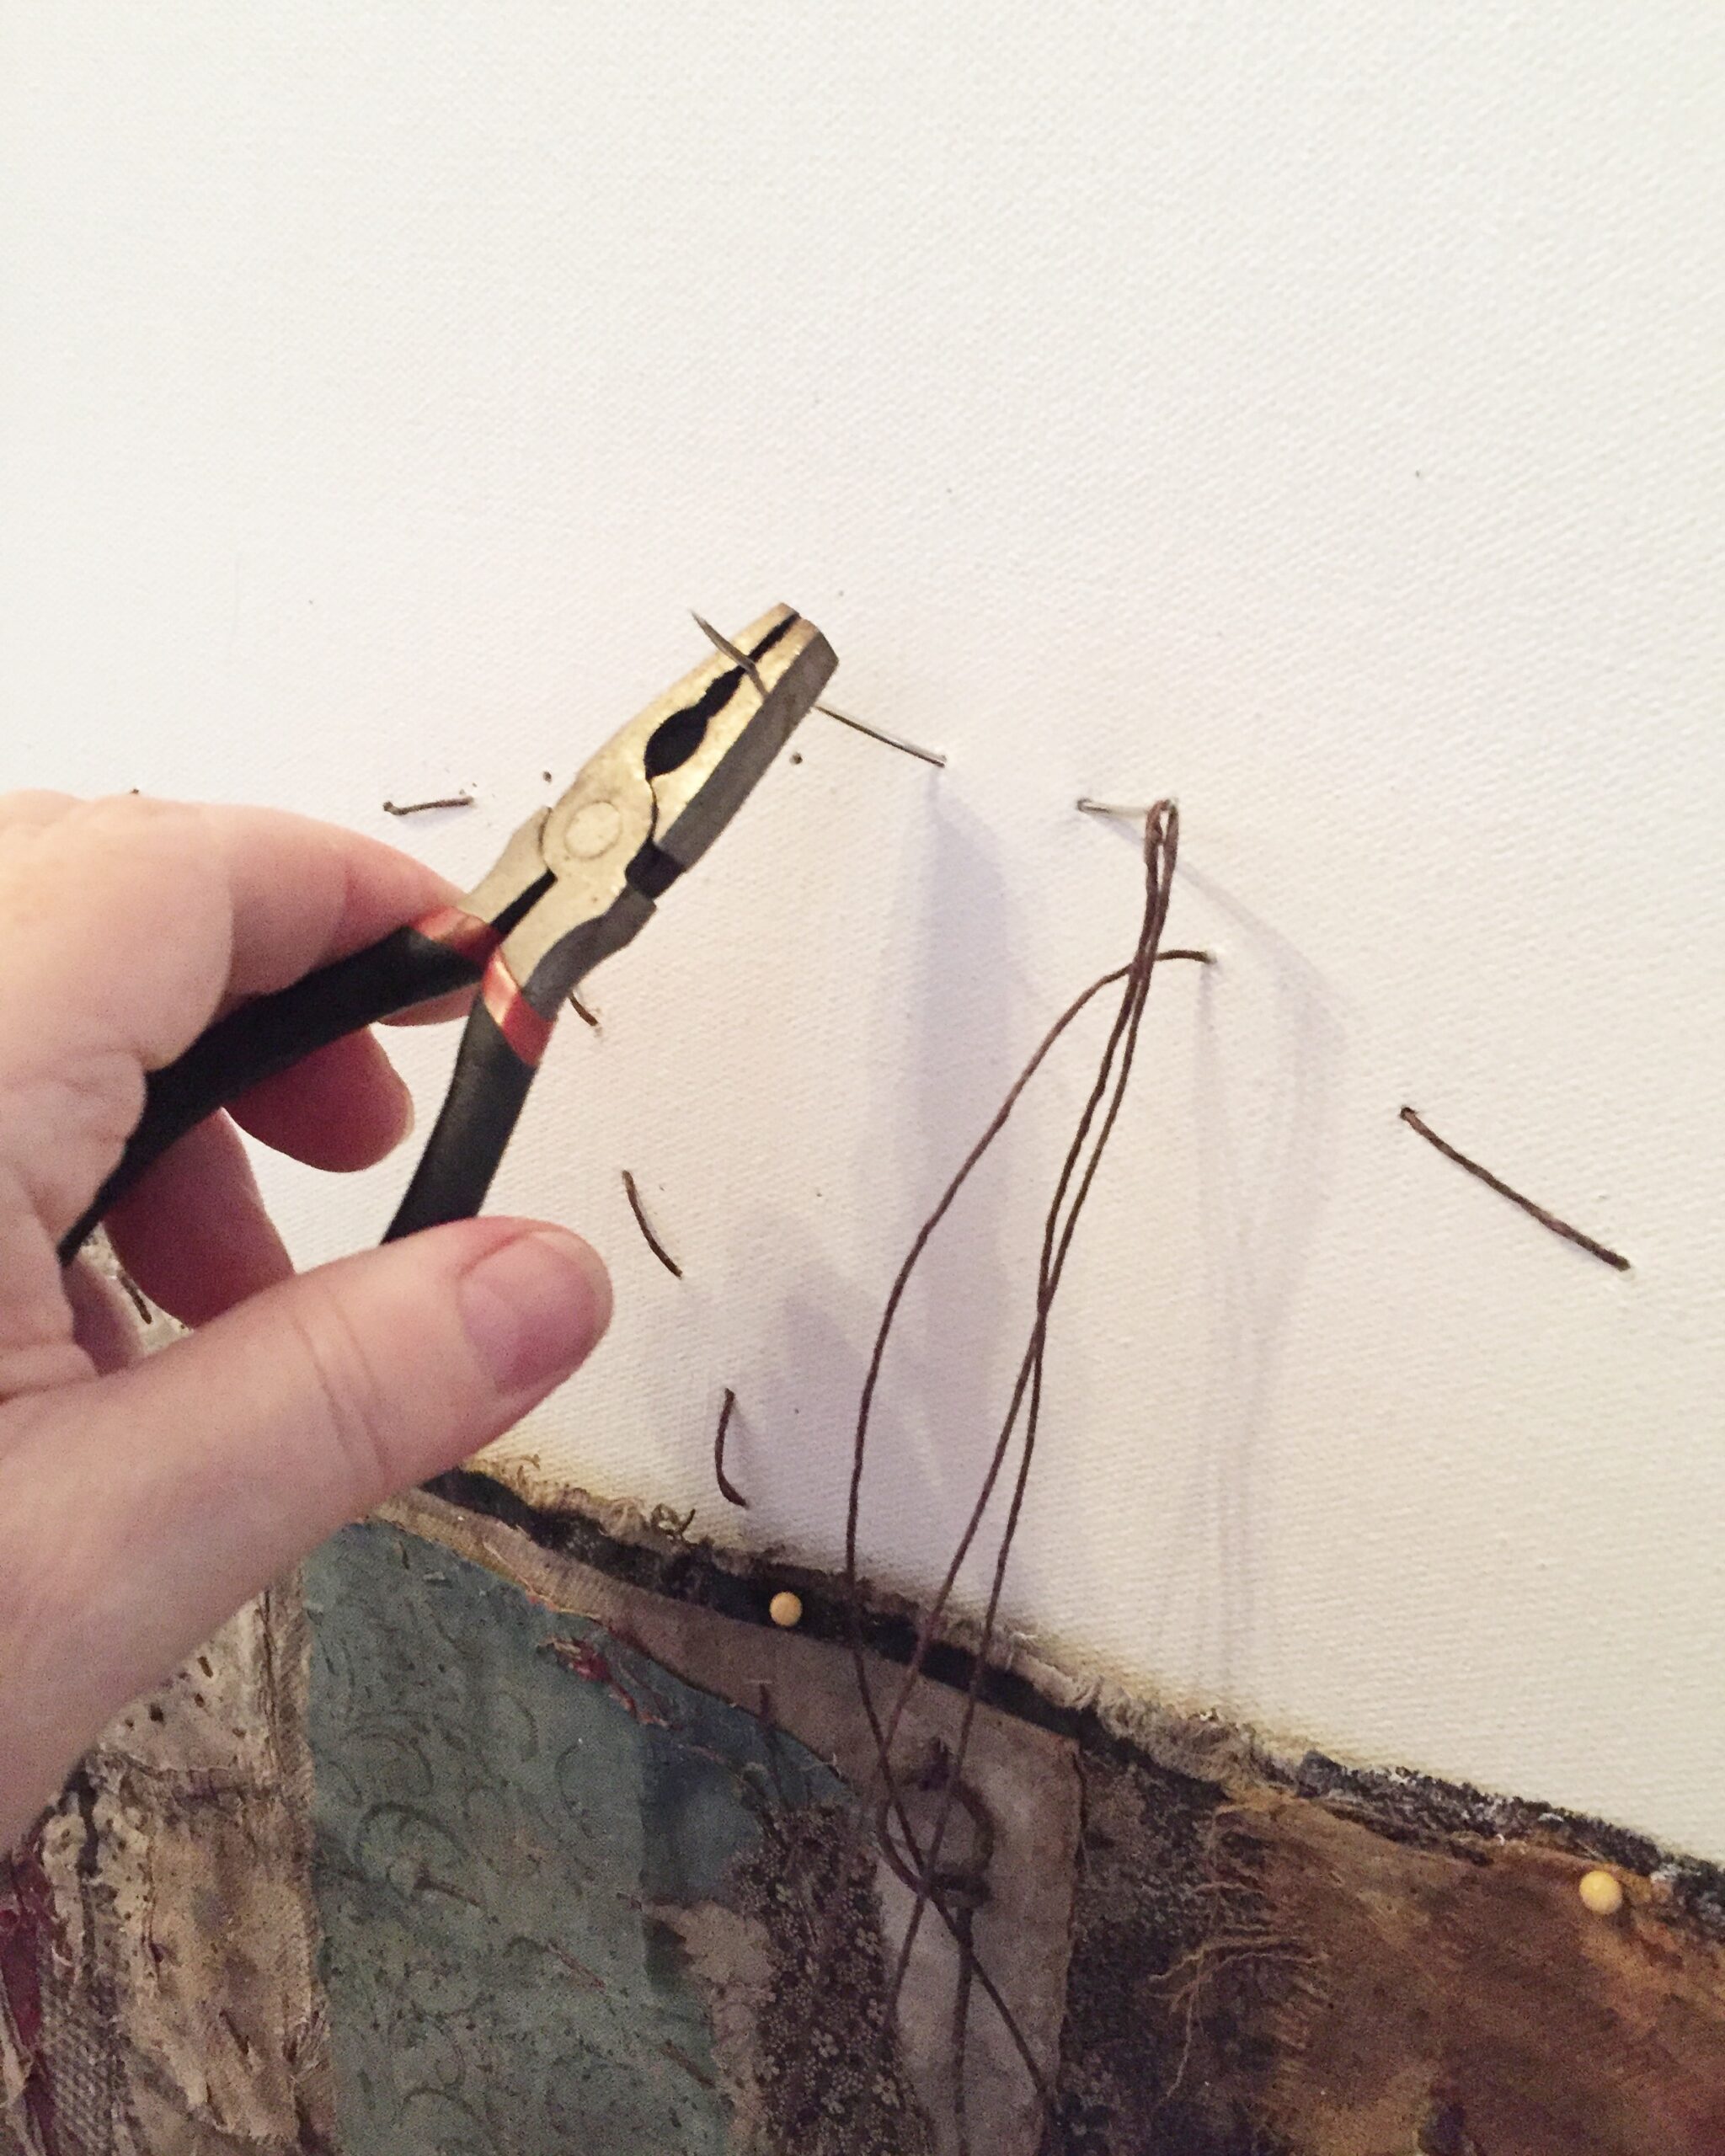
The antique textiles I work with in the “Land Wrap” series are centuries old and sometimes, they seem to yell at me, but mostly, they lay silent. I think of the conversations had as I make my own marks alongside, others gone before. Ragged bits, old and new stitching, tracing marks left behind on old textiles are a reminder, of a time when women, had many obligations and few choices. I feel comfortable, as I stitch, tear, dye and reinforce the fragmented pieces. Somehow, I hope, in a small way, by reclaiming and reworking the textiles, I can give a voice to those women. Jenny Davis 2023
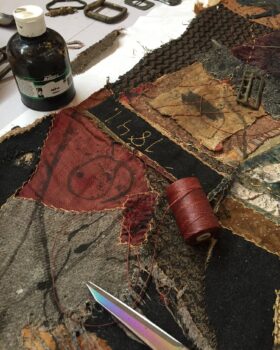
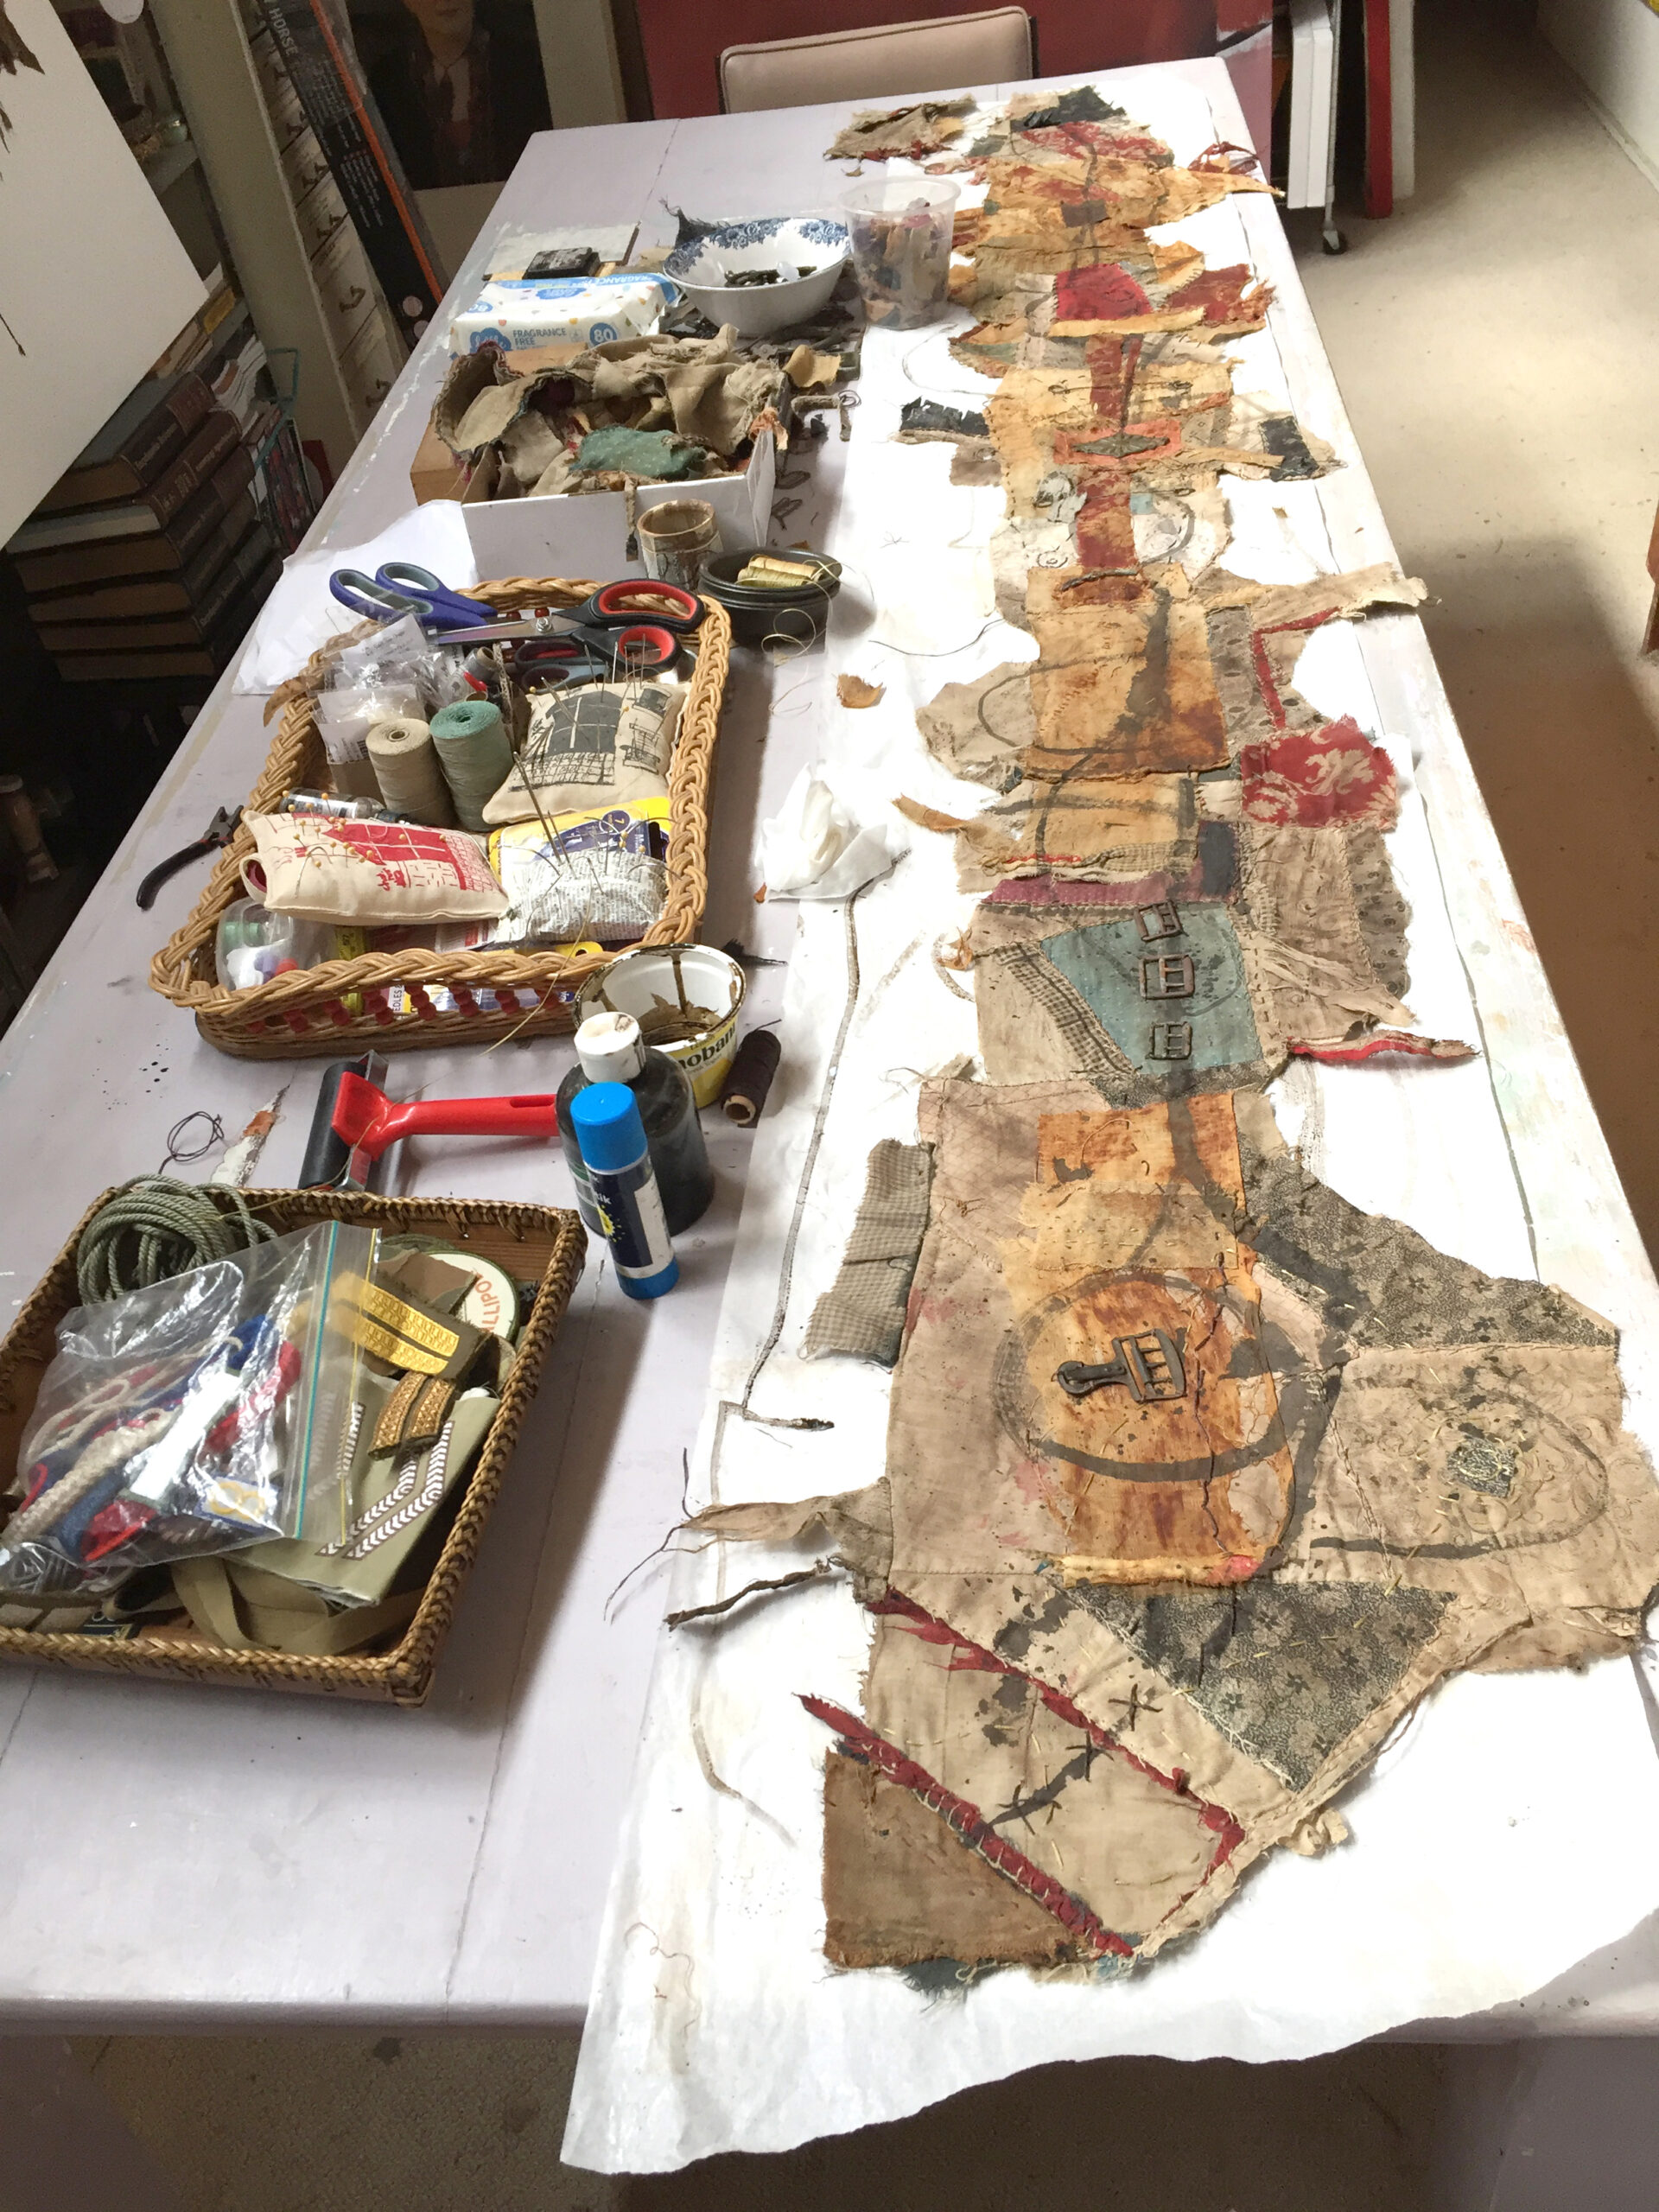
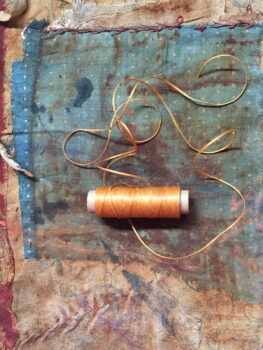
Started stitching the 3rd artwork in the “Land Wrap” series with antique textiles. I find my textile pieces are just like creating my big abstract paintings except, I’m using cloth & stitch instead of oil paint and pigment stick. A bit slower than the swish of a big paint brush or rag but worked in the same way. Antique textiles 200 years old, ink, gesso, rust, found objects and wax linen threads
I’m interested in the worn, stained & rusted patina of older cloth and random mark making. I bury textiles, tear up old clothing, antique & vintage cloth. I like to tell my story alongside the marks of other women and those long gone. If you would like to know how to rust textiles, paper etc.
I create with the debris left behind in the streets.
When I travel or just go walking, I discovered the physical “act” of gleaning (collecting) a creative process in itself, therefore, just as, important as the resulting idea or piece I may be working on.
When I used to go overseas, I usually had to buy another case, or send home boxes of stuff through the post back to Australia. Things I find in the streets, are free, or for little cost at markets, op shops etc. I sometimes, call myself the nomad artist as I like the challenge of creating with whatever stuff is around and rarely, take art materials with me.
Last time, when I was in London I found a few little bits along the Thames river. In the large mixed media textile pieces I am creating for the hotel, I have included some finds, I have collected over time.
A small collection of clay pipe stems from 17th century, rusty wire fence droppers from outback Australia, decorative metal bits from Paris markets and some 1800s metal detector finds from the goldfields in Maryborough Victoria. The textiles I’m working with are from 1800’s and they are from the USA.
I find as much interest looking on the ground for stuff as a tourist sees in the classic art and architecture.
At the beginning of 2022, I was approached by an interior design studio from Sydney, who asked if I would be interested in creating some artworks for a hotel refurbishment in Melbourne. It sounded like a good project and I was up for the challenge. Now, after many months of negotiations and studio visits I can finally begin creating the artworks. Over the next few months, I will create several large scale mixed media & textile artworks for the lobby and penthouse of the hotel. There will be lots of rust, mark making and stitch.
Working this way allows me to be spontaneous and more free with the paint and marks.
I add many layers and glazes, drawing into the canvas with oil pigment sticks and sometimes add collage elements to give interest and depth.
All depends on what it is I’m trying to get out and express.
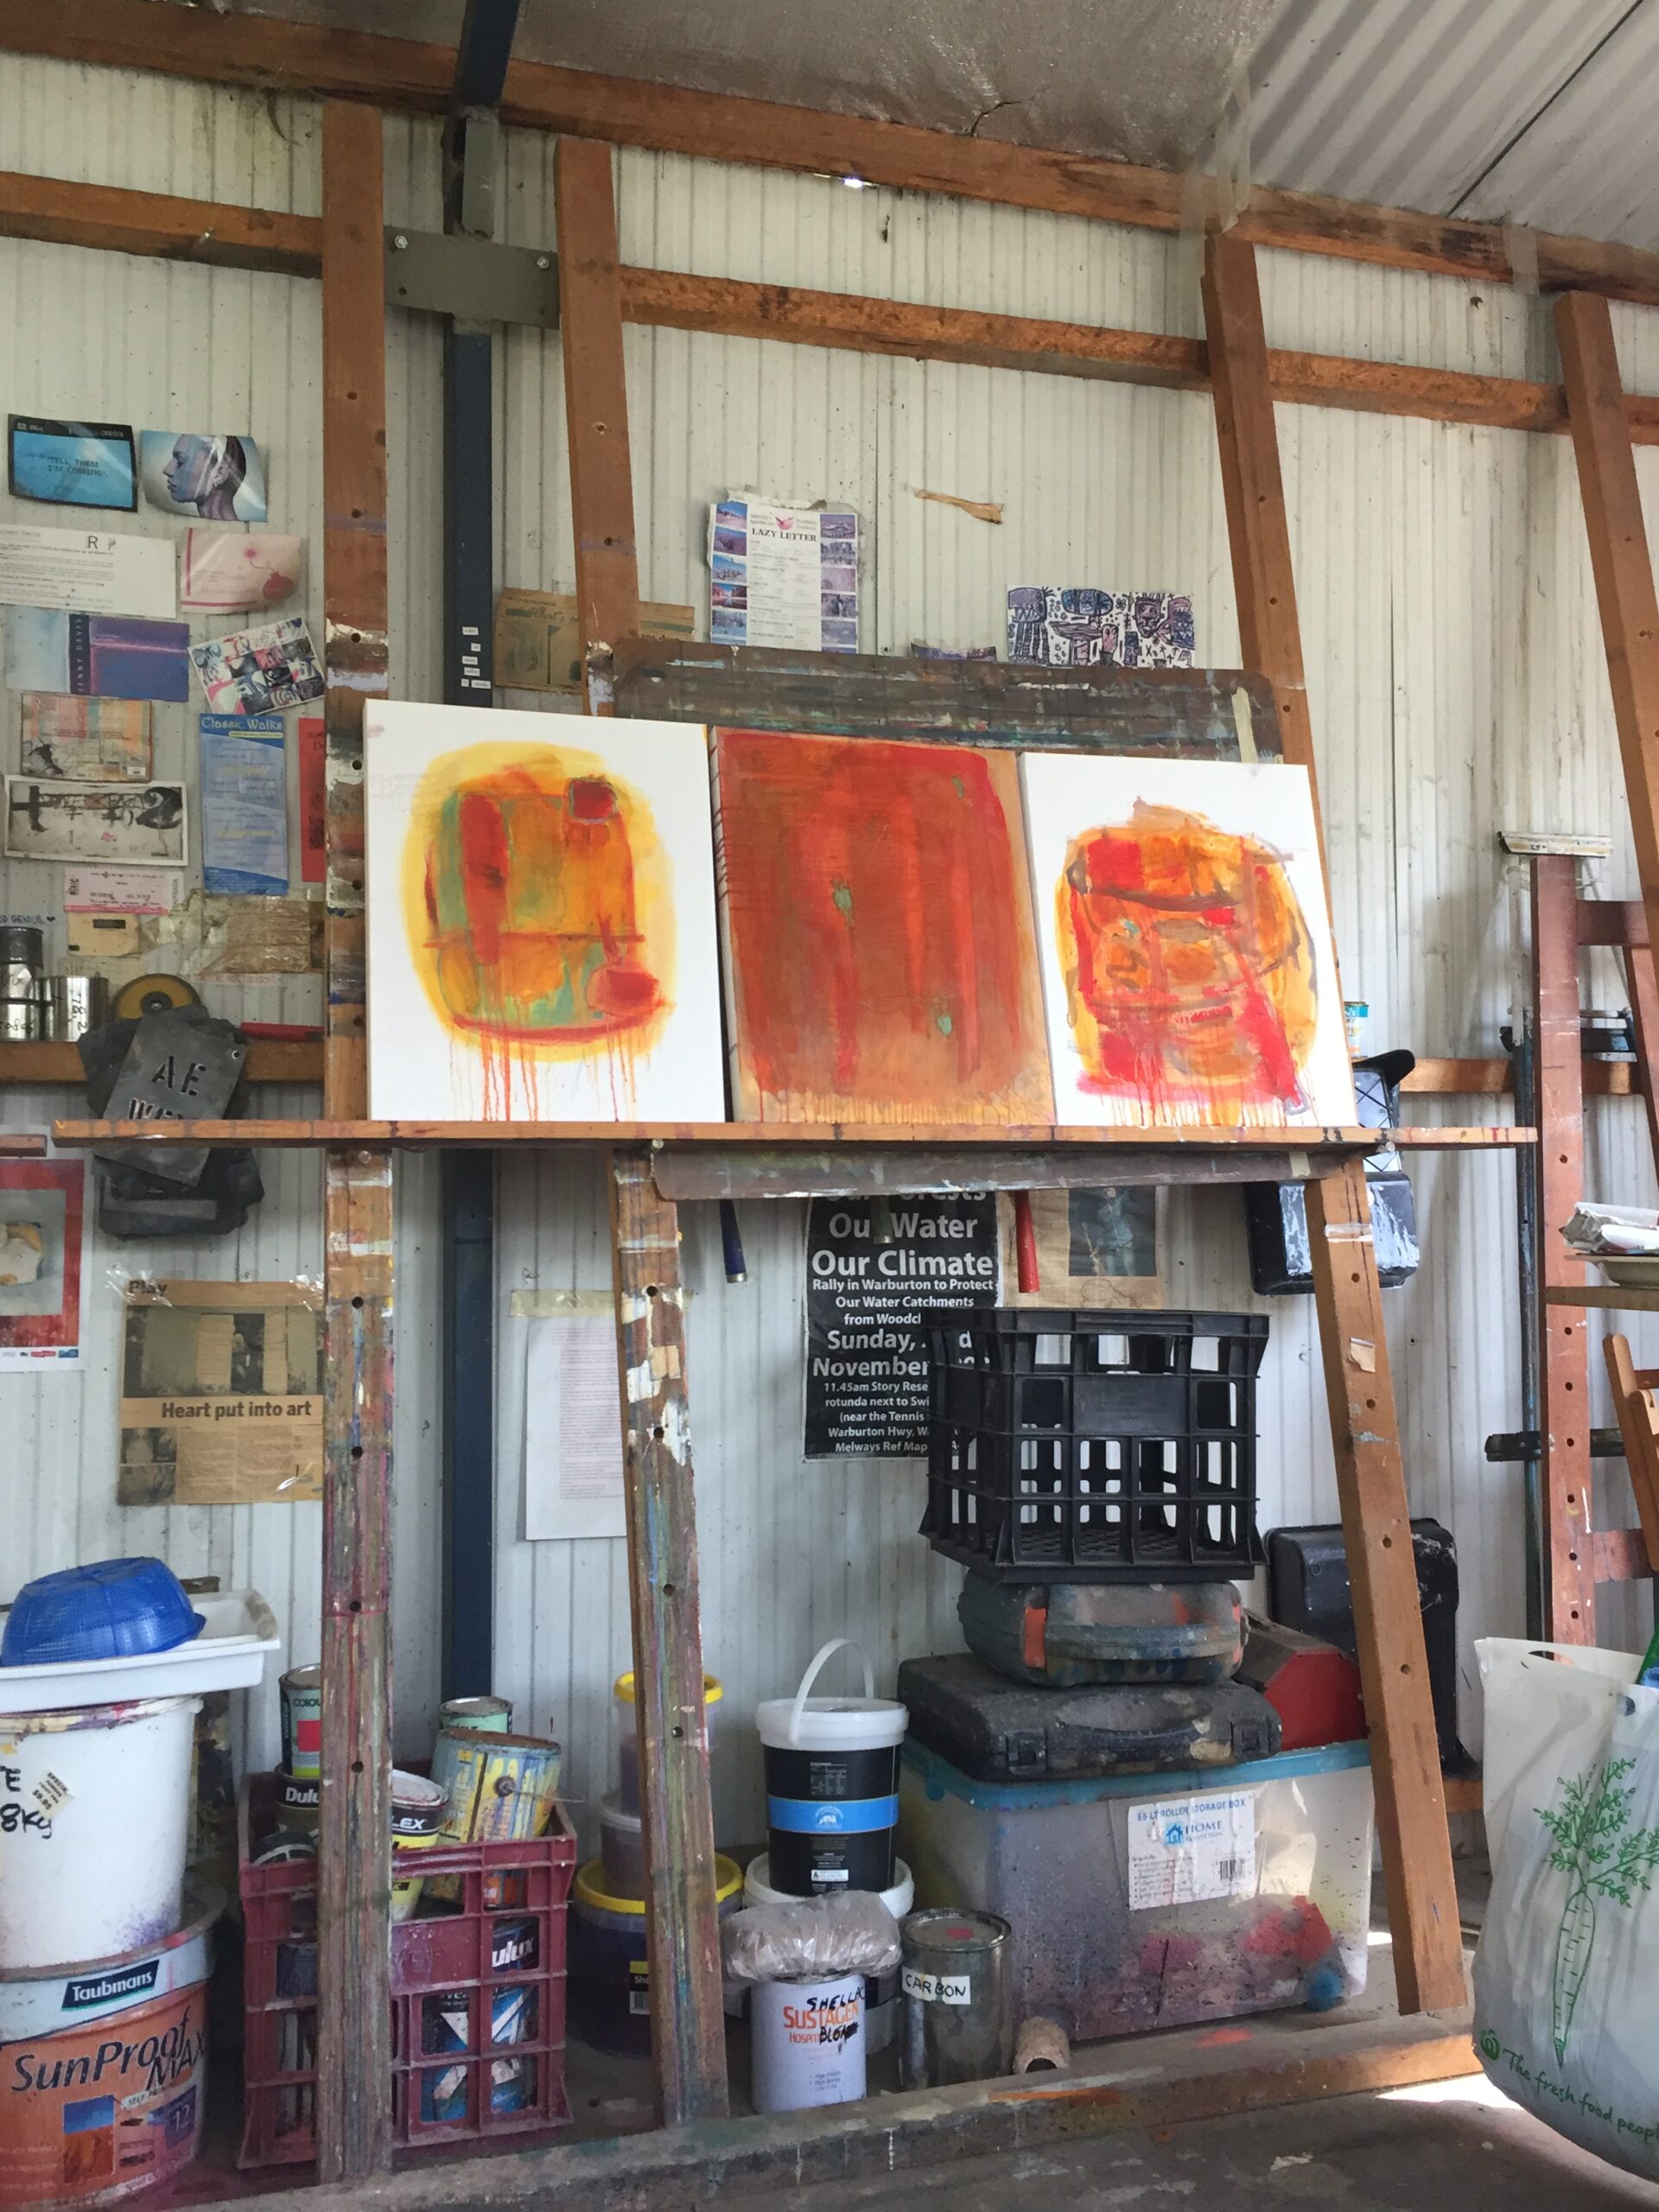
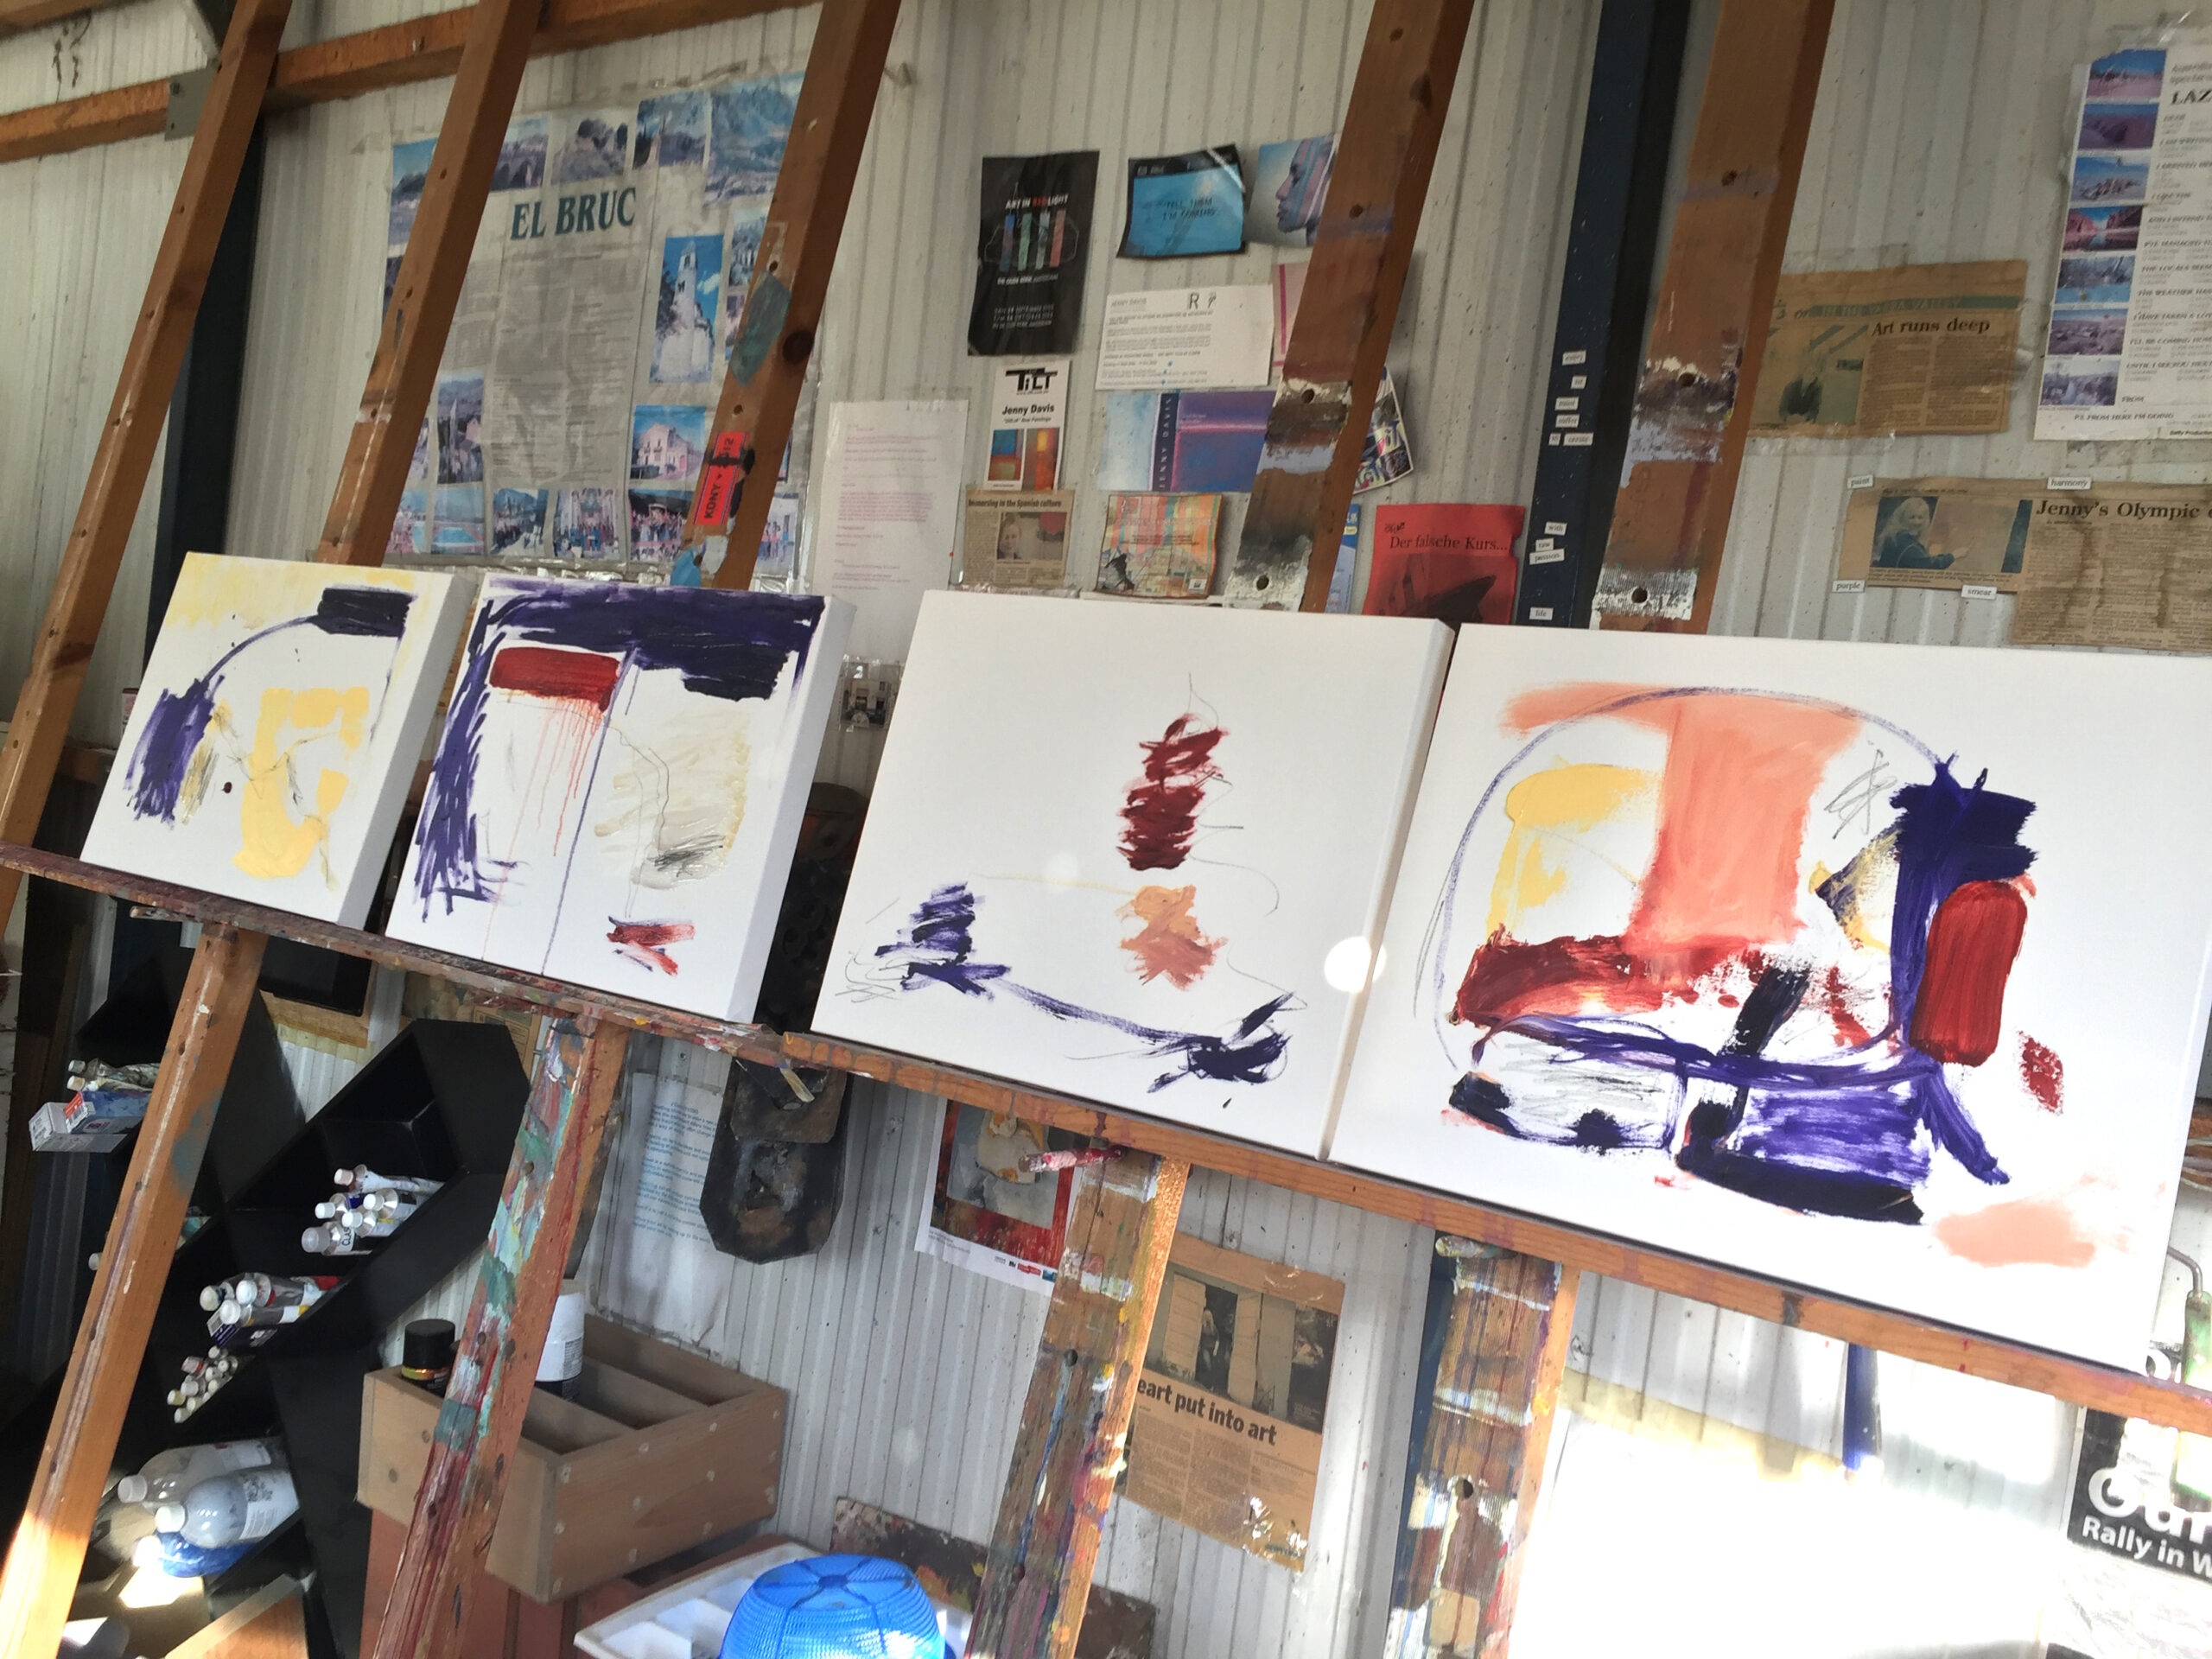
The first 2 rows of photos show each painting as it progresses through the different stages.
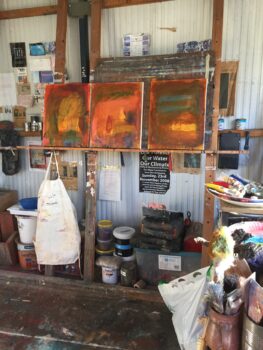
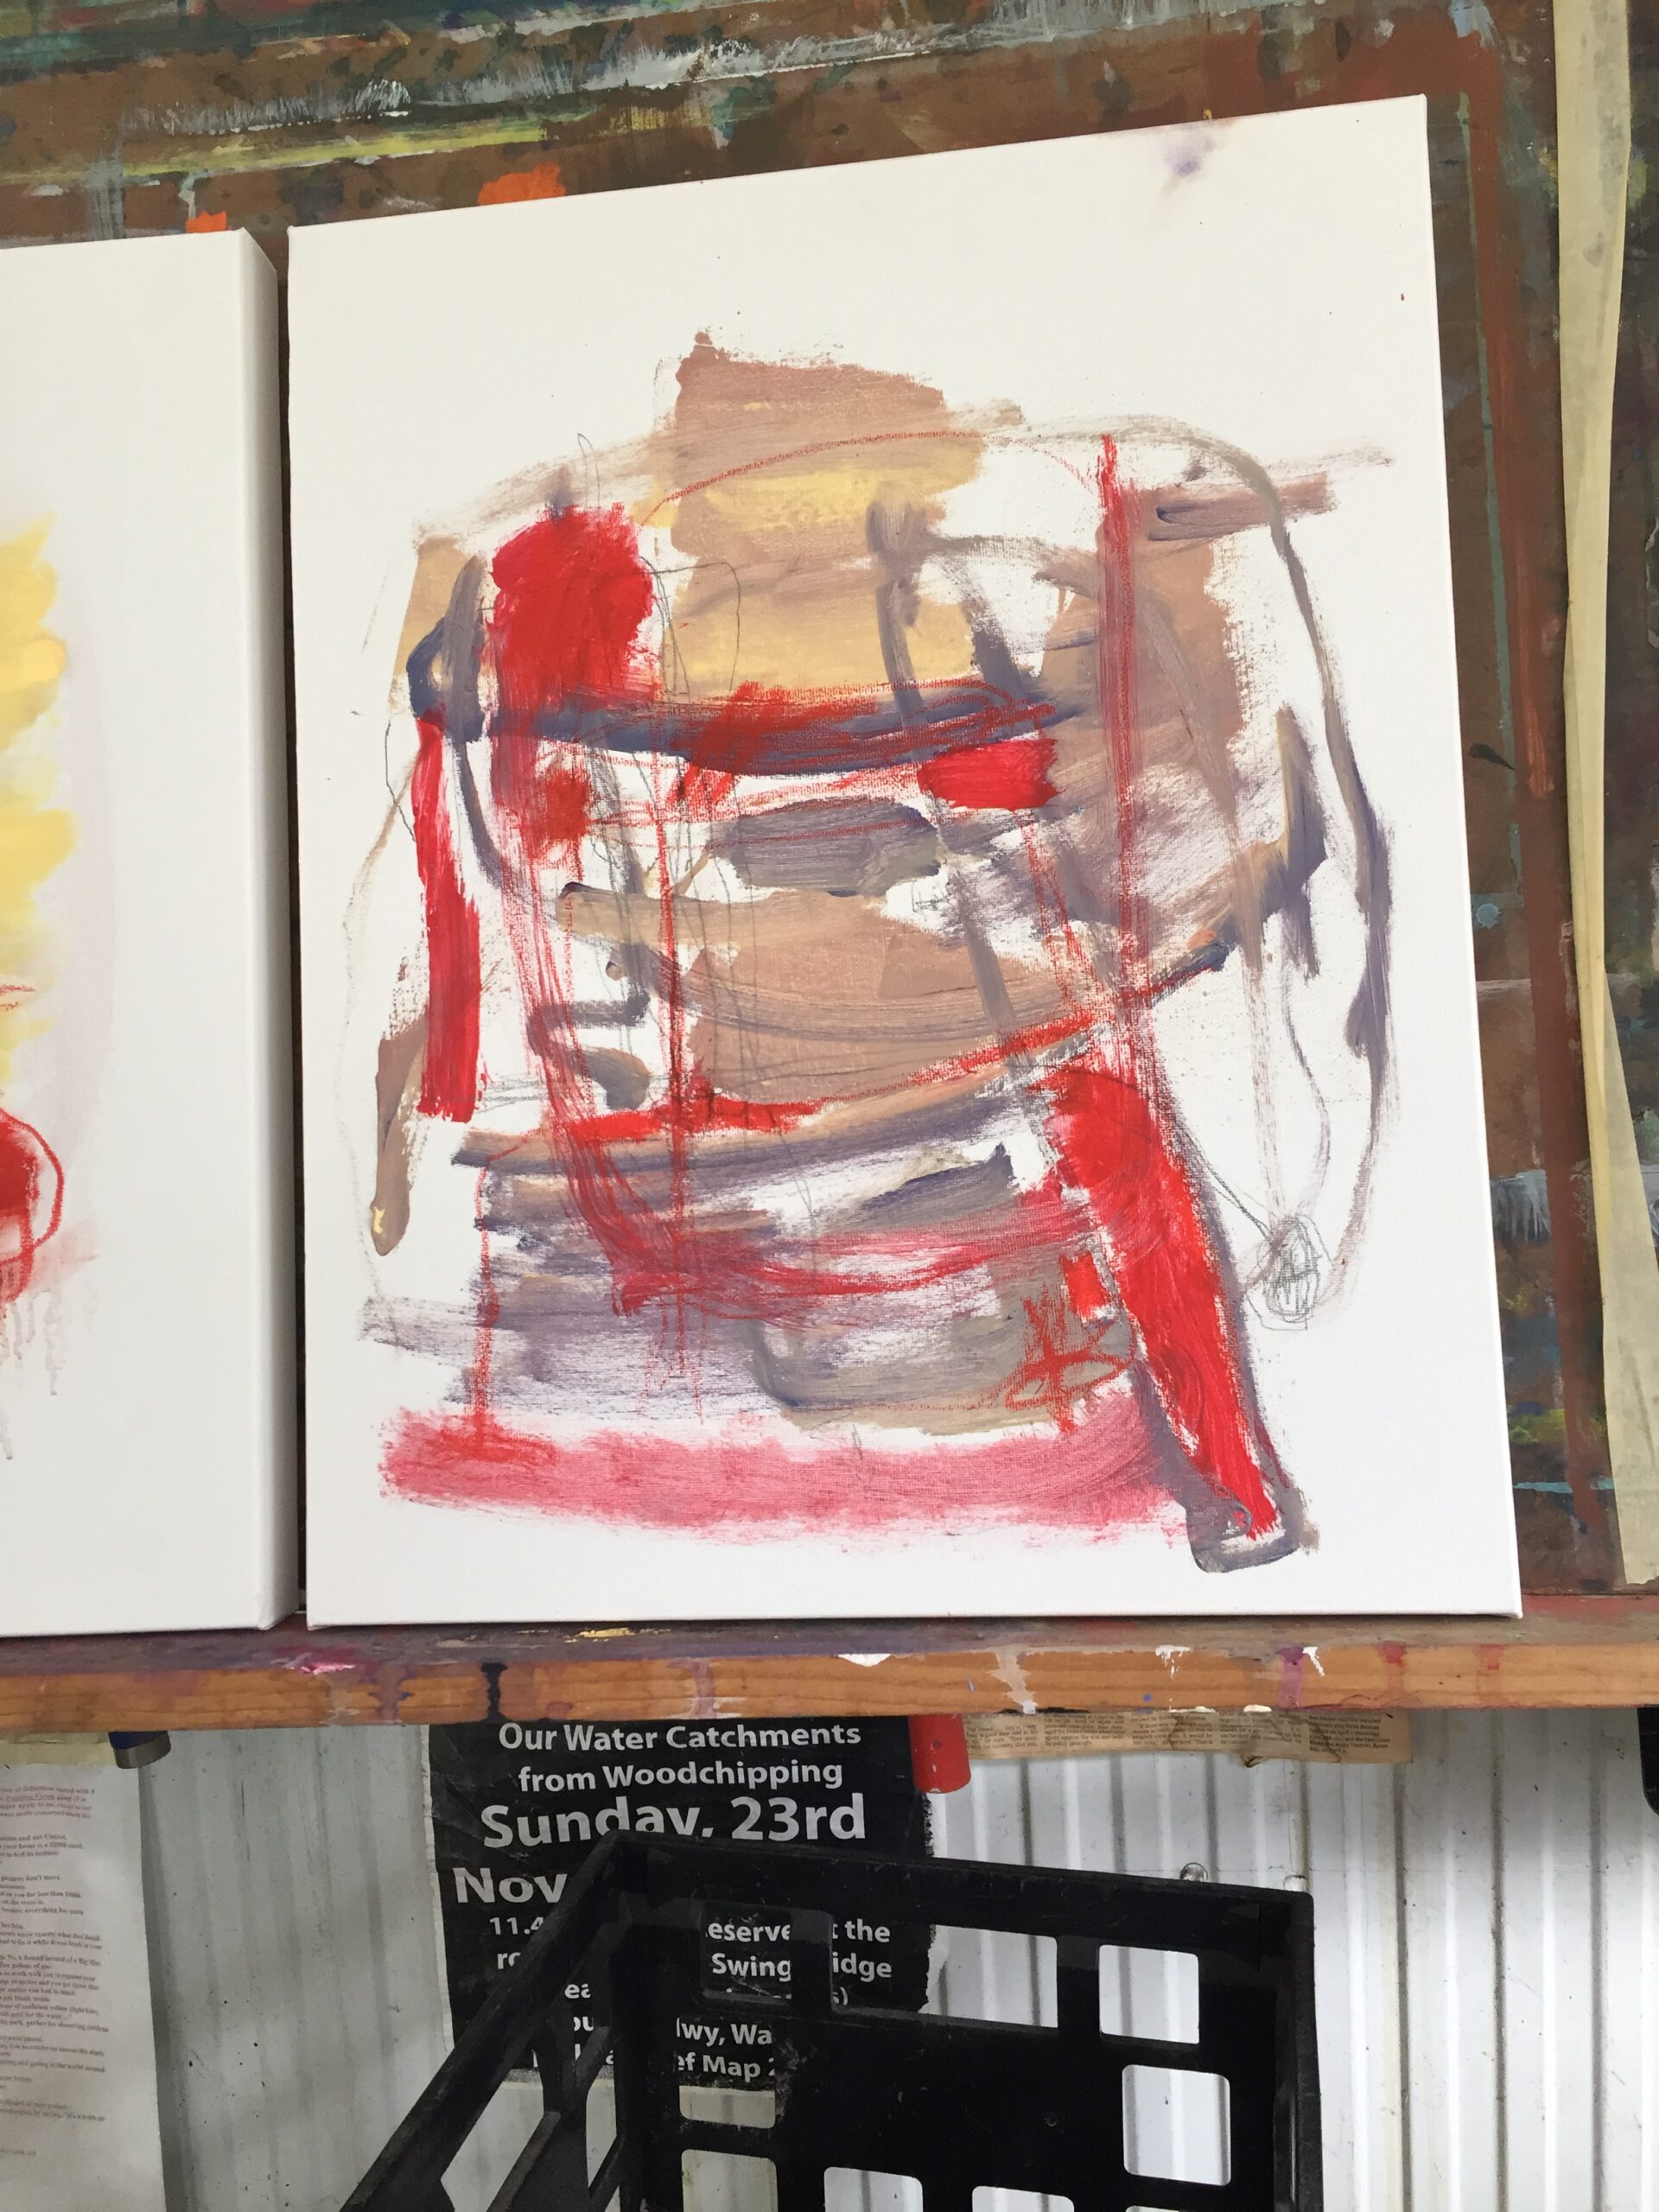
The last 2 rows show another series of thicker oil paintings using thicker paint and using oil sticks to draw with..
None of the artworks have been resolved yet
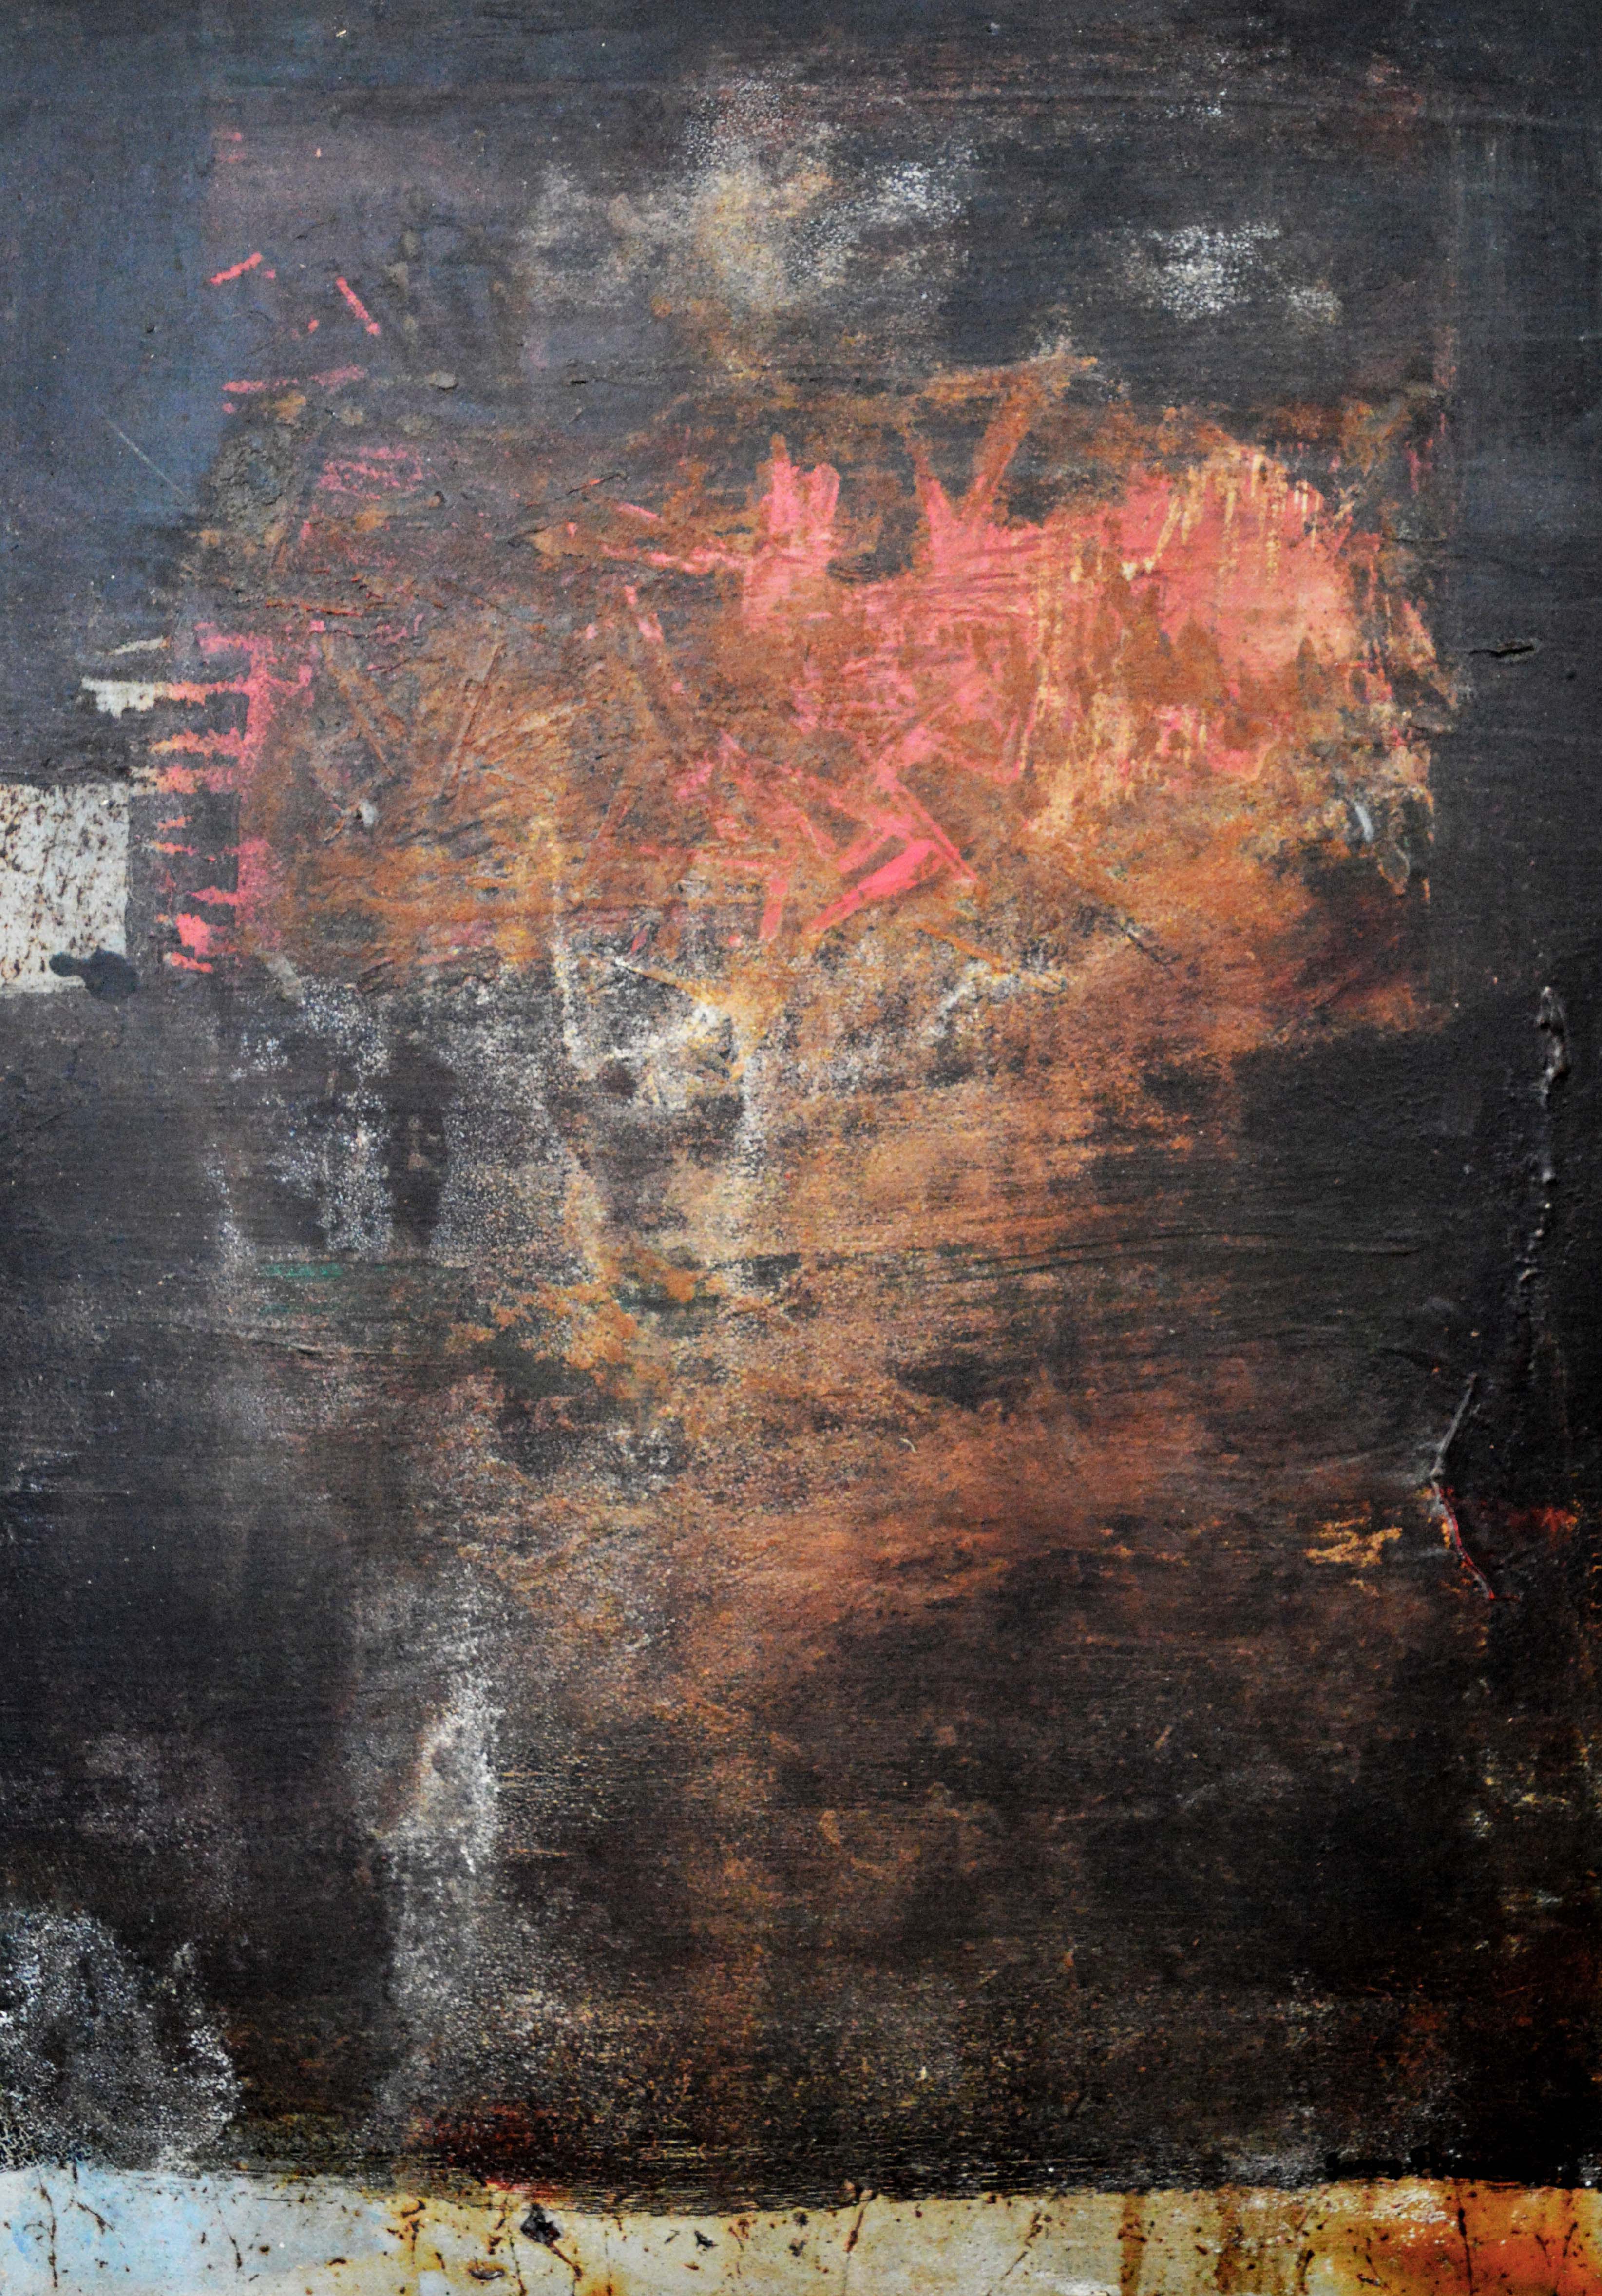
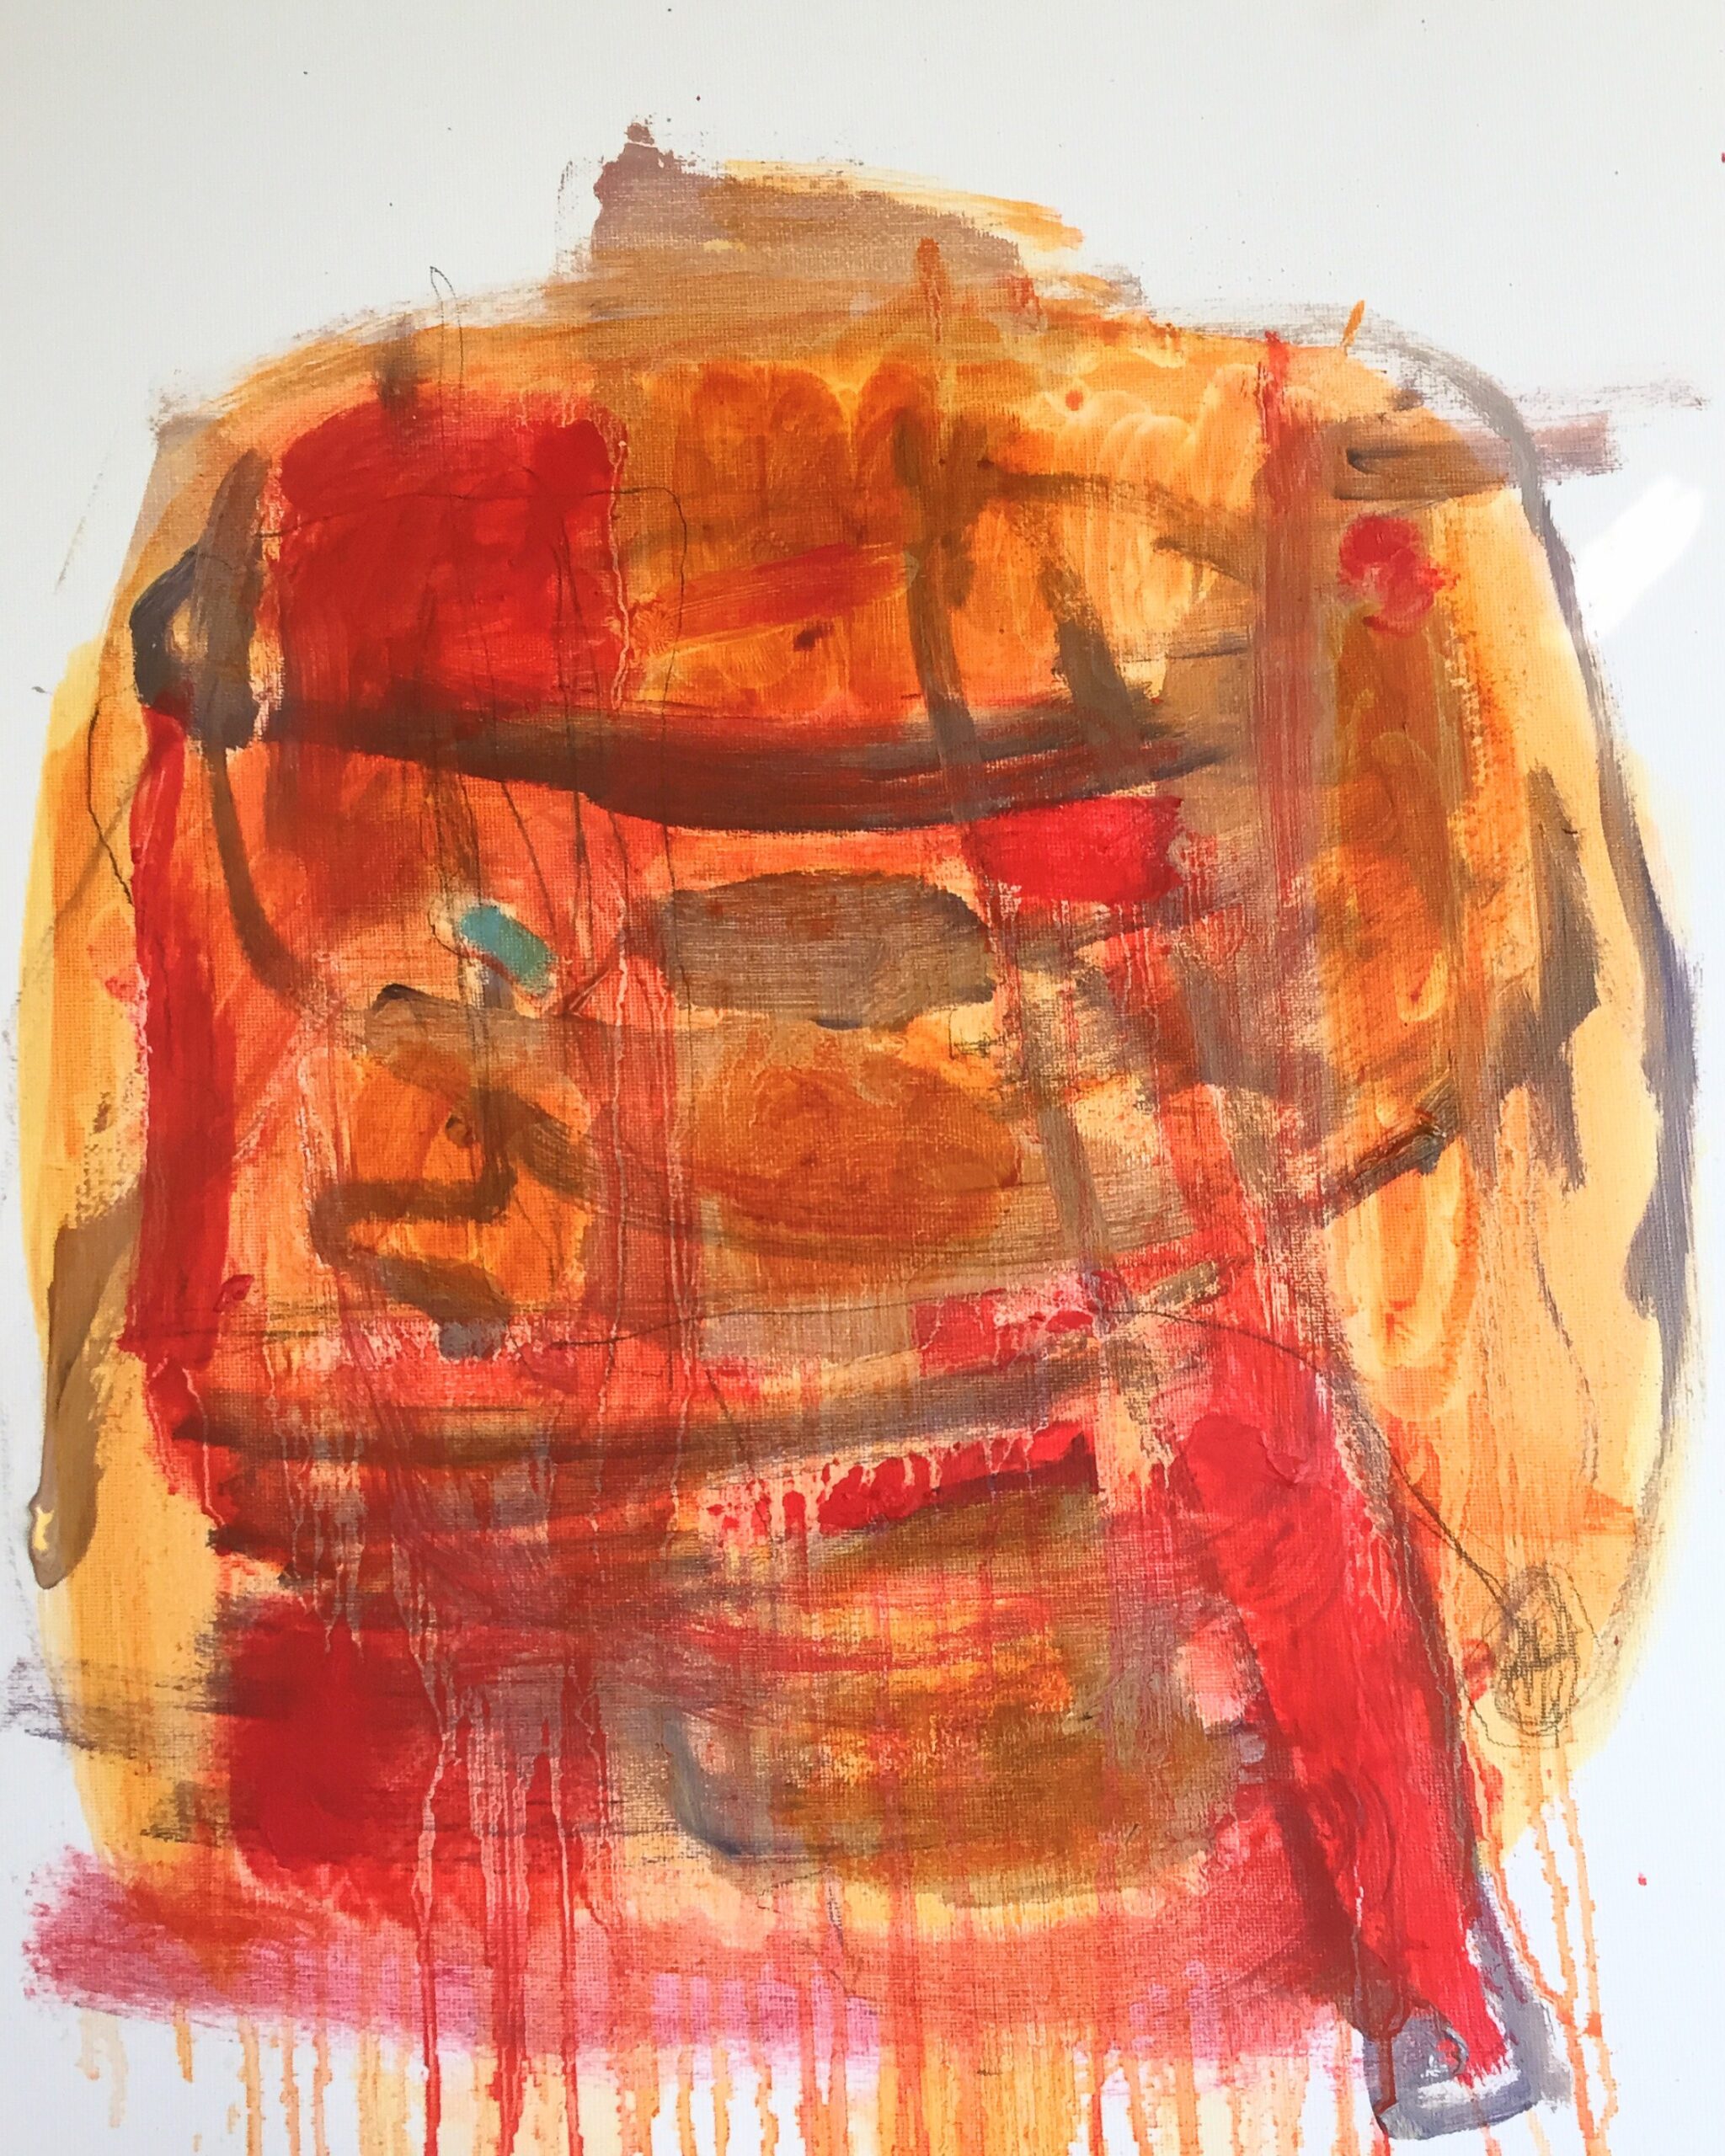
I still seem to come back to the rich gold, red and orange colours of the Australian landscape, I experienced, when trekking in outback, Northern Territory, in the late 1970s.
Still the colours haunt me unconsciously and seep into my work, to influence me.
Adding marks is always a fun way to add movement and interest
I just love museums full of curiosities with collections of objects and natural history, of worlds filled with beauty, wonder and the imaginations.
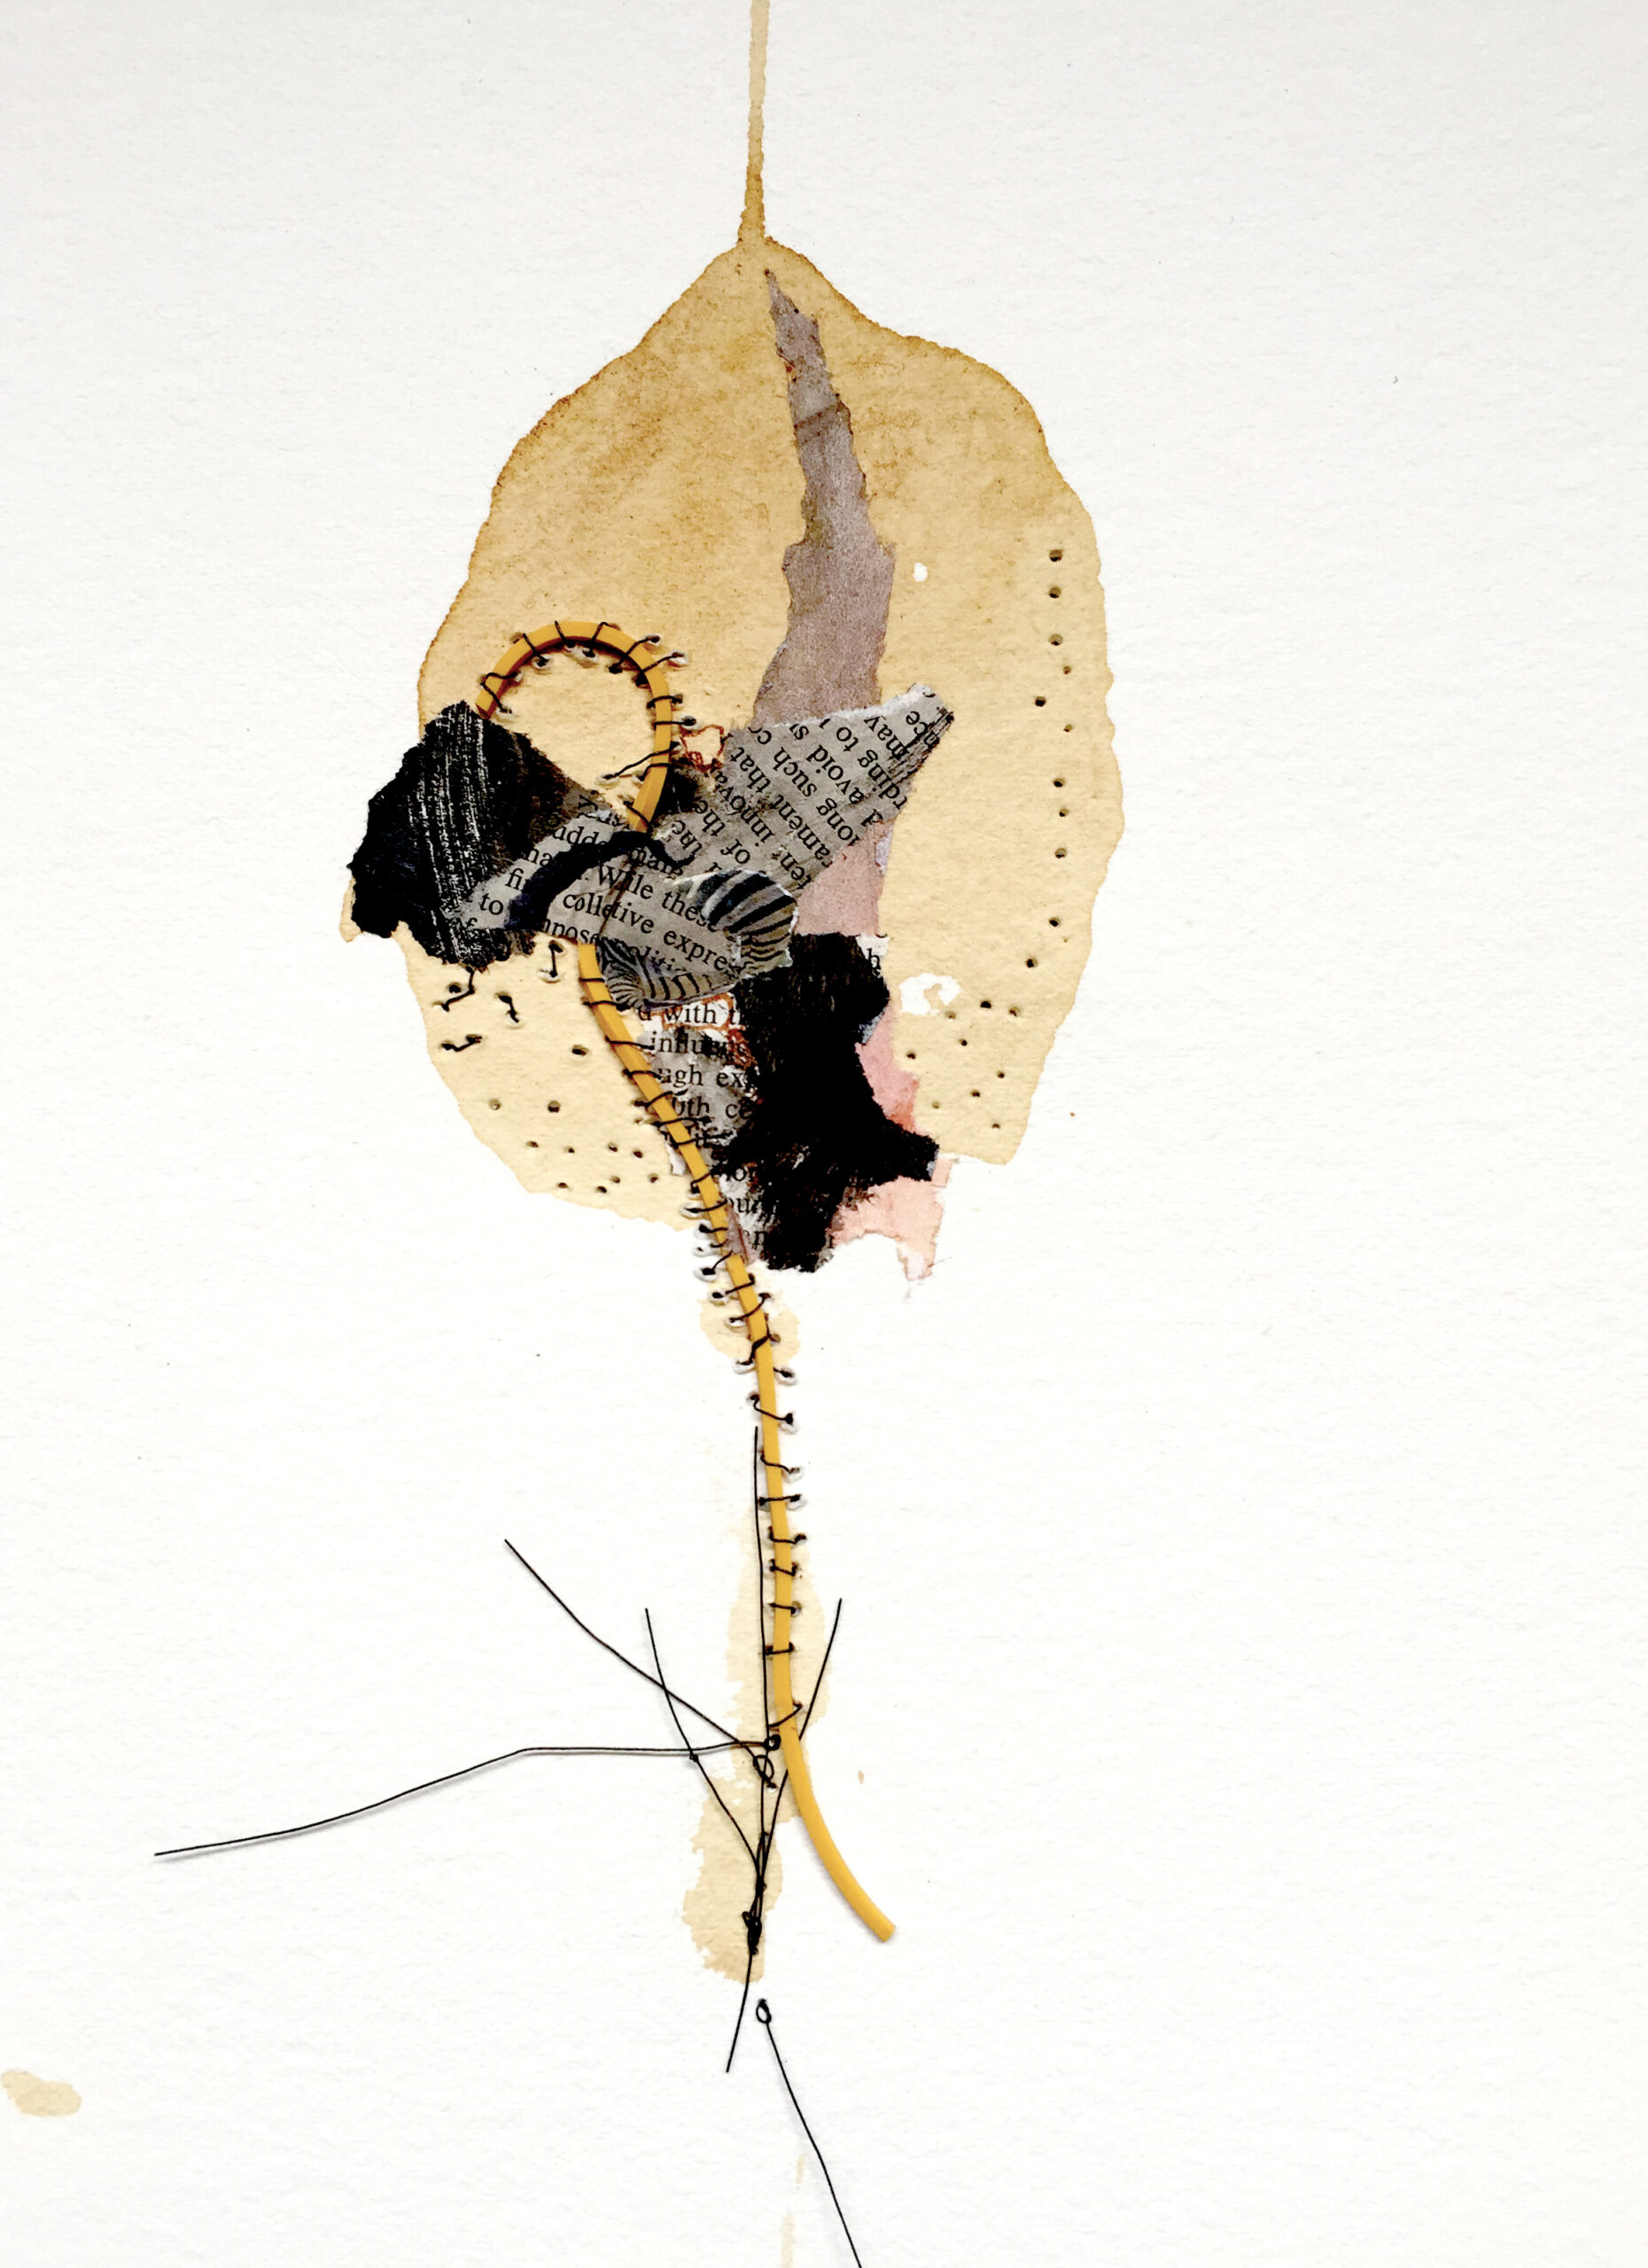
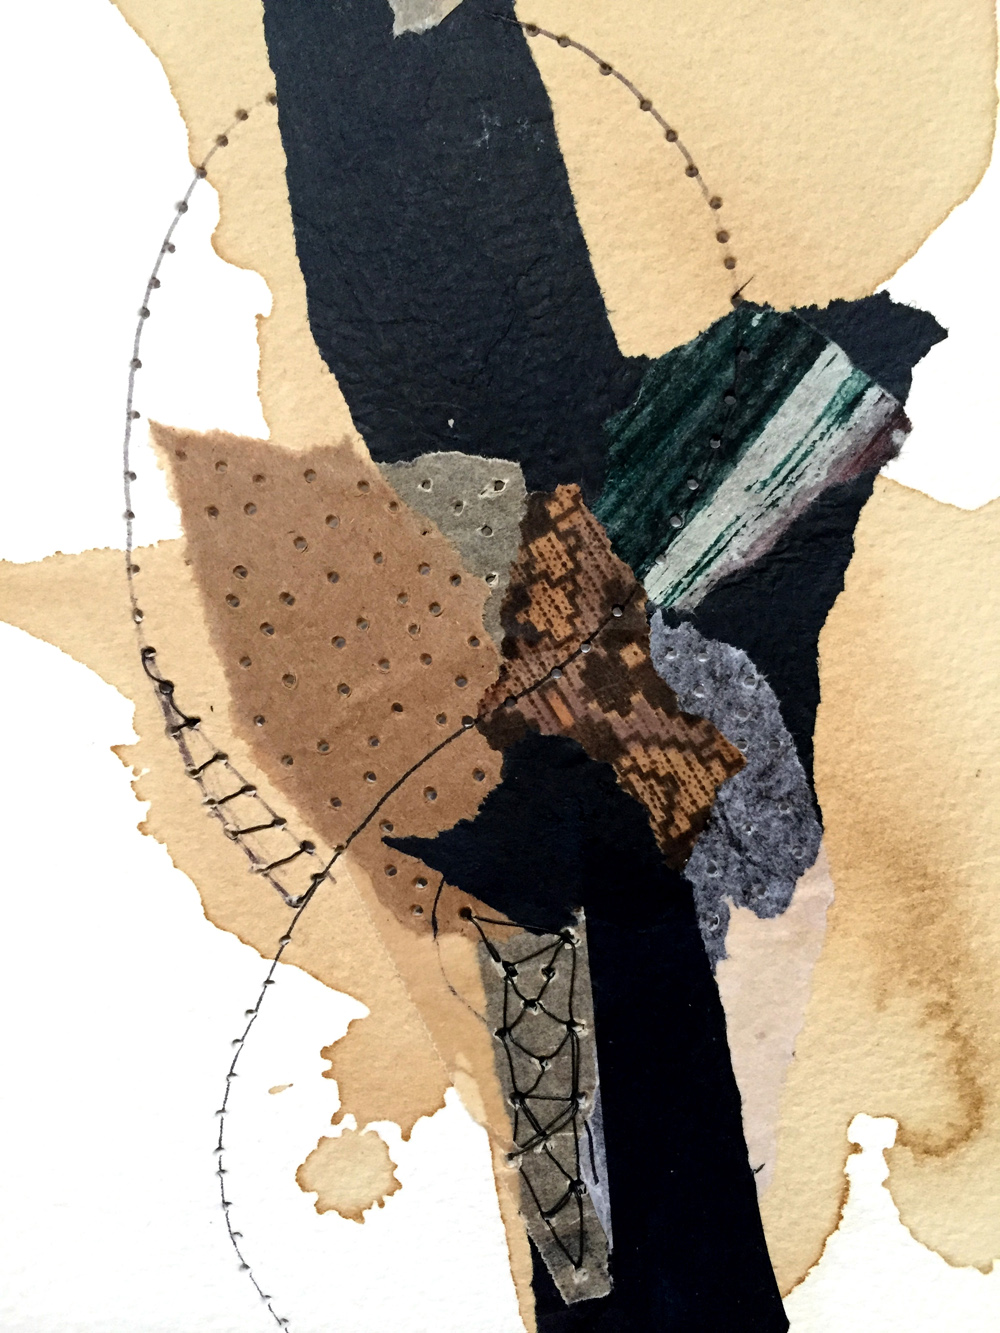
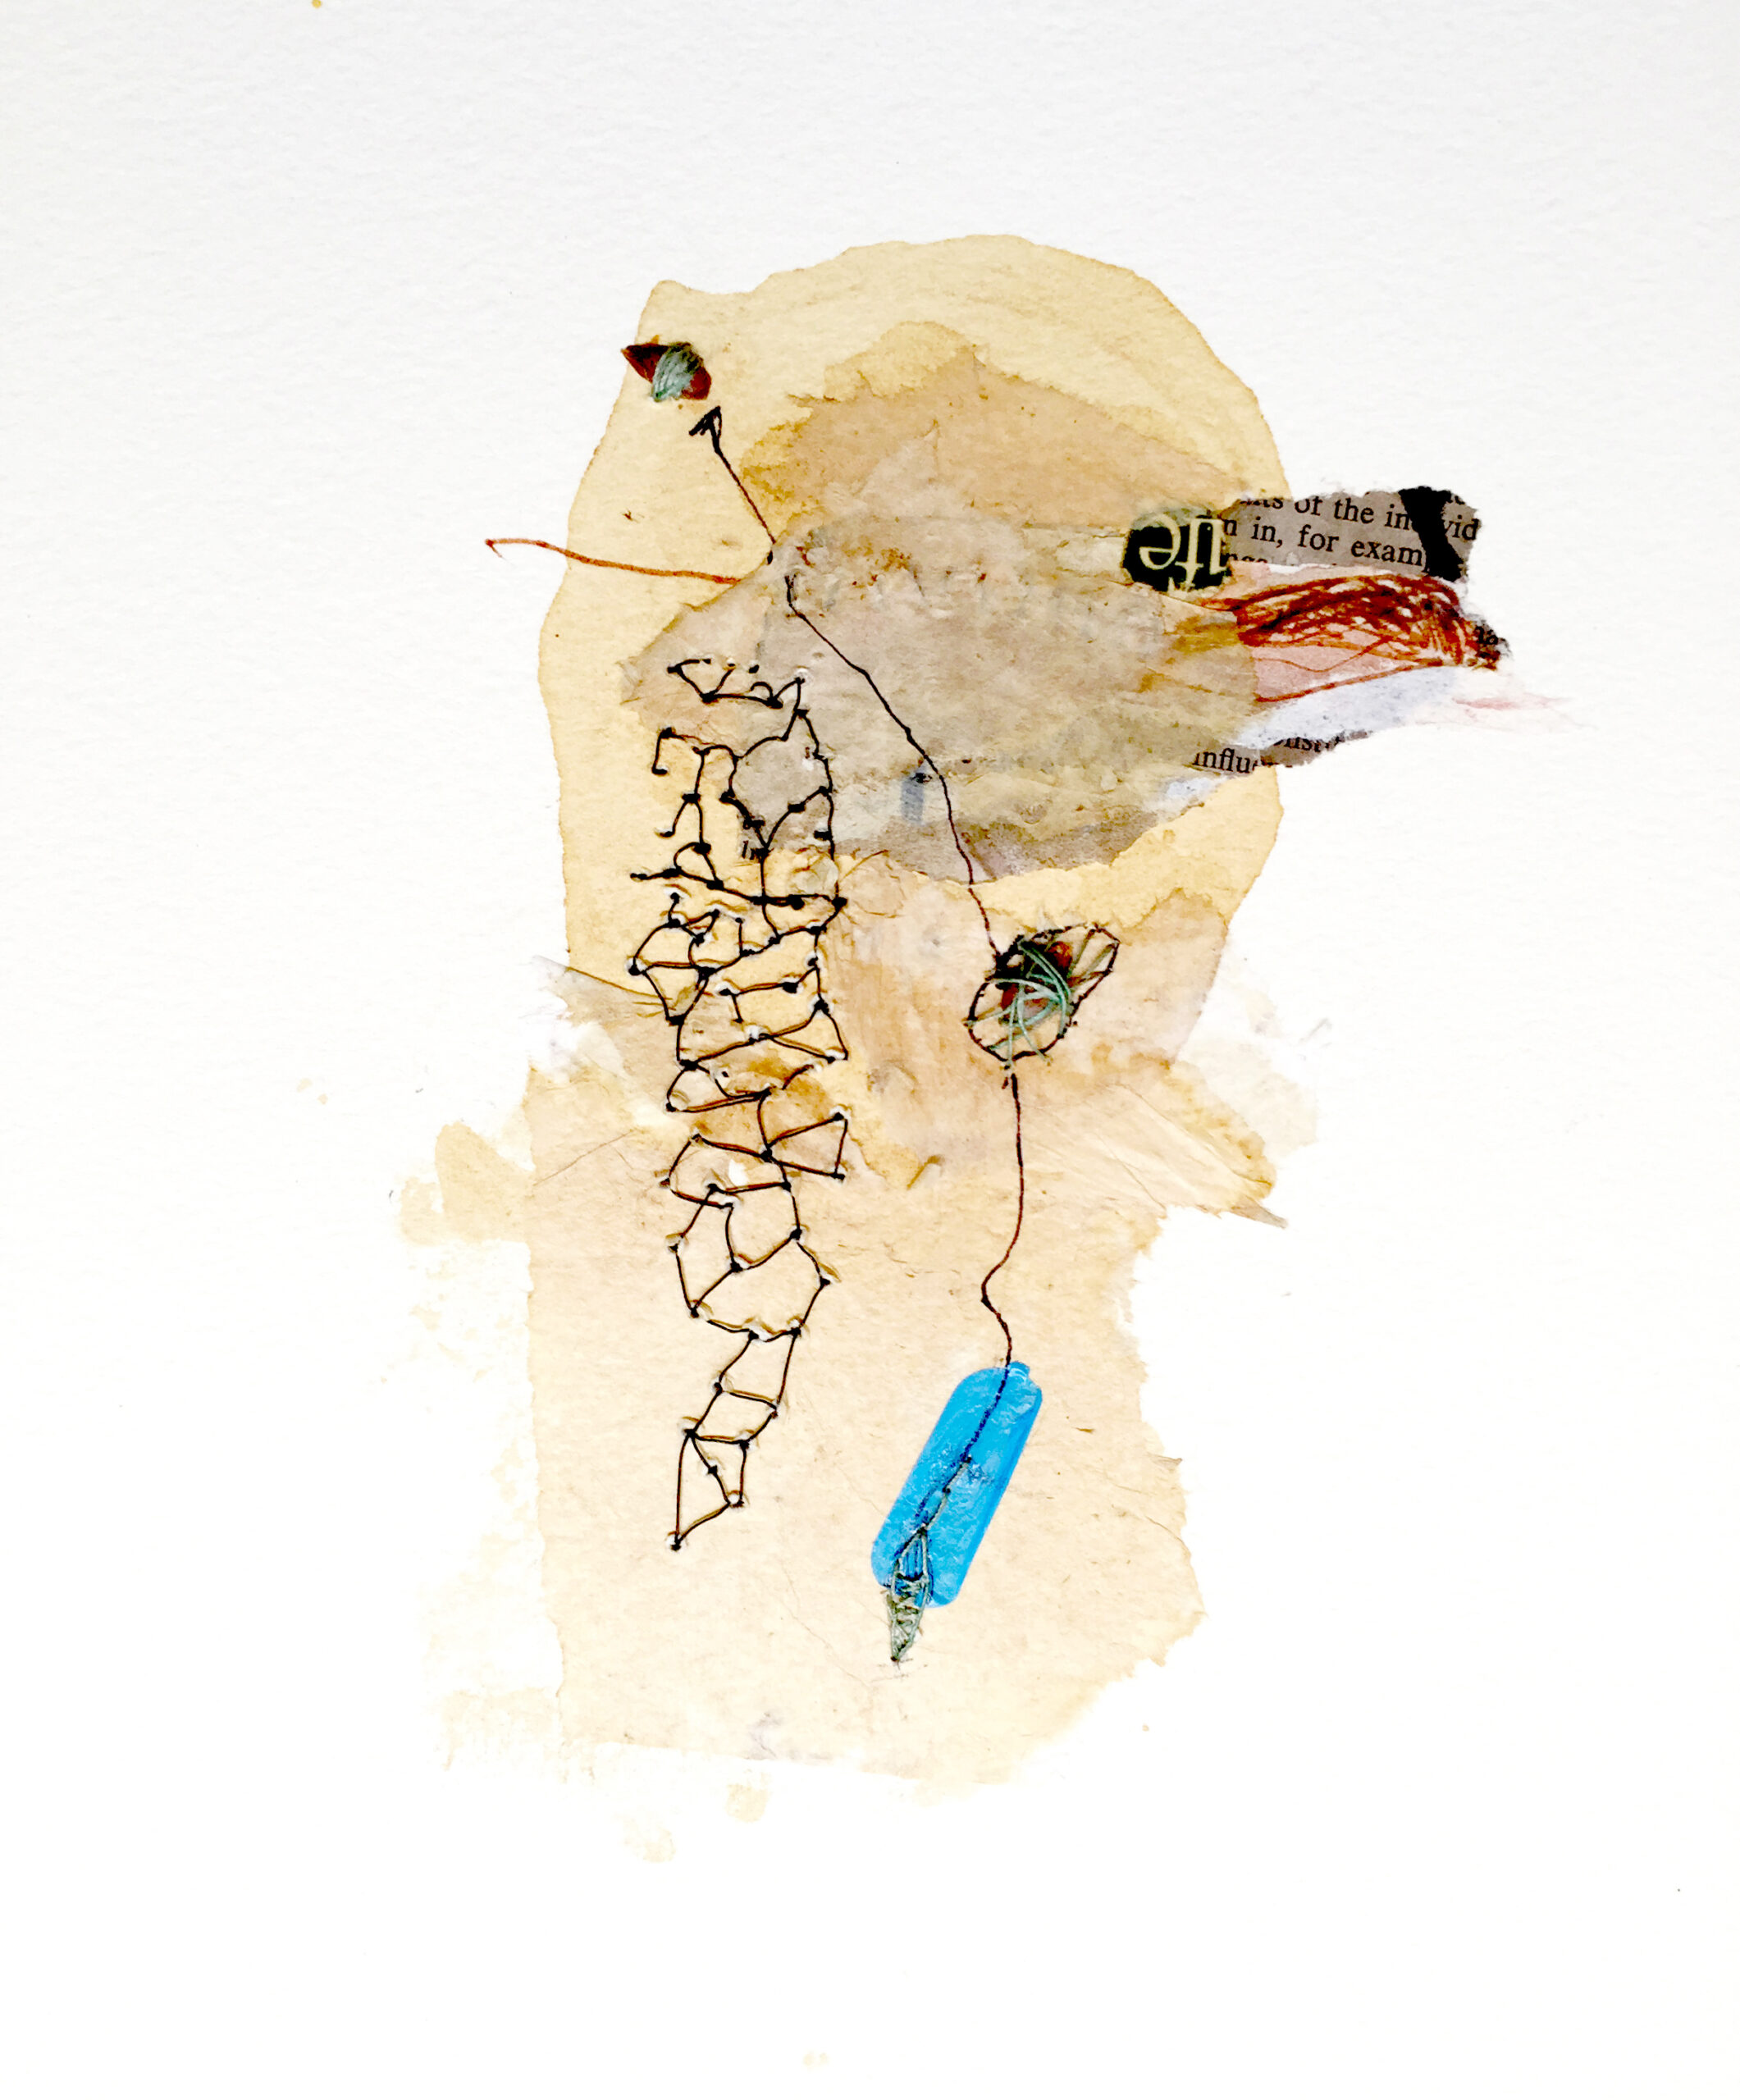
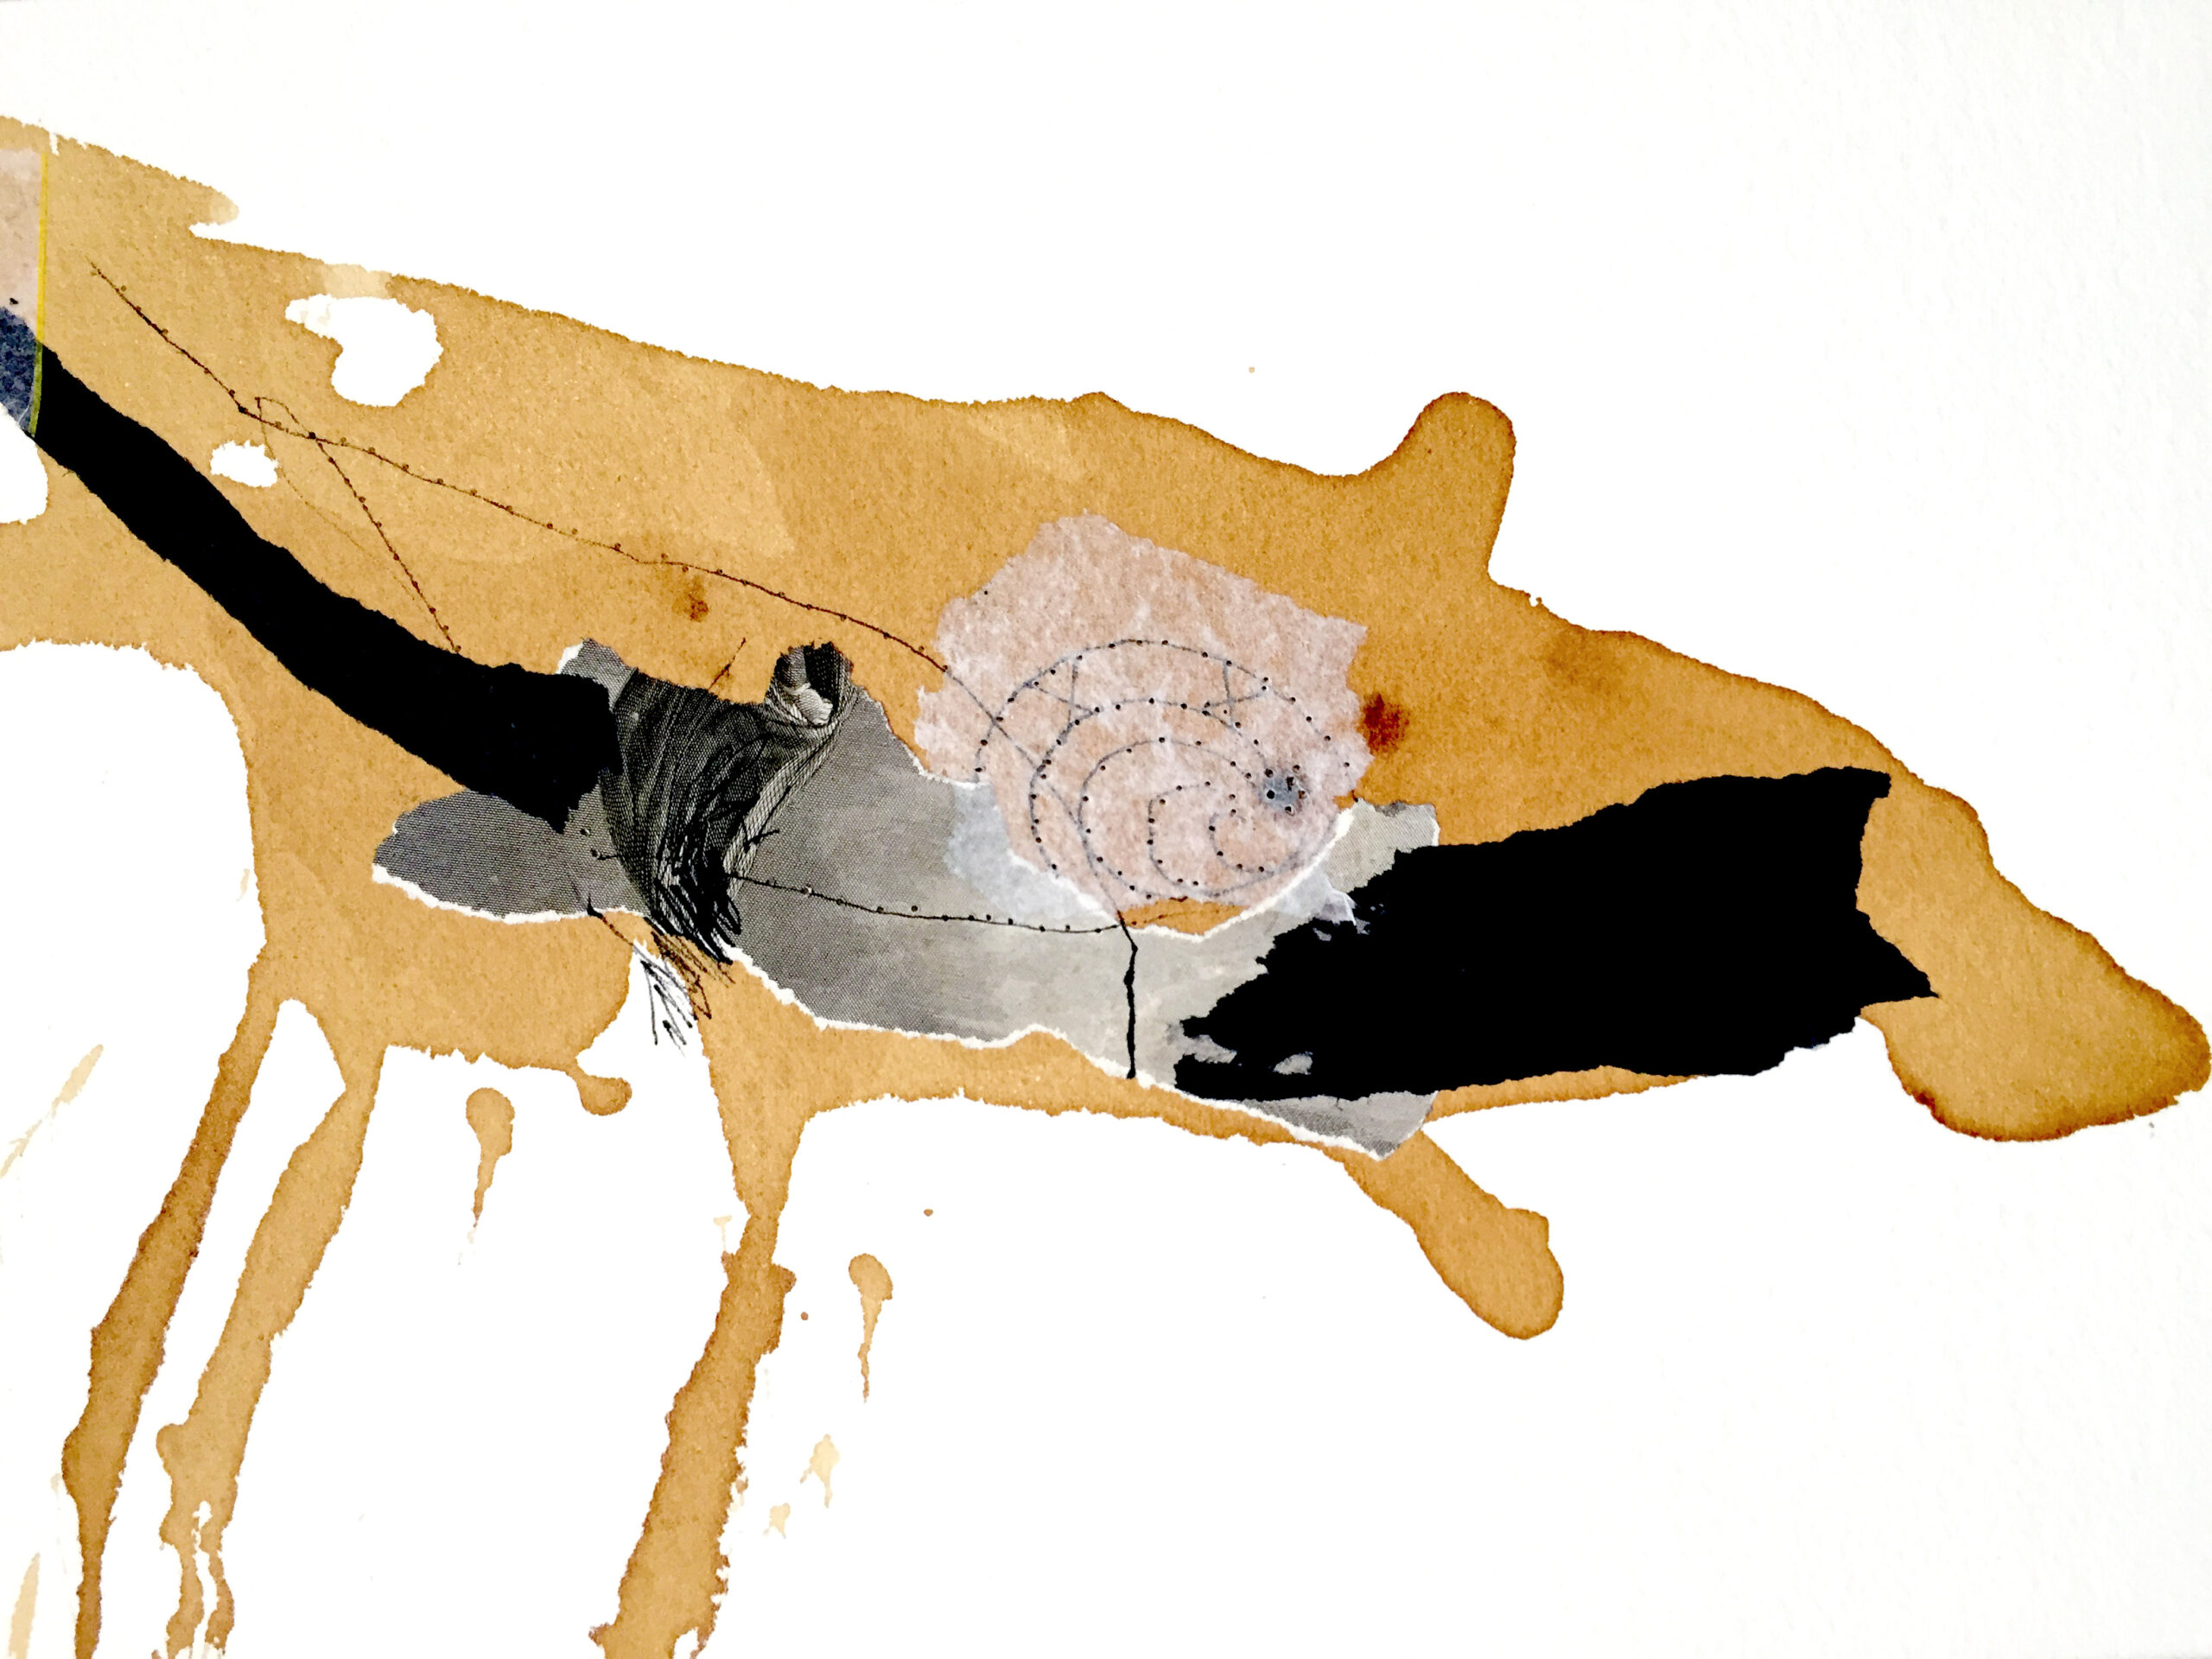
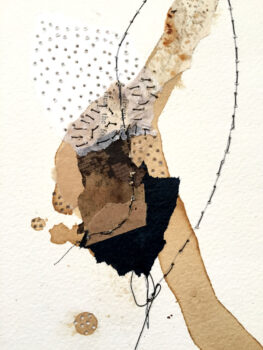
Over the past few years I have been adding to a series of collages connected to artworks I originally created in London just before Covid hit.
Each piece has been created with found papers and packaging collected from the streets in London & suburbs with a mix of vintage papers. Hand sewn with linen threads. Artwork created using many methods, painting, sewing, pin – pricks, tearing , gluing and drawing. I have quite a few more than whst is seen below and will list more soon.
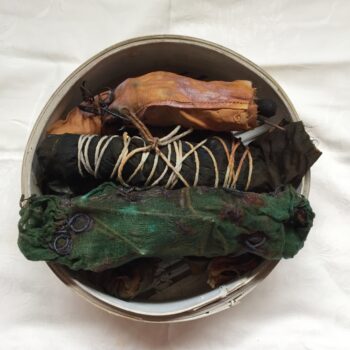
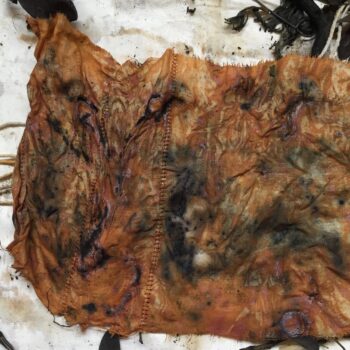
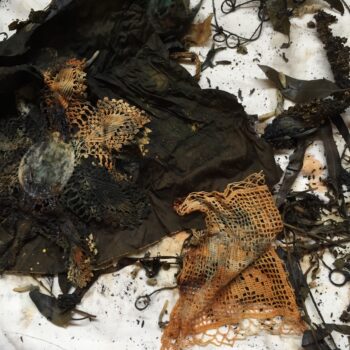
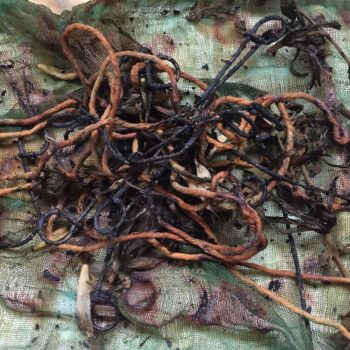
Peeks at new sculpture I’ve been working on. Grey army blanket I found at mums house when clearing out to sell after she passed away in 2020. Linen thread, vintage doilies, antique cloth 1800’s, gold thread, eco plant dyed textiles & rusted buried cloth under ground for around 3 months. Rusted wire fence droppers found in outback Australia.
My first bit of creating for the New Year. I’ve been wanting to do some textile sculpture for years. I usually make sculpture with hard materials, like wood, metal and found objects. Working with textiles, I want to continue my story of hard and soft. I like the harsh coldness of metal and soft and subtle of textiles. Total opposites. A few years ago I did a series of sculptures made from concrete with embedded indigo and rust dyed textiles into the pieces.
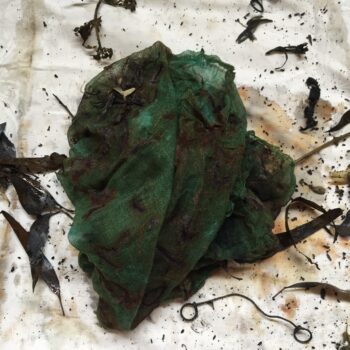
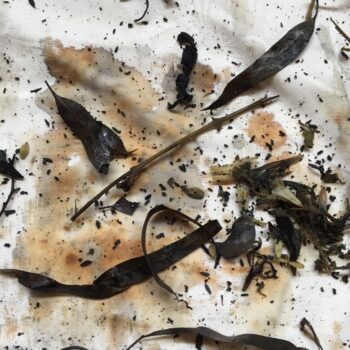
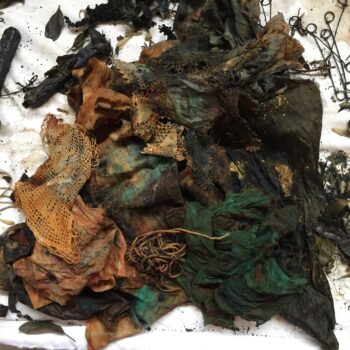
This bundle of eco dyed textiles will be used with rusted metals and found objects to create, free hanging sculpture installations for a future exhibition.
You can see some more about my art and creative process @ instagram
The first layers of textiles were rust dyed then, paint and ink used freely to create marks and colour. Then I used gum leaves, weeds, agapanthus flowers, saltbush and more rusted metal on the following textiles.
If you are wanting to learn how to eco dye and make textile sculpture. This course from Fiber Arts Take Two is amazing. Creating with Courage is an online course by Clarissa Callesen who is a sculptor and installation artist based in the USA The course is based on creativity and exploration. Centred around found objects and recycled textiles you’ll create fabric forms that are pieced together to make your own fibre sculpture.
My latest series of smaller works painted during isolation. I’m loving the colour combinations and I can see a bit of rebellion and freedom shining through. Maybe, connections to how I’m feeling, with the world situation, we are all in at the moment.
Making time for creative and studio time has been hard for me lately, with extra, unforeseen, life responsibilities. I work daily on my arts business, early hours, in the morning, before breakfast. Before anyone is awake. I then grab little pockets of time, in between, for time at the studio. At the moment, I am working on some smaller paintings, that can be created in a shorter amount of time, but, itching to start on some larger oils.
This year, I also planned on launching, a new series of online art courses, but for now, I’m unable to find the head space, time, or silence needed, to work on it. They are coming though… I’m looking forward to it all opening up again soon and making a fresh, new start. Hope you are all staying healthy and safe!
About the artworks
Spontaneous gestural marks with a play of colour and forgotten marks, left behind in the environment and in the mind.
Artwork Description
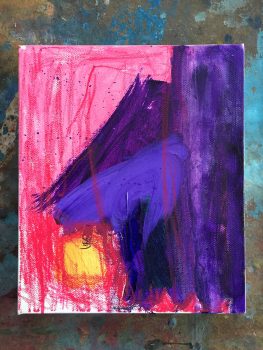
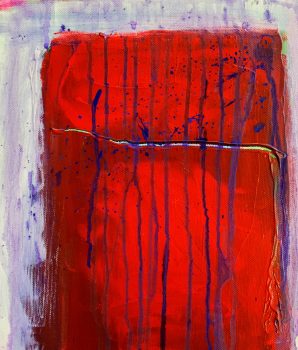
Acrylic paint, oil sticks, sealed, on deep sided gallery stretched cotton canvas. Each artwork measures, 25x30x4cm. Ready to hang with D-rings and hanging wire. (Framing Available) when purchased through Bluethumb
Signed with a certificate of authenticity.
If interested, in any of my paintings, or require, more info, please go to my online gallery. Bluethumb
Rose Yellow Light & Purple by Jenny Davis Purple Yellow Light – by Jenny Davis Purple Yellow Light – by Jenny Davis Purple on Rose Yellow Light – by Jenny Davis Purple on Rose Yellow Light – by Jenny Davis Purple Rain on Red – by Jenny Davis Purple Rain on Red – by Jenny Davis
If interested, in any of my paintings, or require, more info, please go to my online gallery. Bluethumb
The first phase of Artaviso ‘s Door to Door project is now live! An evolving virtual exhibition that will culminate in a physical exhibition in November 2020 at No Vacancy Gallery in Melbourne.
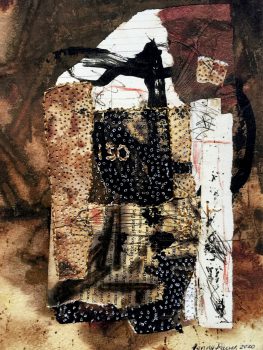
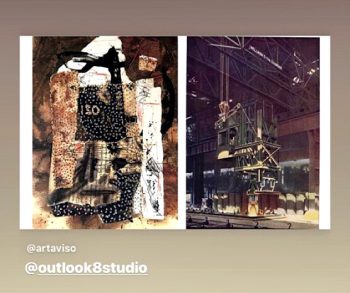
Here’s the image of my entry showing the finished artwork followed by the page from Newnes’ Pictorial Knowledge 1950s Encyclopedia (edited by Enid Blyton) which, selected at random, formed the basis of the artwork.
Check out my a mixed media artwork, Iso Charging Machine here
Check out the virtual exhibition “Door to Door” exhibition here
For sales enquiries please contact Hayley at @novacancygallery info@no-vacancy.com.au
Iso Charging Machine. Jenny Davis Being ripped from our natural normal states, during unprecedented times, this machine collects our thoughts, ideas, emotions and turns them into ingots. A kind of sorting machine for making sense of thoughts and the human state. Using as a sorting machine we may then see the bigger picture.
Once filled, each ingot is ejected from the mould and left to simmer and collate. Upon settling, thoughts, ideas and emotions disperse into smaller sections. Once, we can identify and describe our own emotions, action, can then be taken, to sort, keep, or delete. Some gold, some less important.
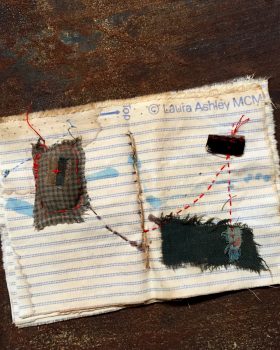
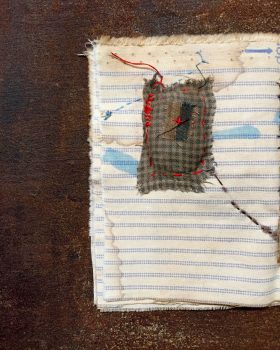
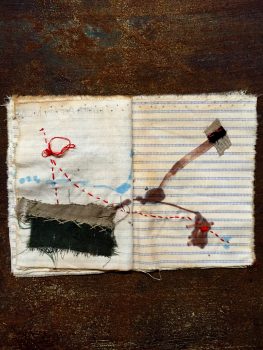
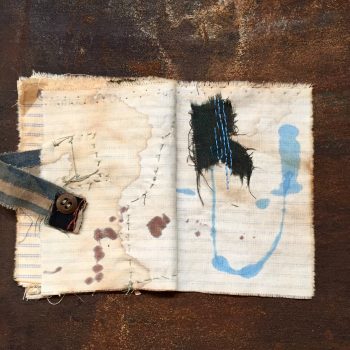
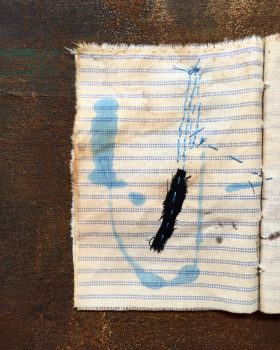
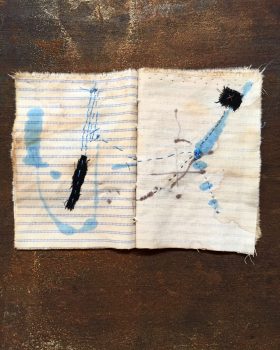
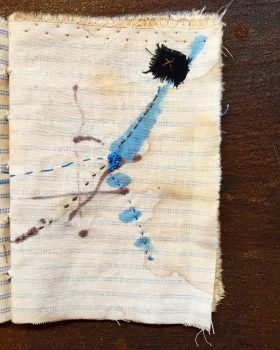
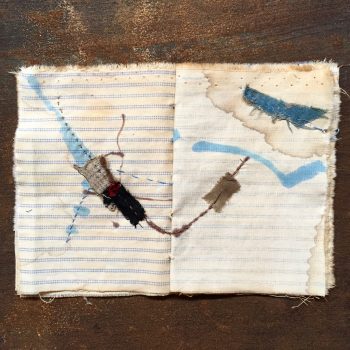
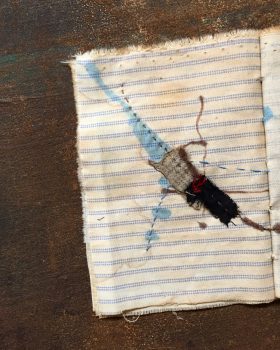
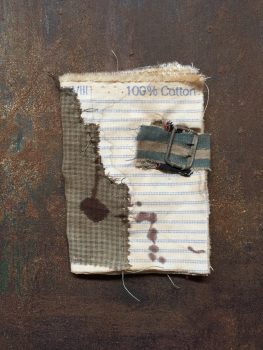
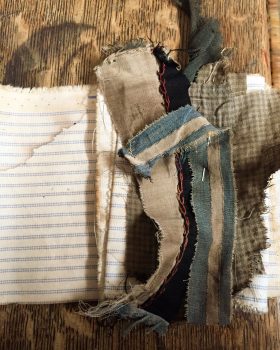
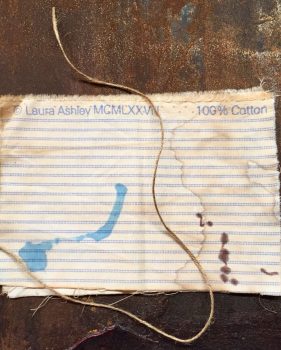
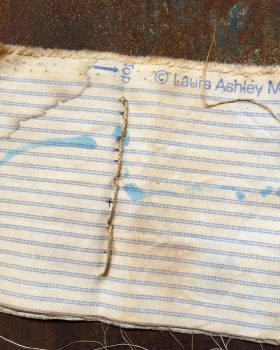
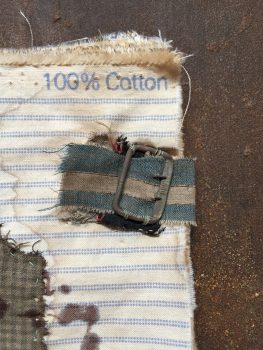
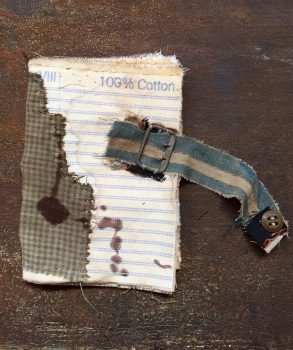
Inside the little textile book I have been making from my previous post.
I hope you are well and safe at home if you are in a lockdown situation still. I’ve been finding it difficult to create with all that is going on, but I have managed to add to this little book bit by bit each day so far.
Hope everyone stays safe and finds some inspiration and snippets of time to create in these strange times💜🌻❤️
I hope you are well and safe at home if you are in a lockdown situation still. I’ve been finding it difficult to create with all that is going on, but I have managed to add to this little book bit by bit each day so far.
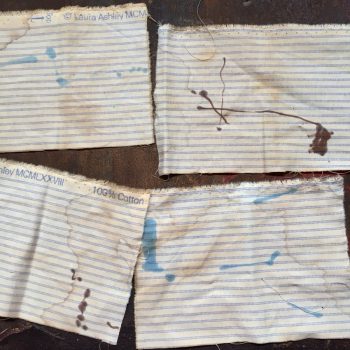
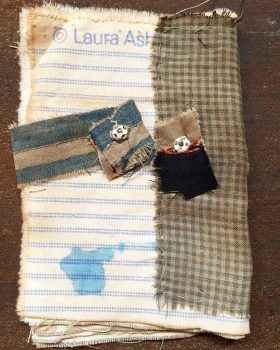
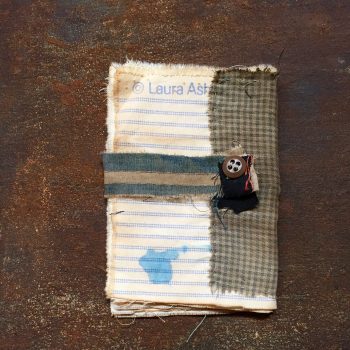
I started of with a pile of old fabrics I had sitting on the table for ages. Some antique pieces from 1800s quilt and 70s Laura Ashley pin stripe fabrics.
Decided to make a little fabric book. I stained the pages some more and made marks with inks. Found some old string to sew down the center to make the pages.
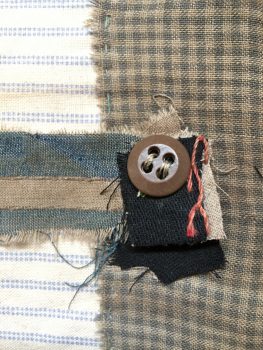
Using some of the antique textiles, I added some features to front cover with an old buckle. The buckle was found in Maryborough Vic. with a metal detector. 1800’s
It’s the first time in my life,!I’ve sewn on press studs, very fiddly…I used them for the closure on the back of the book. With a button on top. The fabric on closure is over 100 yrs. old, very delicate, so hoping it holds.
Now all I have to do is fill in the pages.
Hope everyone stays safe and finds some inspiration and snippets of time to create in these strange times💜🌻❤️
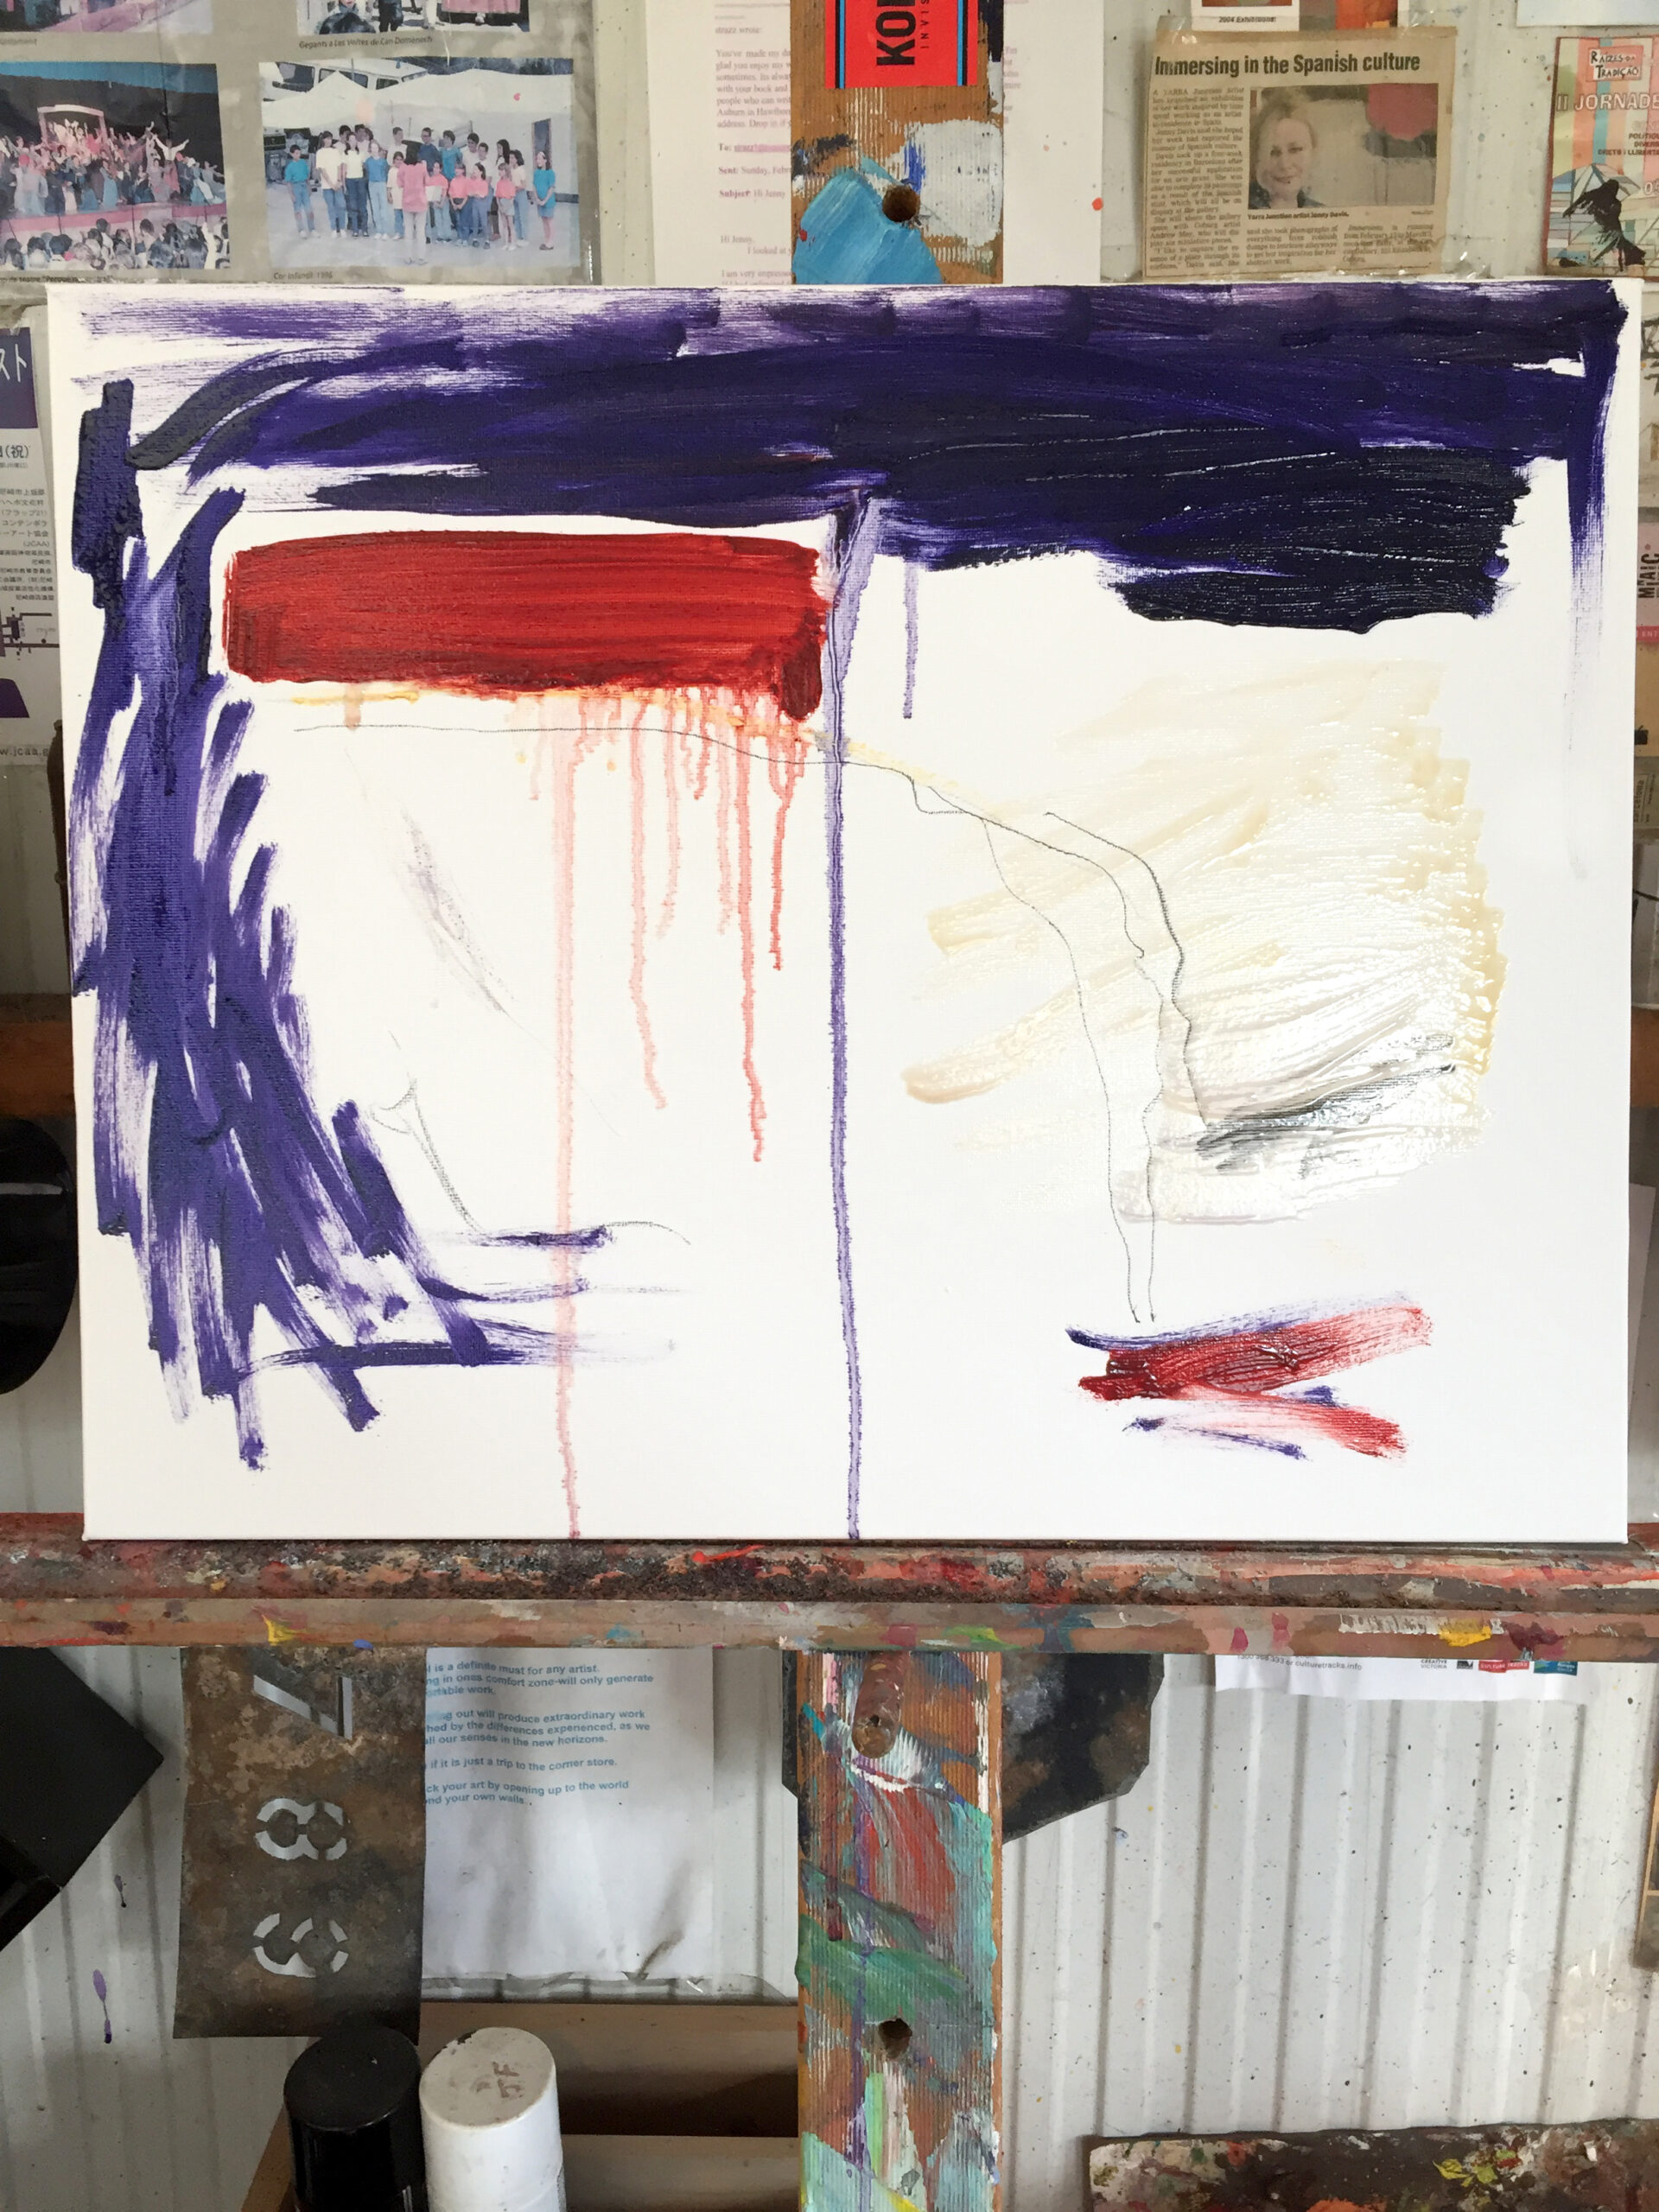
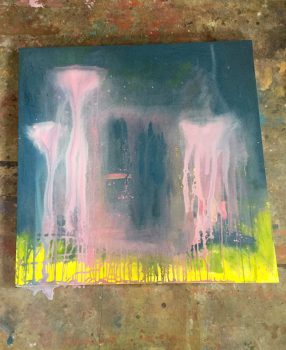
In the studio. The beginnings of my first painting and series for 2020.
Day 1
Day 2
Day 5 … Made a few more changes to the painting today. Still a way to go.
A week later
Finished painting. Minimal flat, top surfaces, with many transparent underlays of colour, marks, drips and splashes. I don’t want the edges of the painting to be contained so, I’m not sure if I would frame this. Untitled for now. 90 x 90 x 2 cm. Acrylic paint on stretched canvas.